Order Hub App#
Managing sales orders, tracking inventory availability, and ensuring timely order placement across multiple systems can be complex, time-consuming and resource intensive. In many organizations, users rely on multiple platforms to gather inventory data, create orders, and communicate with stakeholders. This fragmented approach leads to inefficiencies, delays in order processing, and increased dependency on manual coordination, limiting operational agility and visibility.
The Order Hub app is designed to streamline and centralize the order management process. It enables users to place sales orders directly within a unified interface while leveraging AI Recommendations based on real-time inventory data. The application integrates seamlessly with multiple ERP systems to bring all relevant data into ConverSight, eliminating the need to switch between multiple platforms for decision making and execution.
All orders within Order Hub are fully customizable to meet specific business requirements, providing flexibility while maintaining control. Additionally, the app supports automated communication by enabling users to send emails for both sales order and purchase order submissions, improving communication and process efficiency.
By consolidating data, providing AI recommendations, and simplifying order execution, the Order Hub app serves as a centralized source of truth, improving efficiency, reducing manual effort, and enabling faster, more informed decision-making.
Challenges in Order Management#
Managing sales orders across systems, inventory data, and communication channels can be complex and inefficient. Traditional order management processes introduce several key challenges:
Fragmented Systems and Data Silos: Users often rely on multiple platforms to access inventory data, create sales orders, and manage purchase orders. This lack of integration leads to disconnected workflows and increased dependency on manual coordination.
Manual Order Creation and Validation: Creating orders requires users to manually gather inventory details, verify availability, and input order data. This process is time-consuming and increases the risk of errors and inconsistencies.
Limited Visibility into Inventory and Orders: Without a centralized view, it becomes difficult to accurately track inventory levels and align them with order requirements, leading to delays and inefficient planning.
Lack of Communication: Sending order details to stakeholders or suppliers often involves manual communication, slowing down the overall order lifecycle and increasing the chances of miscommunication.
These challenges impact operational efficiency, delay order fulfillment, and limit the ability to make timely and informed business decisions.
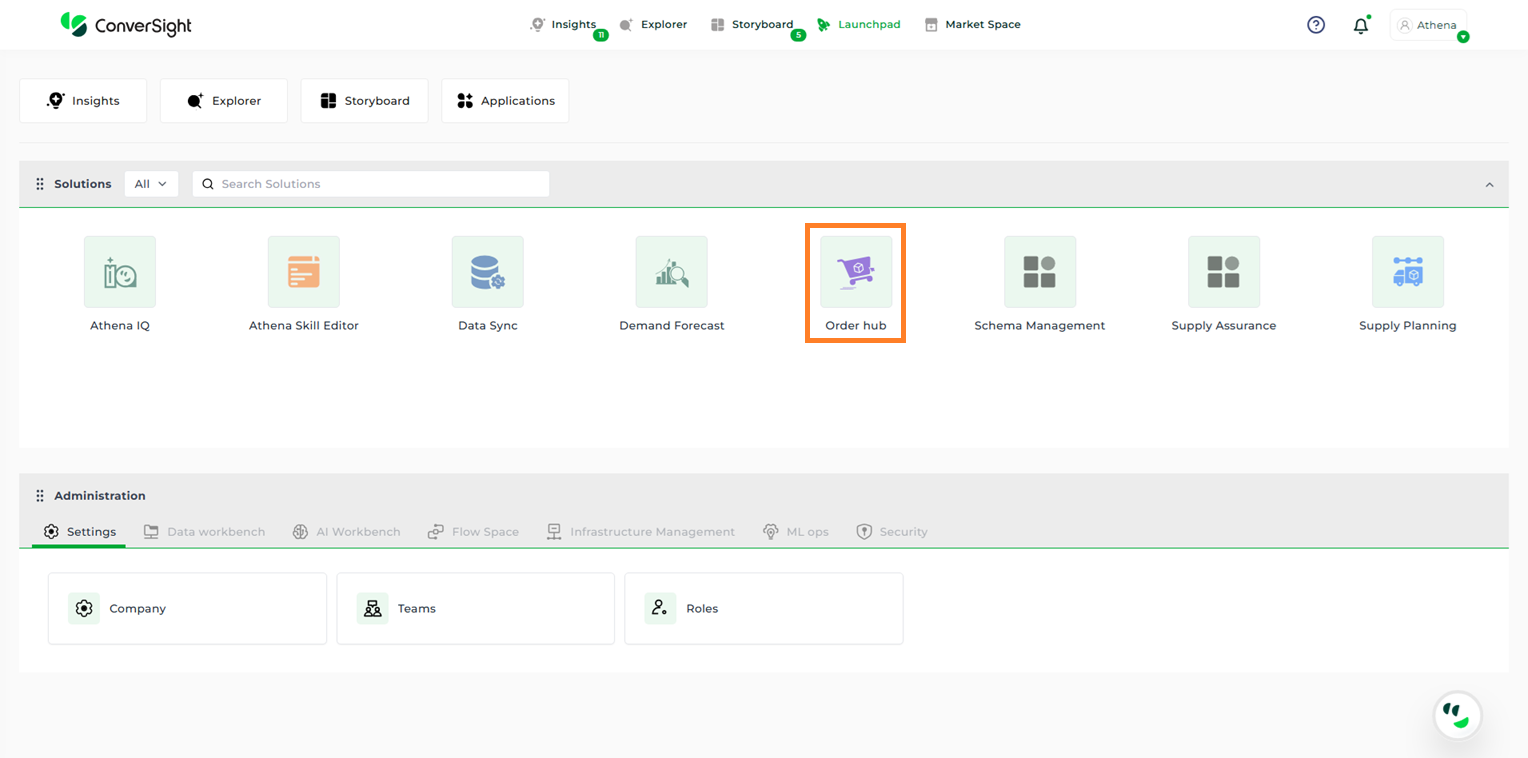
Accessing Order Hub App#
Users are required to purchase the Order Hub app through the MarketSpace before they can access it. Once the purchase is completed, the app is automatically added to the Launchpad. After logging in, the user can navigate to the Launchpad tab to view all purchased applications. From there, the user can search for the Order Hub app and click on it to begin using the application.
Oder Hub App#
Sync Data#
The Sync Data option enables users to fetch the most recent updates and ensure they are working with the latest available data.
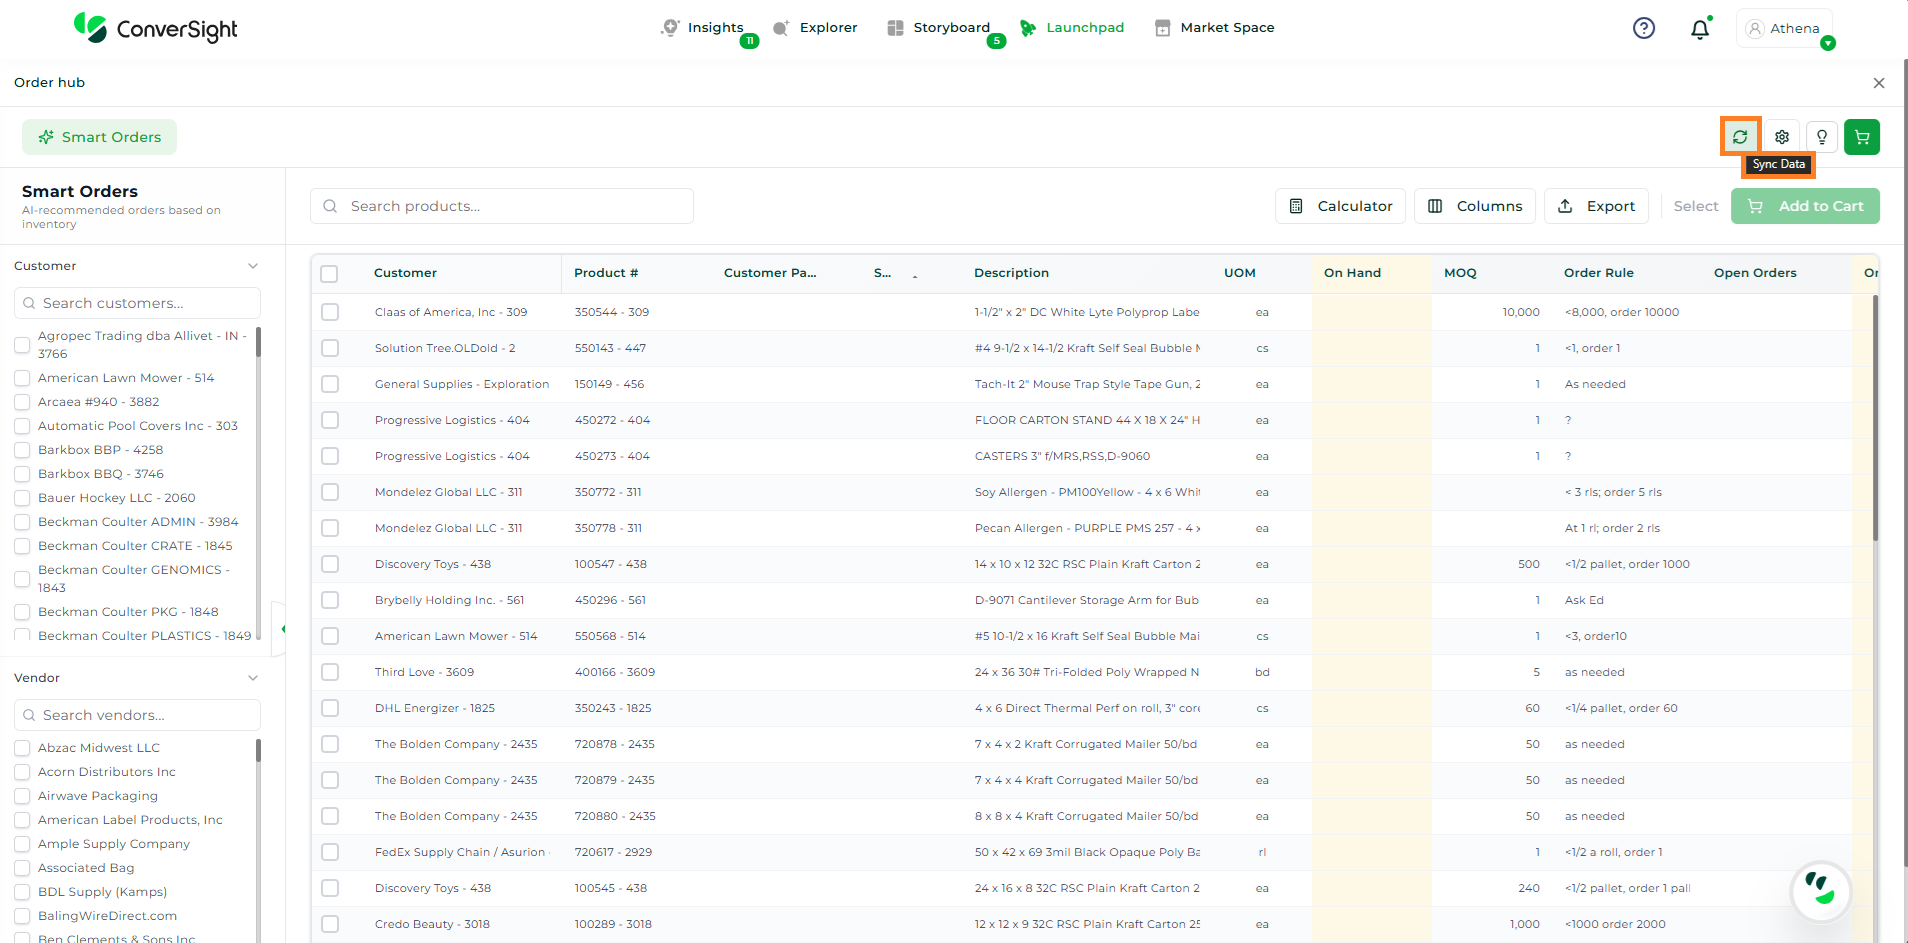
Sync Data#
Settings#
The Settings option is organized into two primary sections: General Settings and App Configuration. These sections allow users to manage and customize system preferences and application-specific behaviours to ensure the app operates according to their requirements.
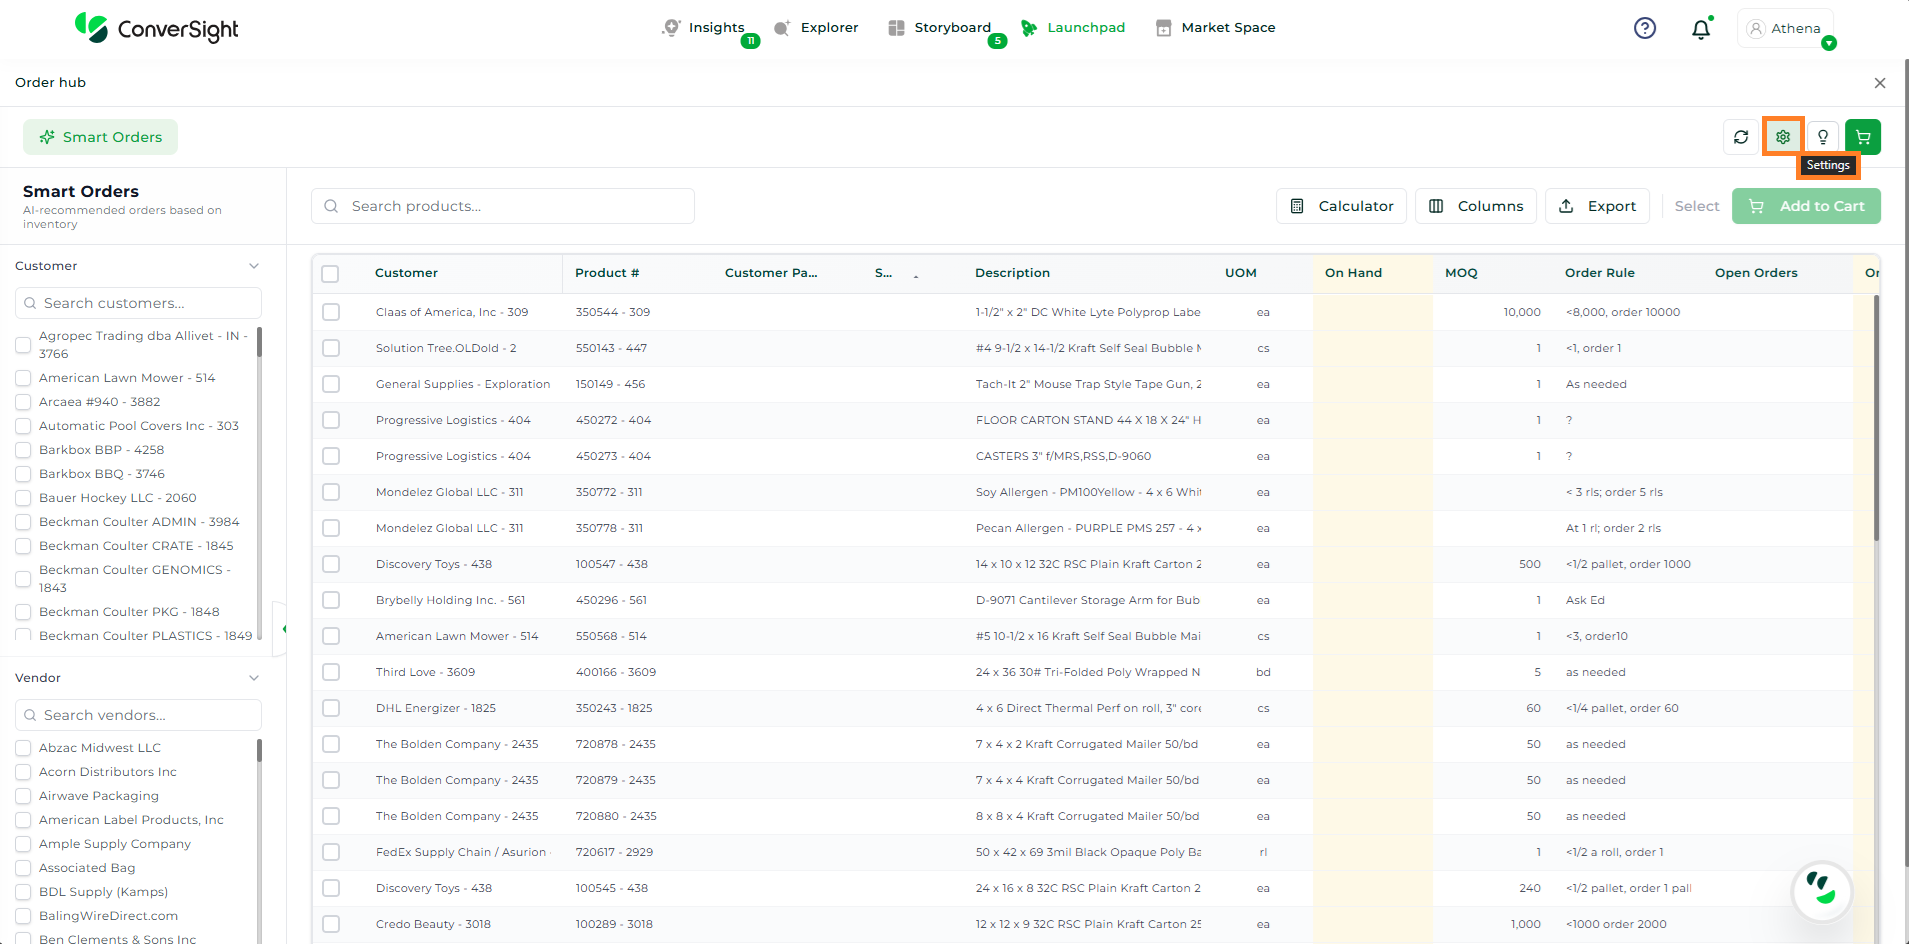
Settings#
General Settings#
Before using Order Hub, administrators or authorized users can configure application-level preferences to define default system behaviour and ensure the application operates according to organizational requirements. These preferences help standardize user experience and control core functionality.
During the Application Preferences setup, users can configure the following options as listed below:
Field |
Description |
|---|---|
Auto-Save Order Drafts |
When enabled, this option automatically saves order drafts as users work. It helps prevent data loss by preserving progress in case of interruptions or unexpected system issues. |
Default Landing Page |
This setting allows users to define the page that will be displayed upon opening the application. The preferred landing page can be selected from the available dropdown options. |
ERP System |
This option enables users to select the ERP connector from which data will be retrieved for order creation and submission, ensuring integration with the appropriate backend system. |
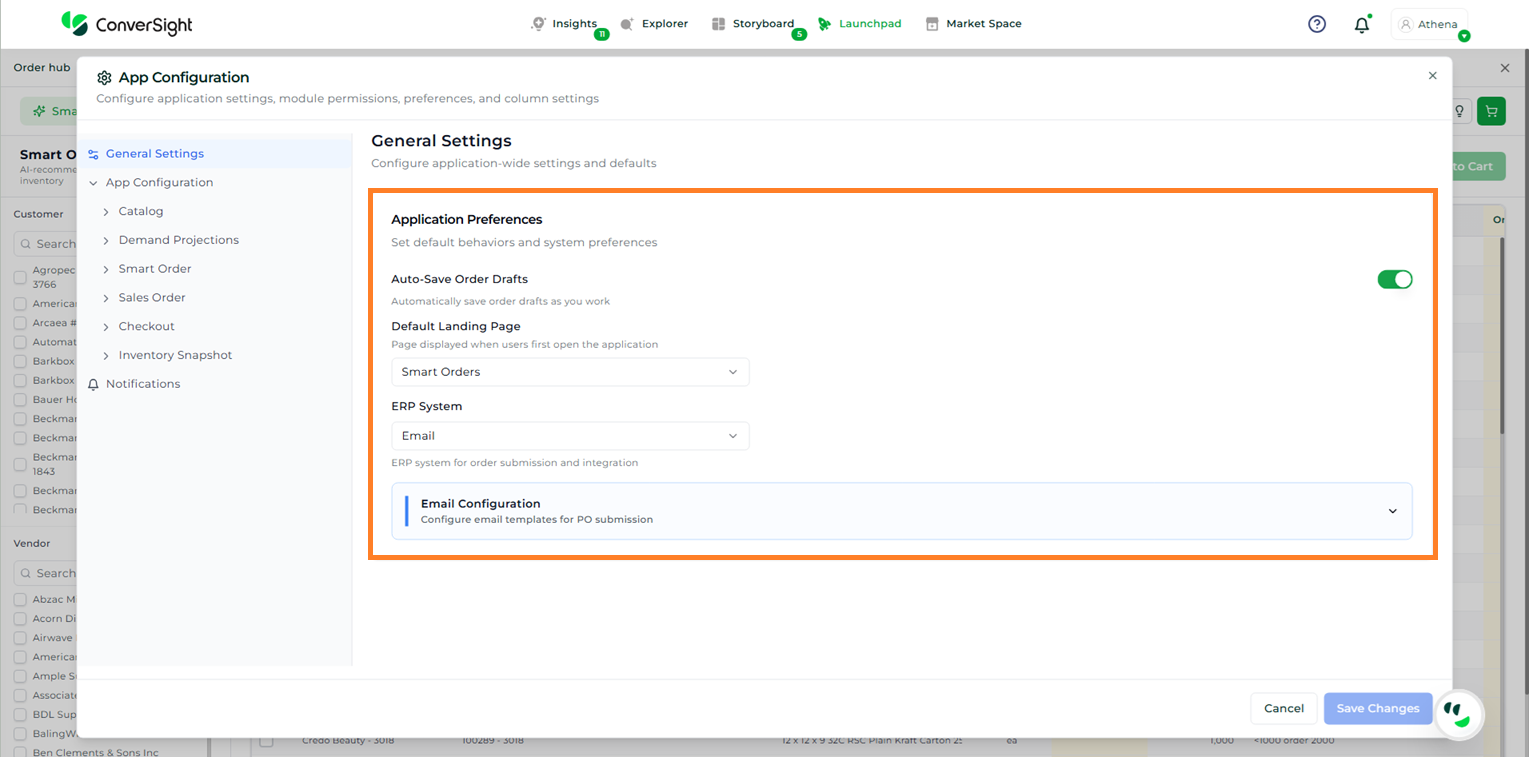
Application Preferences#
Email Configuration#
If Email is selected under the ERP System option, the Email Configuration section is displayed. This section allows users to define and customize email templates used for Purchase Order (PO) submission.
The Email Configuration section includes the following fields:
Field |
Description |
|---|---|
CC and BCC Recipients |
Allows users to add one or more email addresses that will receive order confirmation notifications upon checkout. |
Email Subject |
Enables users to define the subject line for the order confirmation email. |
Sender Name |
Specifies the name displayed in the email signature. |
Sender Email |
Defines the email address shown in the signature. By default, this is set to noreply@conversight.ai. |
Attachment Format |
Allows users to select the file type to be attached to the email. Available options include No Attachment, Excel Spreadsheet, CSV File, and PDF Document. |
Available Placeholders |
Provides dynamic placeholders that can be inserted into the email content. These values are automatically replaced with relevant data when the email is sent. |
Email Body |
Contains the HTML template used to structure the email content. |
Email Preview |
Enables users to view a visual preview of the HTML email template before sending. |
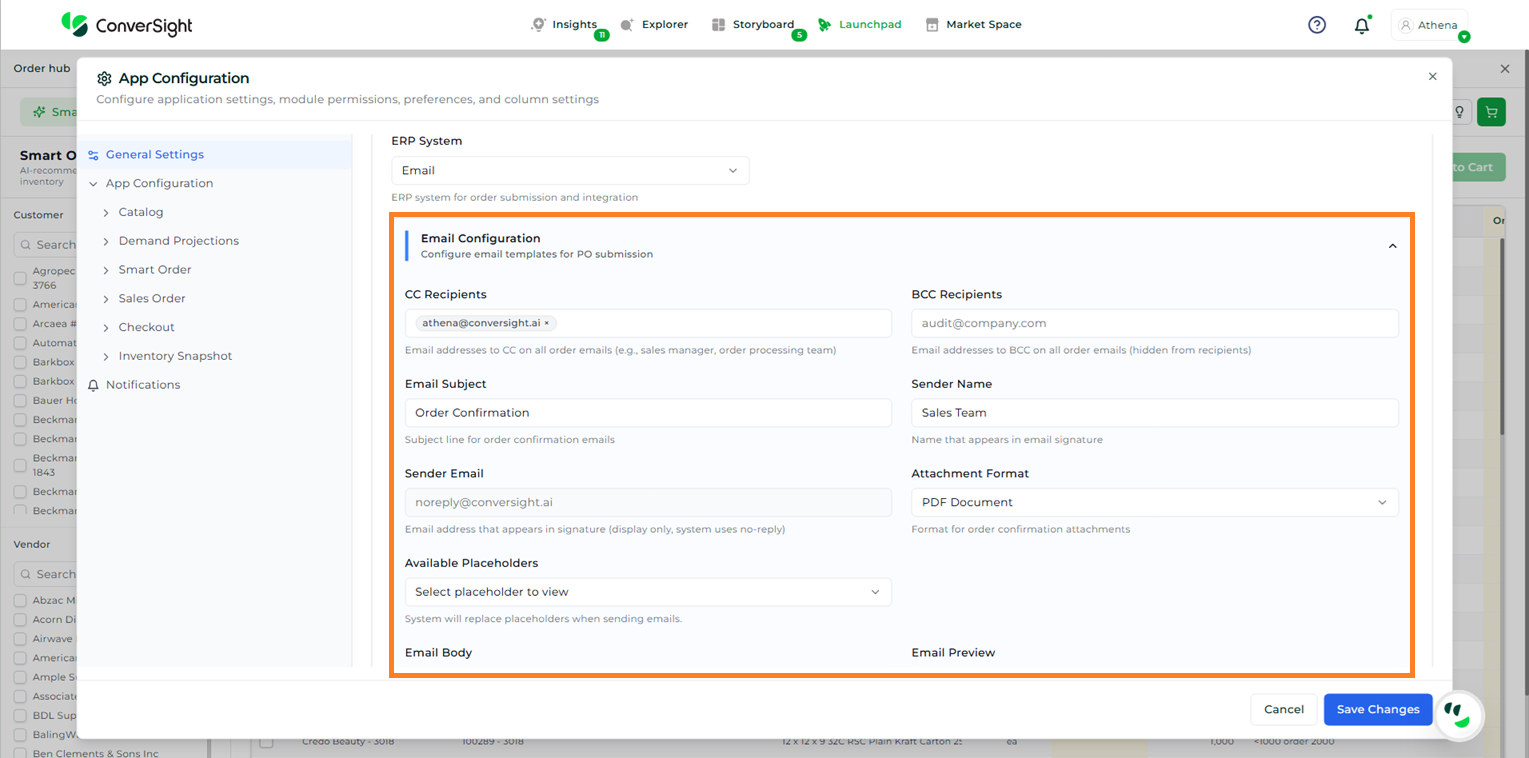
Email Configuration#
App Configuration#
The App Configuration settings are divided into six sections, each corresponding to a specific module. These sections allow users to manage page-level and column-level configurations for each part of the application.
The available sections include:
Catalog
Demand Projections
Smart Order
Sales Order
Checkout
Inventory Snapshot
Catalog Settings#
The Catalog section has two main parts. They are Page Settings and Column Settings.
Page Settings#
The Page Settings in the Catalog section allow users to browse and search available pages, while controlling its visibility.
Page Controls: This option determines whether the Catalog page is visible and accessible to users.
Panels & Components: This section enables users to show or hide, as well as enable or disable, individual panels and components on the page. These include elements such as the Add to Cart button, Cart Summary, Filter Sidebar, Product Details, Product Grid, and Search Bar.
Visibility and Access Controls:
The Eye icon is used to show or hide specific components and panels.
The Lock icon is used to enable or disable them.
Component-Level Configuration: For each panel or component, users can provide a custom description and specify a reason when it is disabled, offering better clarity and context for end users.
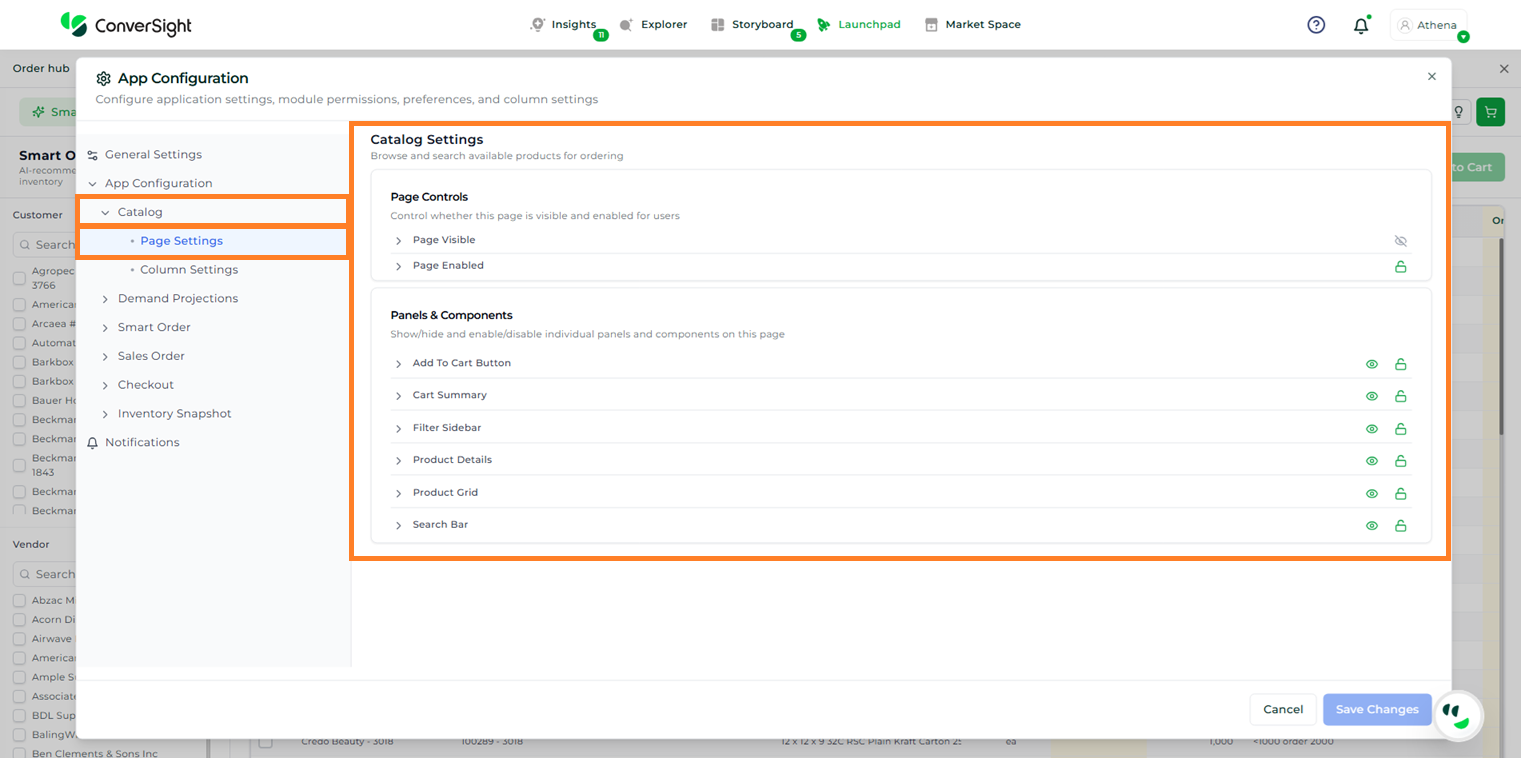
Catalog Page Settings#
Column Settings#
The Column Settings in the Catalog section provide comprehensive control over how data is displayed and managed within the inventory table. These settings enable users to customize column visibility, behaviour, formatting, and interactivity to align with specific business and user requirements.
The Grid Management table includes the following configurable fields:
Field |
Description |
|---|---|
Column |
Lists all available data elements that can be displayed in the inventory table. Each entry represents a specific attribute of the product or dataset. |
Show |
Controls the visibility of a column within the table. When disabled, the column is hidden from the user interface without removing the underlying data. |
Editable |
Determines whether the values within a column can be modified by users directly from the table. This is useful for enabling inline editing where applicable. |
Sortable |
When enabled, allows users to sort the column data in ascending or descending order, improving data organization and accessibility. |
Filterable |
Enables filtering capabilities for the column, allowing users to refine and narrow down data based on specific criteria. |
Width |
Allows users to adjust the column width to ensure that data is clearly visible and properly aligned within the table layout. |
Type |
Defines the data type of the column, such as Text, Number, Currency, Date, or Boolean. This ensures appropriate formatting, validation, and behaviour for each column. |
Alignment |
Specifies how the data within the column is aligned (left, right, or center), helping maintain consistency and readability across the table. |
Actions |
Provides options to modify column properties or remove the column entirely. This allows users to tailor the table structure as needed. |
These settings collectively ensure that users can configure the inventory table to deliver a clear, efficient, and user-friendly data viewing and editing experience.
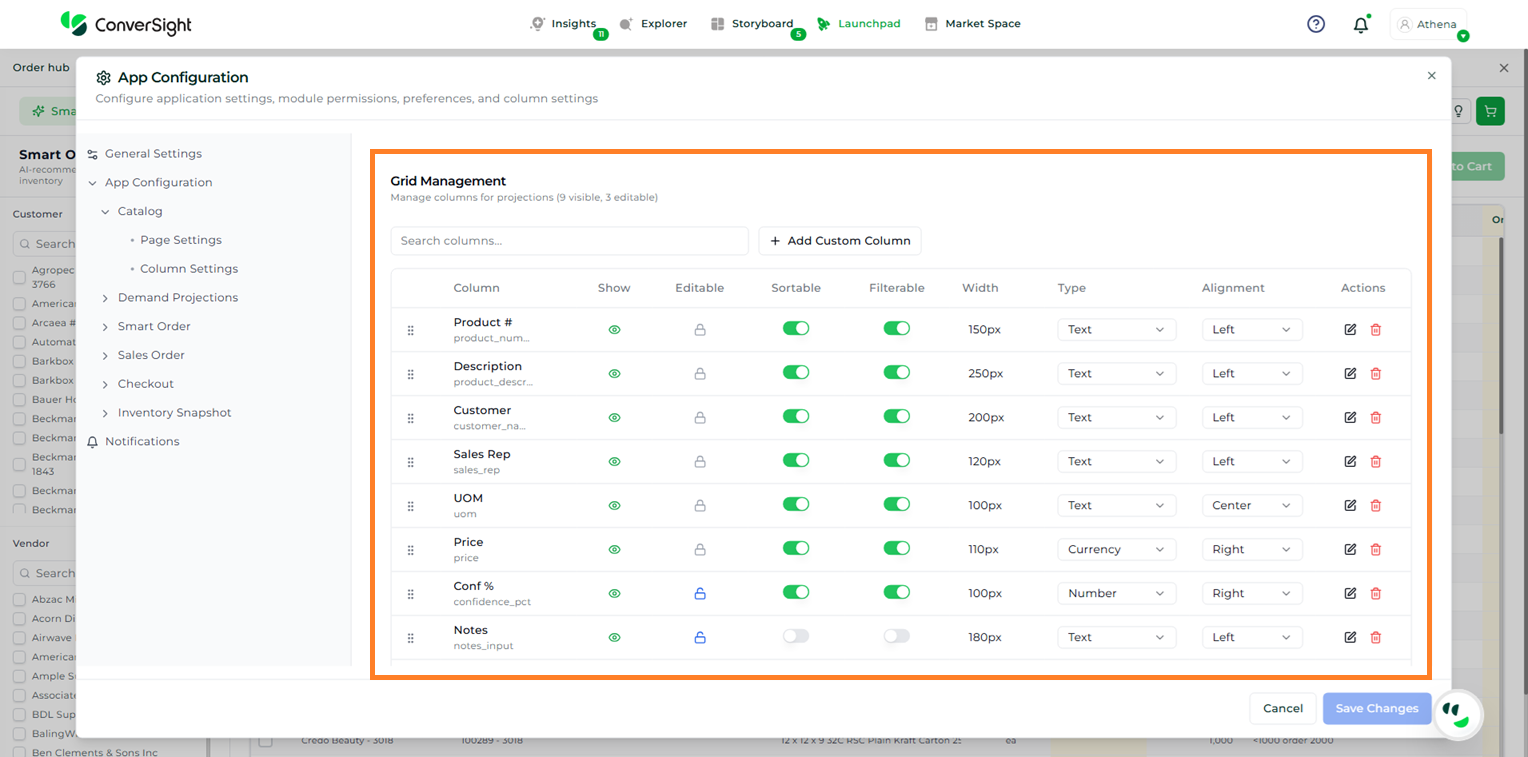
Catalog Column Settings#
Add Custom Column#
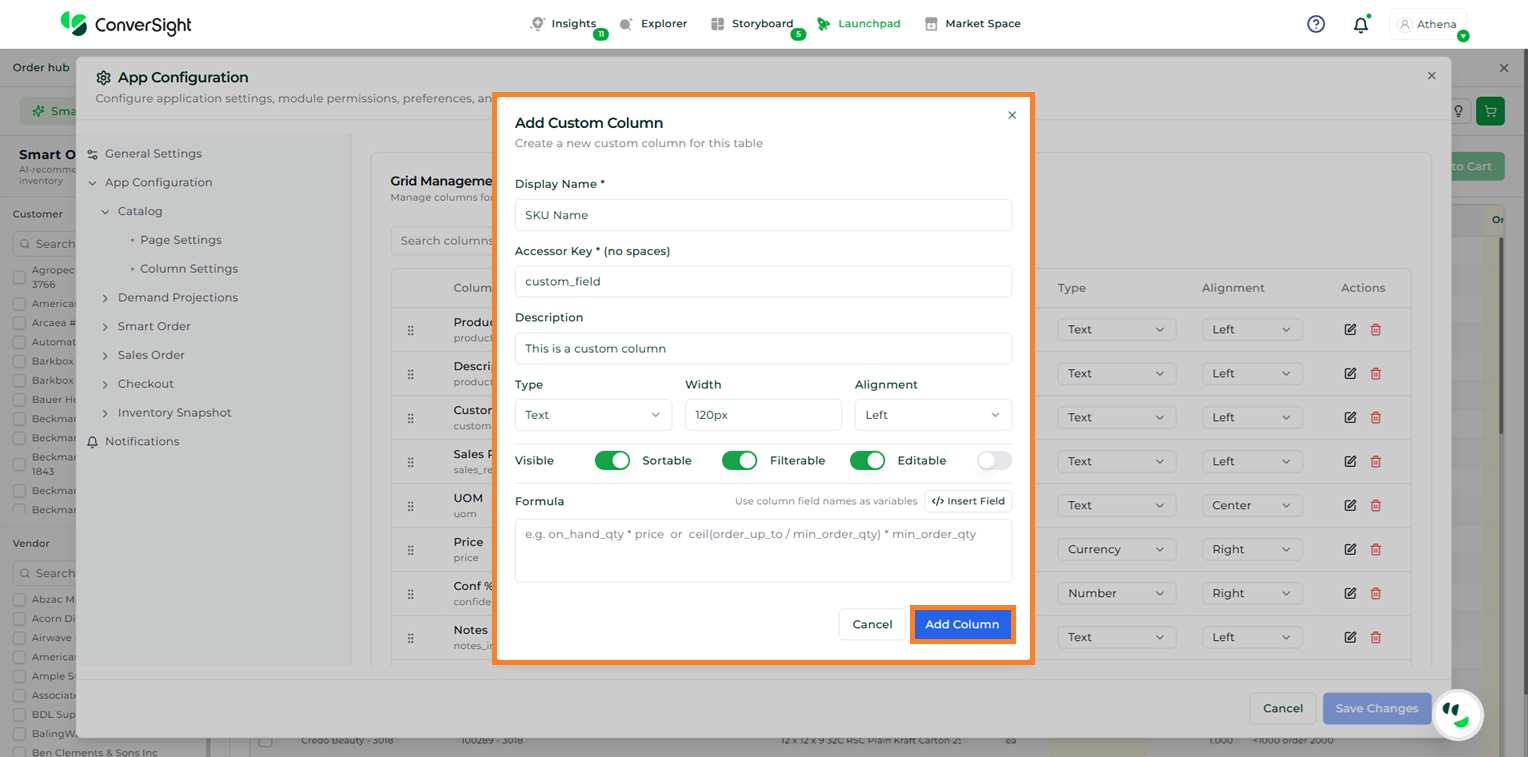
The Add Custom Column option allows users to create and include additional fields in the inventory table based on specific requirements.
Upon clicking the Add Custom Column button, users must provide the necessary details, including Display Name, Accessor Key, Description, Type, Width, and Alignment. Users can also define column behaviour by selecting whether the field should be Visible, Sortable, Filterable, and Editable, as well as configure a formula if applicable.
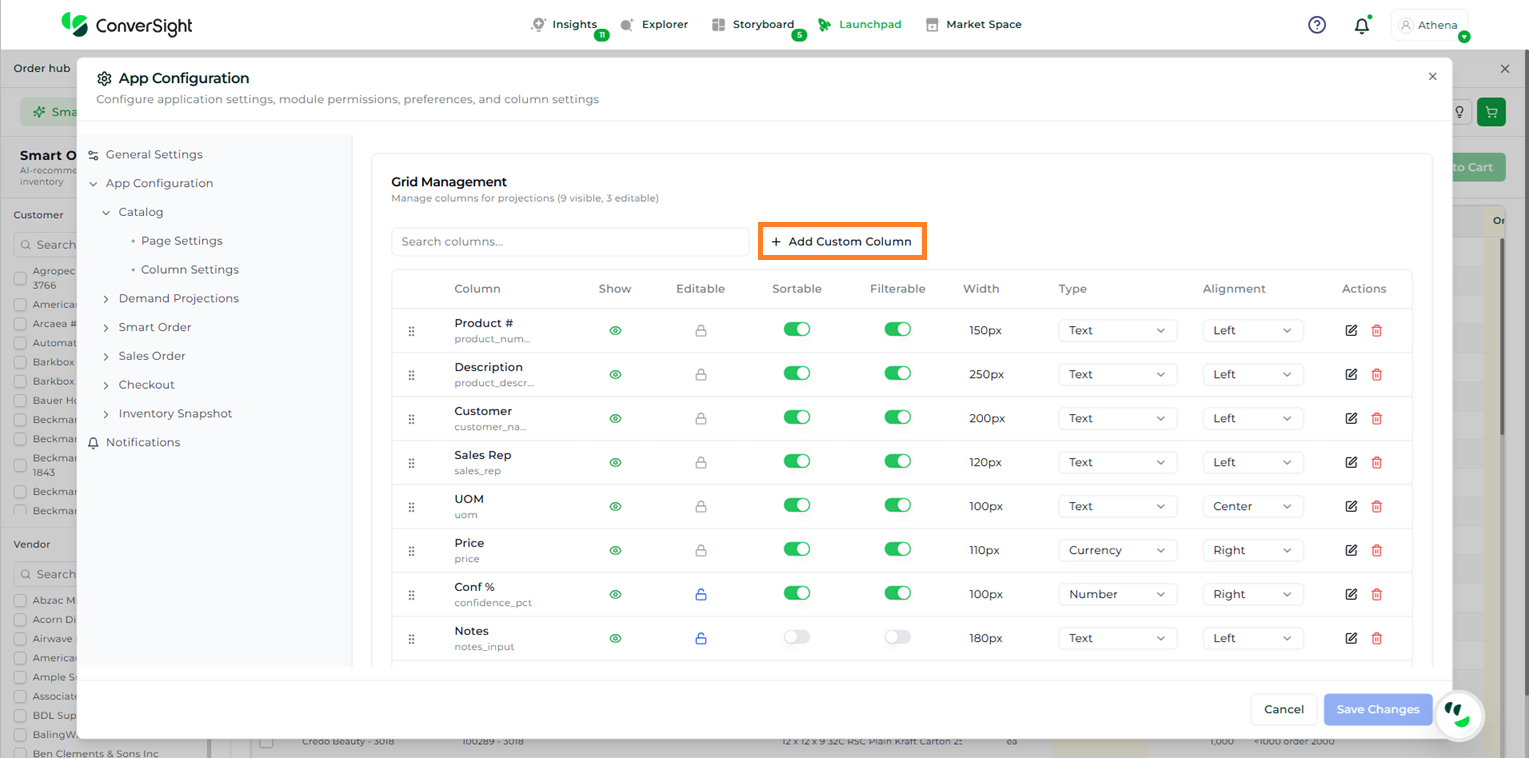
Add Custom Column#
After entering the required information, click Add Column to save and apply the changes.
Add Custom Column#
Demand Projections Settings#
The Demand Projections section follows the same configuration structure and behaviour as the Catalog section, including Page Controls, Visibility and Access Controls, Column Settings, and Add Custom Column functionality. The only variation in this section is within the Panels & Components, which are specific to the Demand Projections page. These include Filters, Projections Grid, Scenario Selector, and Time Period Controls, and can be managed in the same way to control their visibility and functionality as required.
Smart Order Settings#
The Smart Order section uses the same configuration framework as other modules, covering page visibility, access controls, column management, and custom column creation. The distinction in this section lies in the set of Panels & Components available on the Smart Order page. These include Add to Cart Button, Auto Suggestion, Bulk Actions, Column Chooser, Export Button, Filter Bar, KPI Cards, Order Grid, and Search Bar. Each of these elements can be configured to control their availability and behaviour within the page.
Sales Order Settings#
The Sales Order section follows the same configuration structure and behaviour as the Catalog section, including Page Controls, Visibility and Access Controls, Column Settings, and Add Custom Column functionality.
Checkout Settings#
The Checkout section is designed to control the final stage of the ordering process, where users review, validate, and submit orders. While it follows the same underlying configuration capabilities for managing access, layout, and data handling, this section is more focused on ensuring accuracy, completeness, and a seamless submission experience.
A key aspect of this section is the ability to configure Checkout-specific Panels & Components that directly impact order finalization. These include Back to Catalog for navigation, Customer PO Field for capturing reference details, Fulfillment Options for selecting delivery preferences, KPI Cards for summary insights, Notes Fields for additional input, Order Summary for consolidated order details, Place Order Button for submission, and Review Grid for final validation of items. Each of these components can be tailored to control how users interact with and complete the checkout process.
Inventory Snapshot Settings#
The Inventory Snapshot section is focused on providing a real-time view of stock availability and distribution across locations, with configuration options that support quick analysis and operational visibility. While it follows the same foundational configuration model for managing access, layout, and data interaction, this section is specifically tailored to inventory monitoring and status tracking.
The differentiation lies in the Panels & Components available within this section. These include Export Button for data extraction, Inventory Grid for detailed stock view, KPI Cards for high-level inventory insights, Location Filter for refining data by specific locations, Refresh Button for updating real-time data, Search Bar for quick lookup, and Stock Status Filter for segmenting inventory based on availability. Each of these components can be configured to optimize how users view, filter, and interact with inventory data.
Quick Guide#
The Quick Guide feature is designed to provide users with immediate access to support resources and in-app assistance, helping them quickly understand and navigate the application. It serves as a centralized hub for guidance, learning, and troubleshooting, ensuring a smoother user experience.
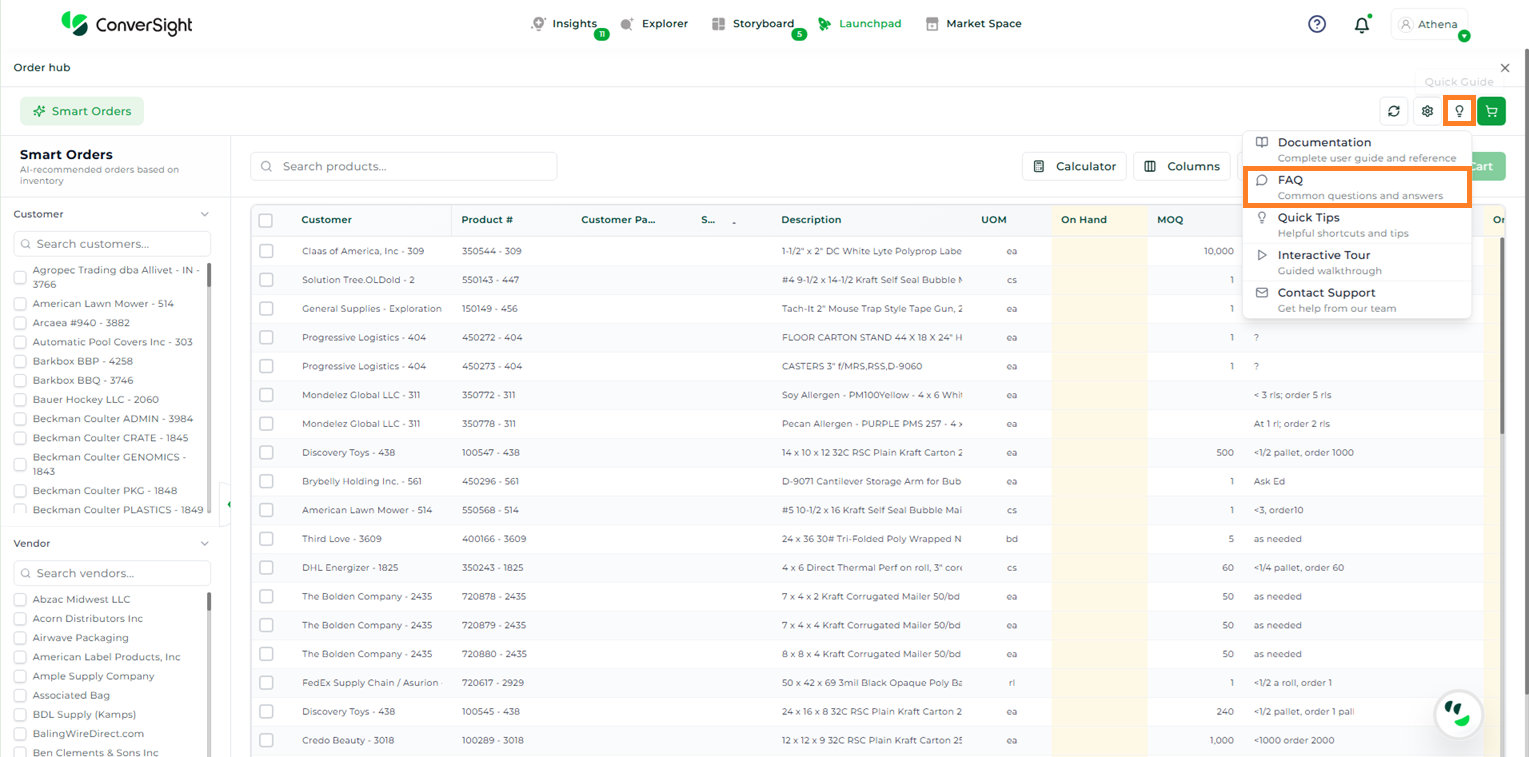
Within this feature, users can access options such as Documentation, FAQ, Quick Tips, Interactive Tour, and Contact Support.
Quick Guide#
Documentation#
The Documentation option provides detailed and structured information about the application, covering features, functionalities, and workflows. To access the documentation, click on the Quick Guide icon and select the Documentation option from the dropdown menu, allowing users to quickly find the information they need without leaving the application.

Documentation#
FAQ#
The FAQ option provides a curated list of commonly asked questions along with their answers, helping users quickly resolve queries and better understand key aspects of the application. To access the FAQ option, click on the Quick Guide icon and select the FAQ option from the dropdown menu.
FAQ#
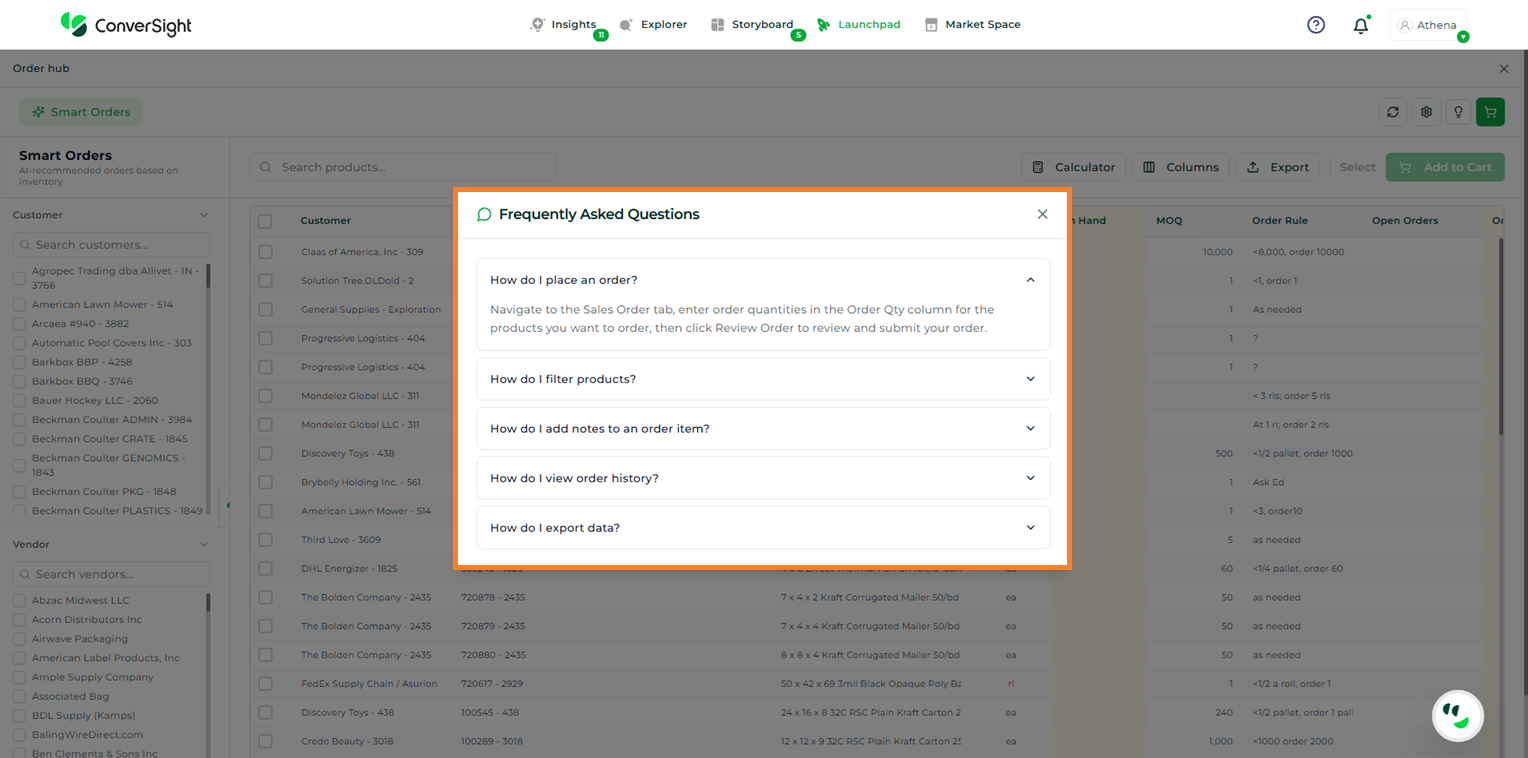
FAQ#
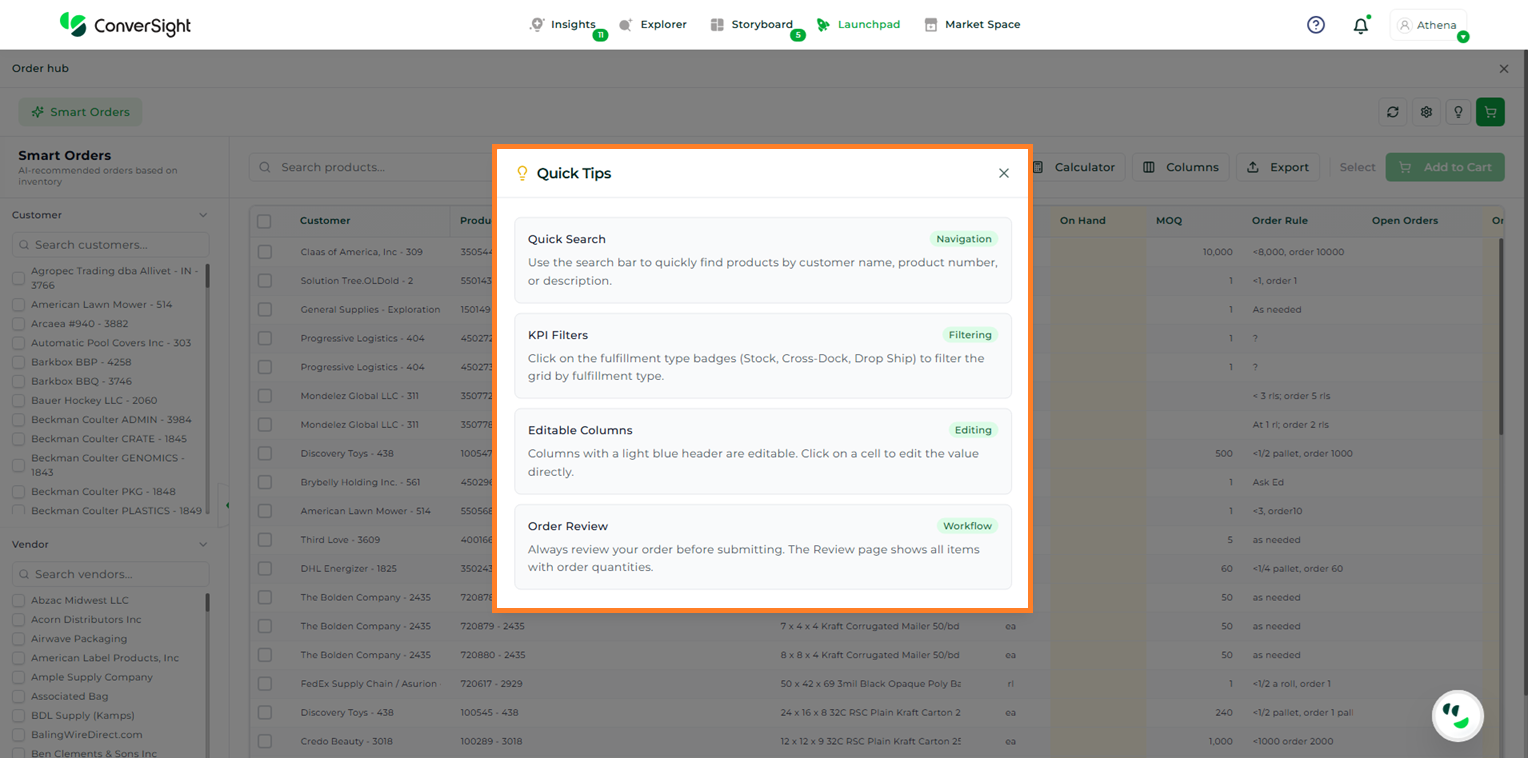
Quick Tips#
The Quick Tips option offers helpful shortcuts and practical tips for commonly used KPIs, enabling users to perform tasks more efficiently and make better use of key features. To access the Quick Tips section, click on the Quick Guide icon and select the Quick Tips option from the dropdown menu.
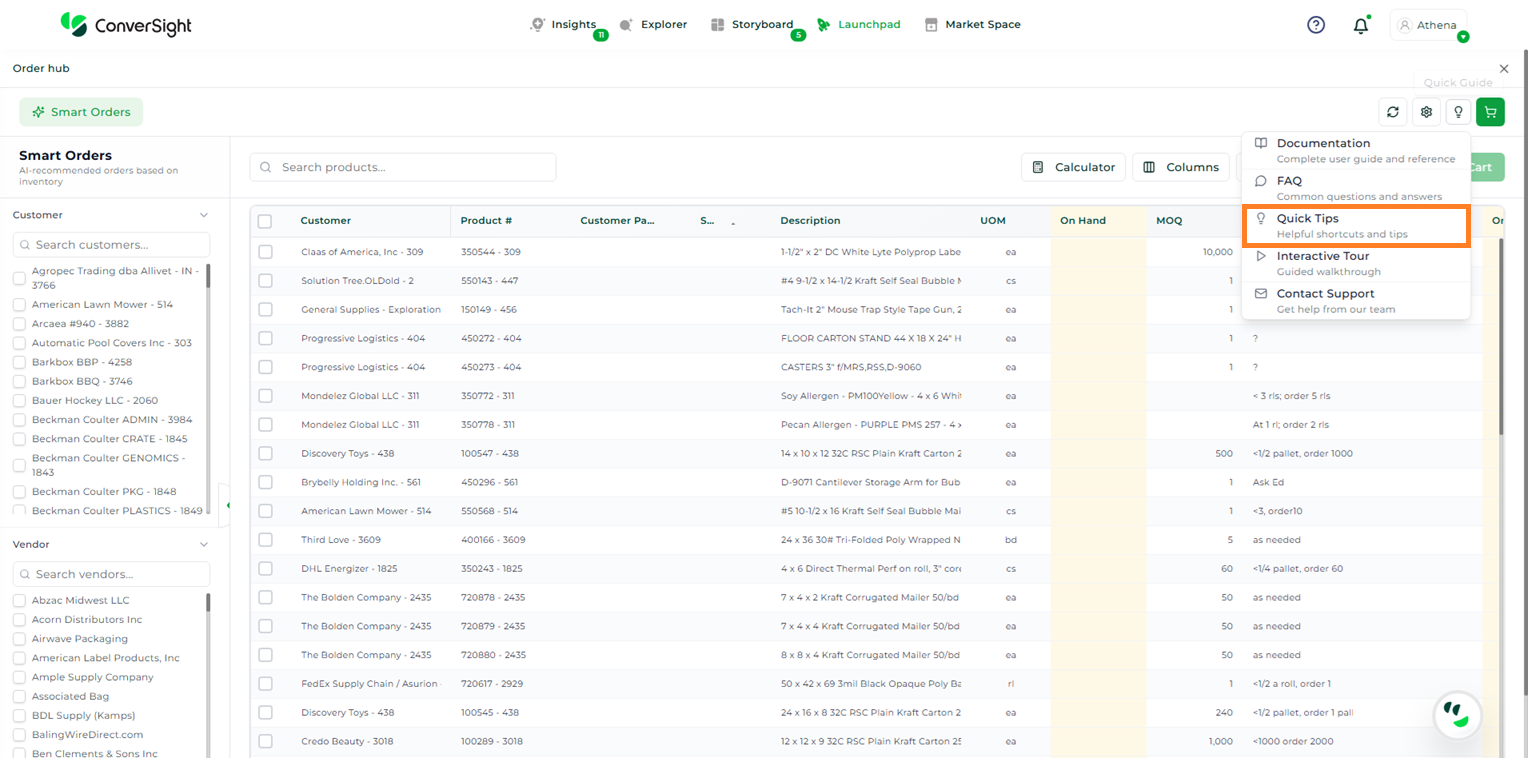
Quick Tips#
Quick Tips#
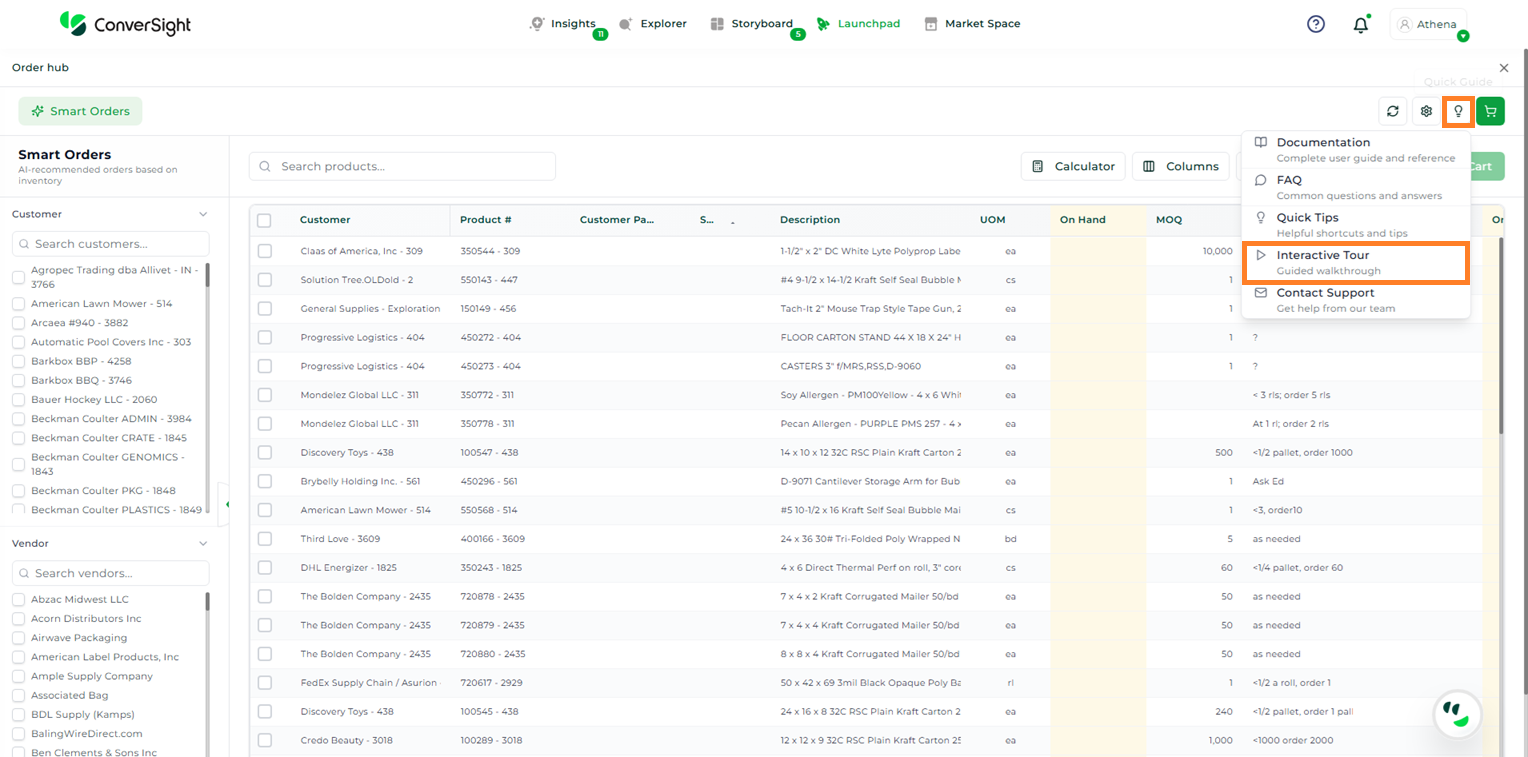
Interactive Tour#
The Interactive Tour delivers an in-app, step-by-step walkthrough that dynamically highlights key features and actions on each page. It is designed to familiarize users with the workflow by guiding them through important elements in context, making it easier to understand how different features are used during actual interaction. Users can launch the Interactive Tour by clicking on the Quick Guide icon and selecting the Interactive Tour option from the dropdown menu.
Interactive Tour#
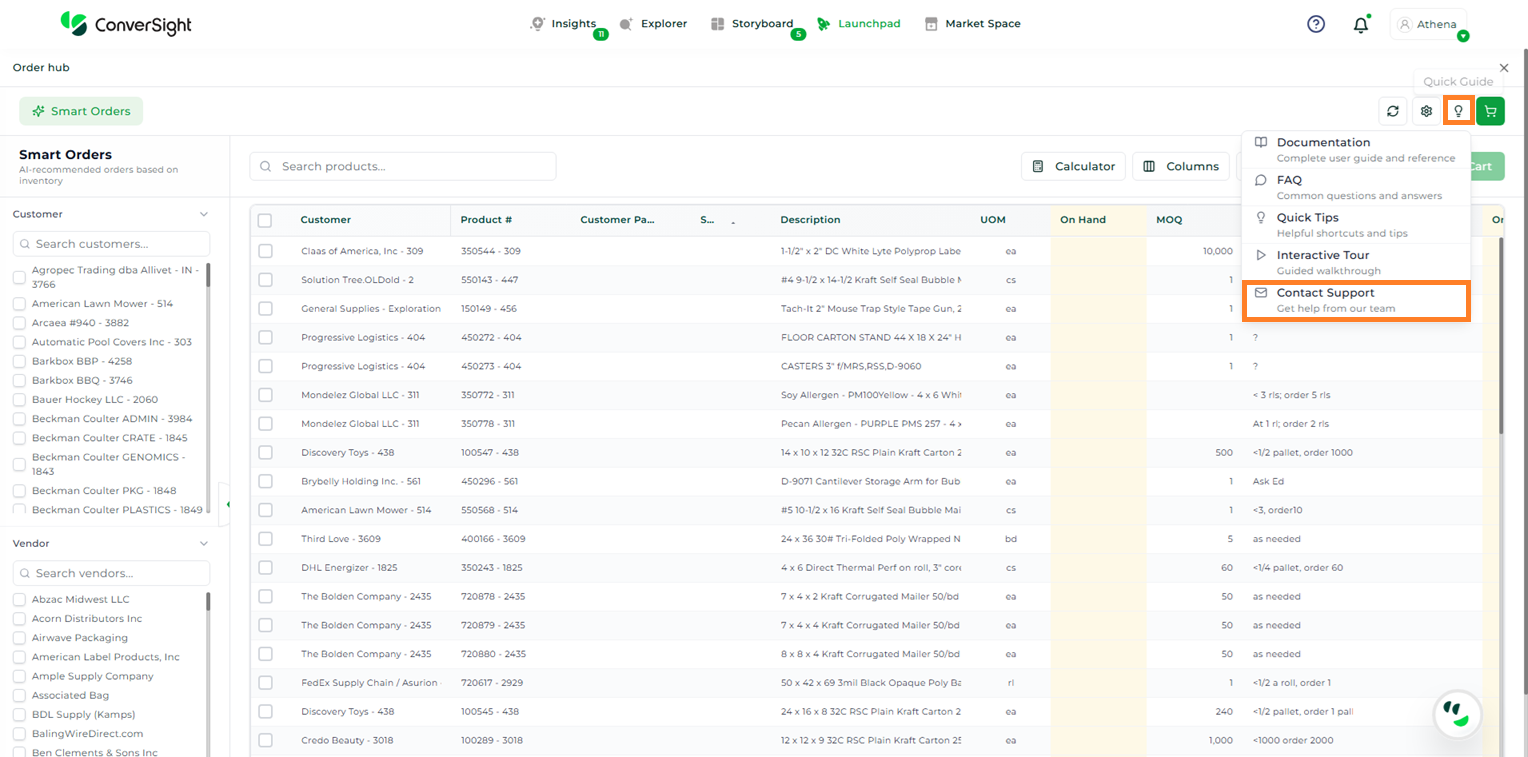
Contact Support#
The Contact Support option enables users to reach out to ConverSight support directly via email for assistance, issue reporting, or queries. It provides a quick and convenient way to connect with the support team from within the application. To access this option, click on the Quick Guide icon and select Contact Support from the dropdown menu. This action will redirect you to your default email client to compose and send your message.
Contact Support#
Cart#
The Cart section provides a consolidated view of all items that have been added for order placement, allowing users to review and finalize purchase details before checkout. It serves as a central workspace for validating order information and making necessary adjustments.
The Cart page presents a detailed Order Summary, which includes key information such as selected items, total quantity, associated customers, and overall order value. This helps users quickly assess the contents and scale of the order.
In the Order Details section, users can optionally enter a PO Number and Order Notes. These fields can be used to add references or additional context, making it easier to track, identify, and categorize orders at a later stage.
The Fulfillment Breakdown section provides insight into how the order will be fulfilled across different logistics methods:
Stock: Represents items that are currently available in on-hand inventory and can be fulfilled immediately from the warehouse.
Cross-Dock: Refers to items that are sourced from incoming shipments and directly transferred for delivery without being stored in the warehouse.
Drop Ship: Indicates items that are fulfilled by third-party suppliers, where products are shipped directly to the customer without being held in inventory.
This breakdown helps users understand the sourcing and fulfillment approach for each order, enabling better planning and decision-making before final submission.
Cart#
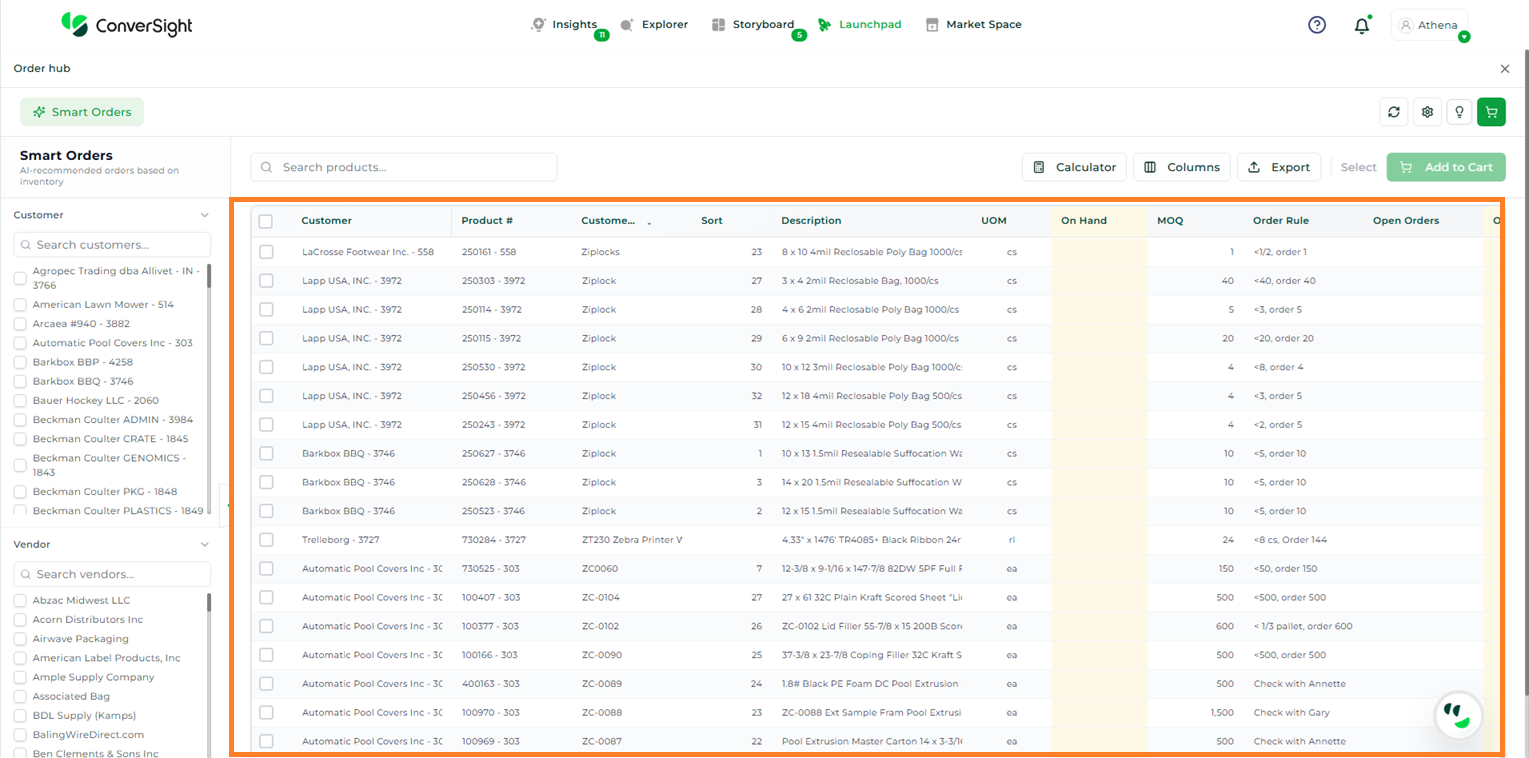
Smart Orders#
The Smart Orders view provides a centralized interface to review and manage AI-recommended orders based on inventory and demand signals. It enables users to efficiently evaluate order requirements, apply filters, and take quick actions from a single screen.
The table below describes the key fields available in the Smart Orders grid:
Column |
Description |
|---|---|
Customer |
Displays the name of the customer associated with the order. |
Product |
The unique identifier or name of the product, used as the primary reference across inventory and order records. |
Customer Part |
Customer-specific part number for the product, if applicable. |
Sort |
An internal reference or sequence value used for organizing and categorizing items within the grid. |
Description |
A brief overview of the product, providing additional context for identification and selection. |
UOM |
Unit of Measure in which the product is handled (e.g., each, case, roll). |
On Hand |
Indicates the quantity of the product currently available in inventory. |
MOQ |
The minimum quantity required to place an order for the product, as defined by the supplier or business rules. |
Order Rule |
Defines the logic or condition used to trigger order recommendations based on demand and inventory thresholds. |
Open Orders |
Displays the quantity already ordered but not yet fulfilled. |
Order Qty |
Shows the system-recommended order quantity based on demand and inventory. |
Notes |
Displays additional remarks or contextual information related to the order. |
Total Price |
The estimated total cost calculated based on the suggested order quantity and unit pricing. |
Fulfillment |
Indicates the fulfilment status or method for the order. |
Vendor |
Displays the supplier or vendor associated with the product. |
Lead Time |
Specifies the estimated time required by the vendor to fulfil the order. |
ETA |
Indicates the expected date of arrival for the ordered items. |
Smart Orders#
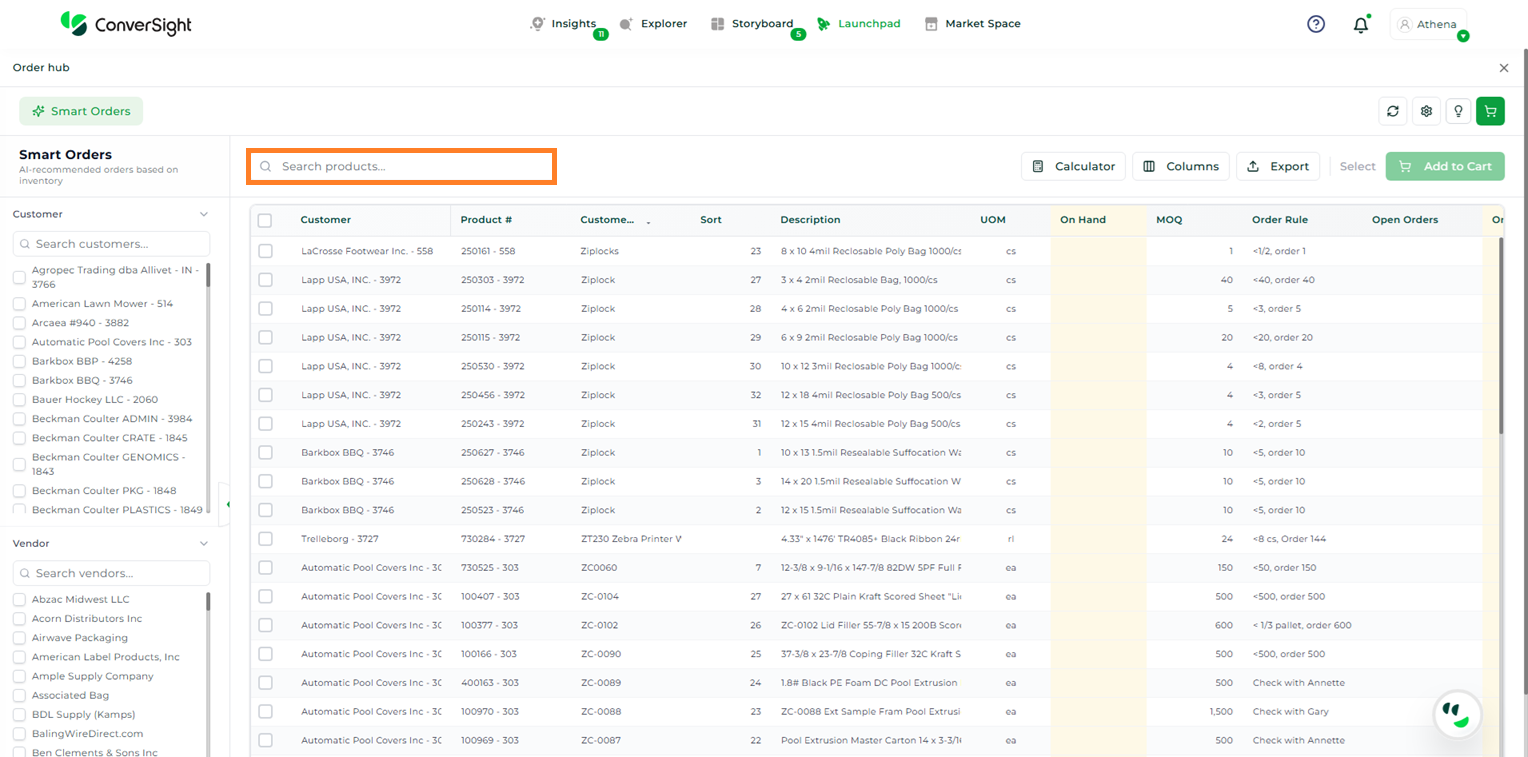
Search#
The Search option allows users to enter keywords to locate specific products or customers within the grid. It filters the displayed records based on the input provided, enabling users to quickly access relevant data.
Search#
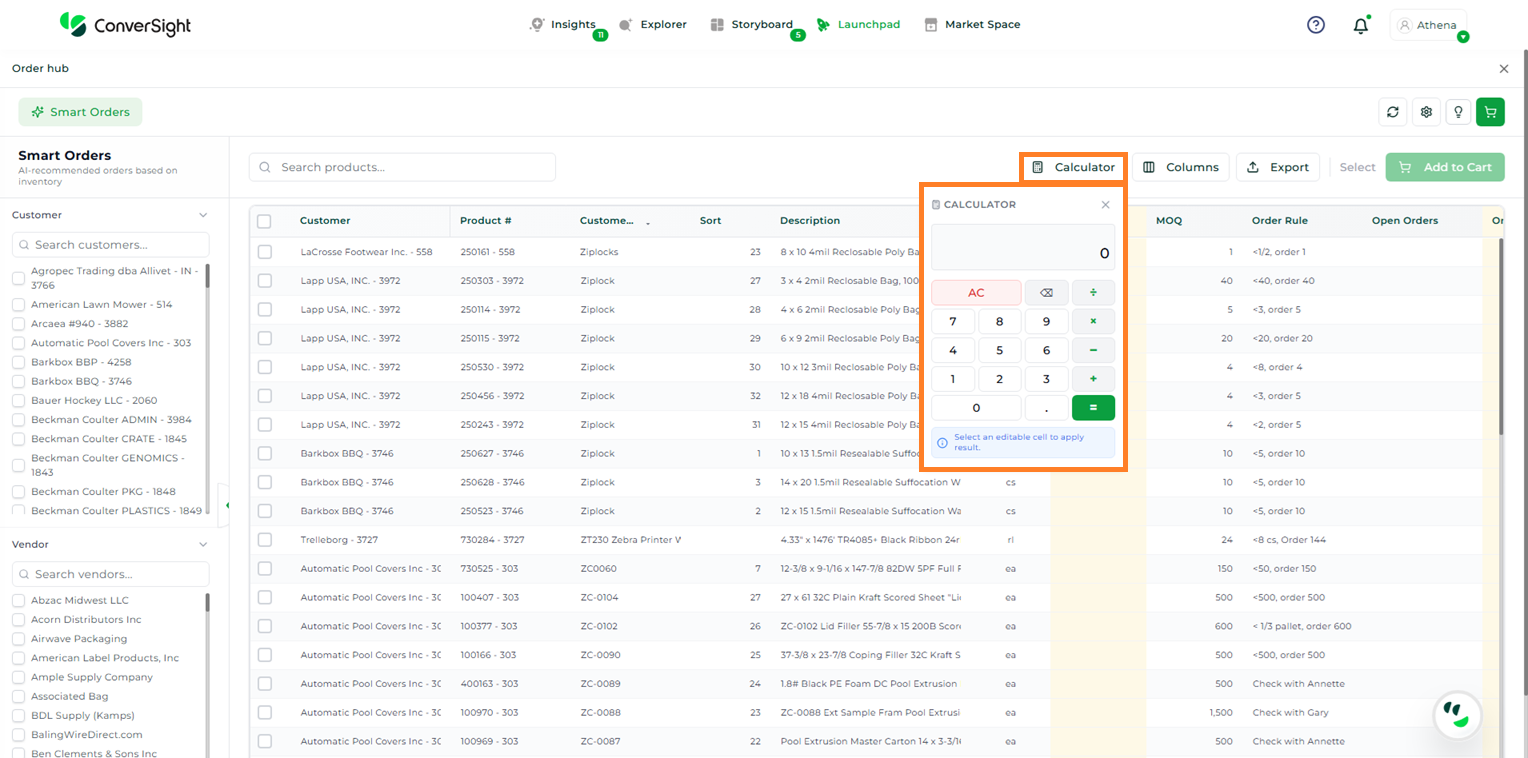
Calculator#
The Calculator feature enables users to perform calculations directly within the Order Hub app. It opens an inbuilt calculator, enabling users to complete calculations without leaving the application.
Calculator#
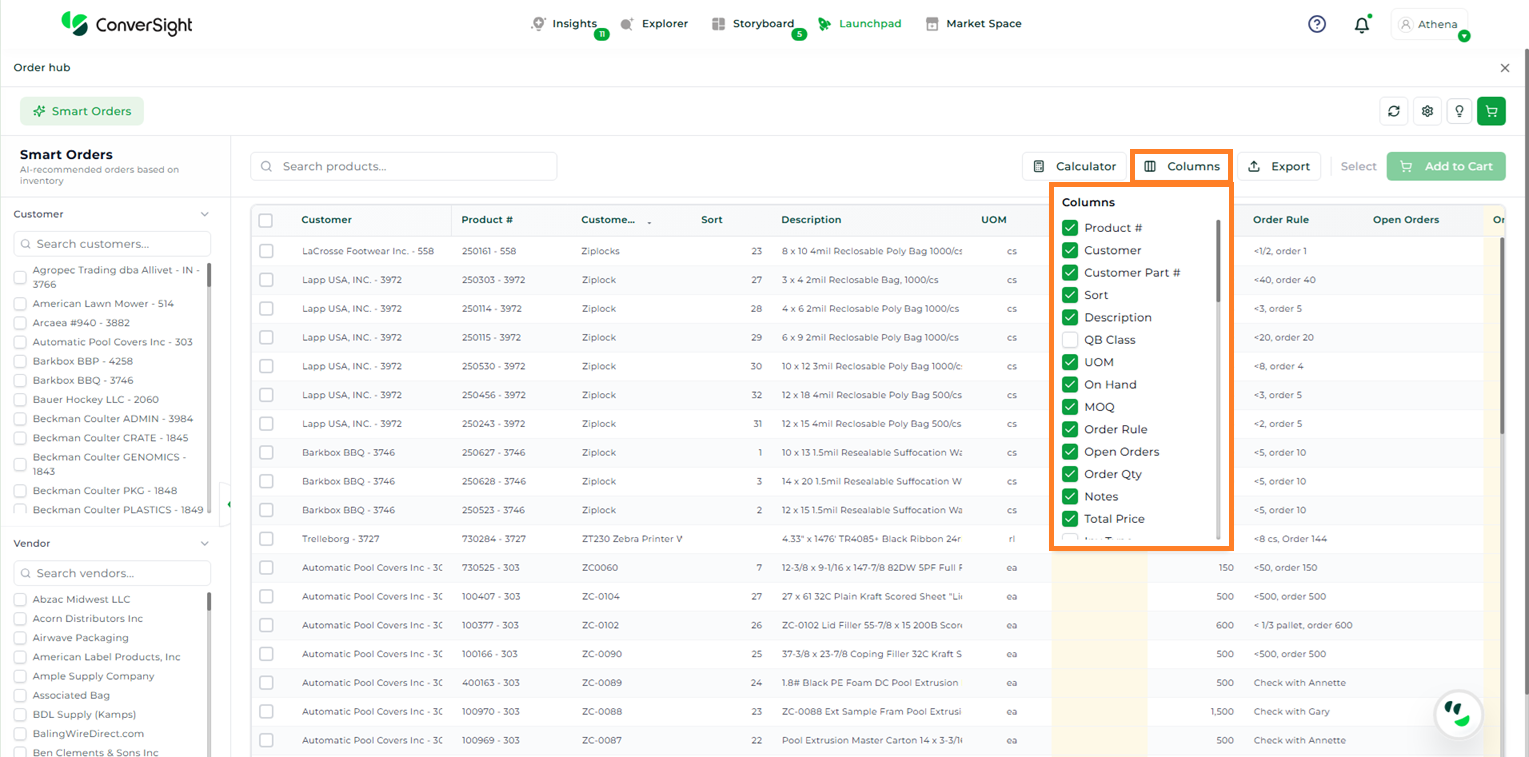
Columns#
The Columns option allows users to show or hide specific columns in the table based on their preference. It updates the table view to display only the selected fields, enabling users to focus on relevant information.
Columns#
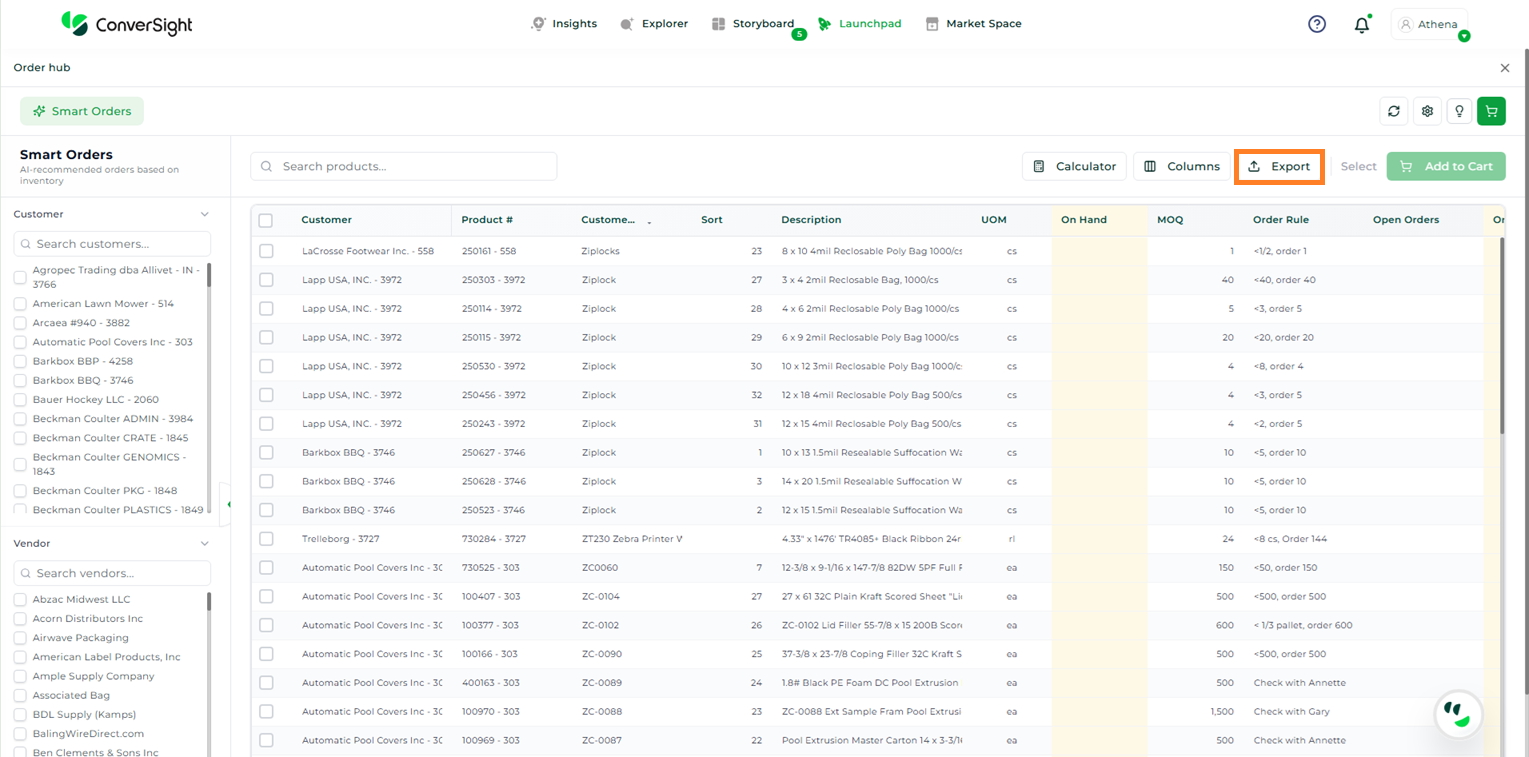
Export#
The Export option allows users to download the order data as an Excel file. This allows for offline review or further analysis.
Export#
Order Placement#
The Order Placement process enables users to finalize and submit purchase orders after reviewing inventory requirements. It is designed to ensure accuracy and flexibility by allowing users to validate system recommendations and make necessary adjustments before proceeding to checkout. This process is carried out in two stages: reviewing and adjusting quantities, followed by order submission and checkout.
Reviewing and Adjusting Quantities#
In this step, the Order Hub application automatically populates the inventory table with relevant data and suggests order quantities based on configured reorder rules and demand signals. Users can review and modify these values to ensure they align with current business requirements before proceeding to checkout.
The following fields in the inventory table are editable:
On Hand Quantity: Allows users to update the available stock quantity for each item directly within the table, ensuring accurate inventory representation.
Order Quantity: Enables users to modify the suggested order quantity for each item based on specific needs or adjustments.
Notes: Provides an optional field for adding additional context, instructions, or references for internal teams or vendors.
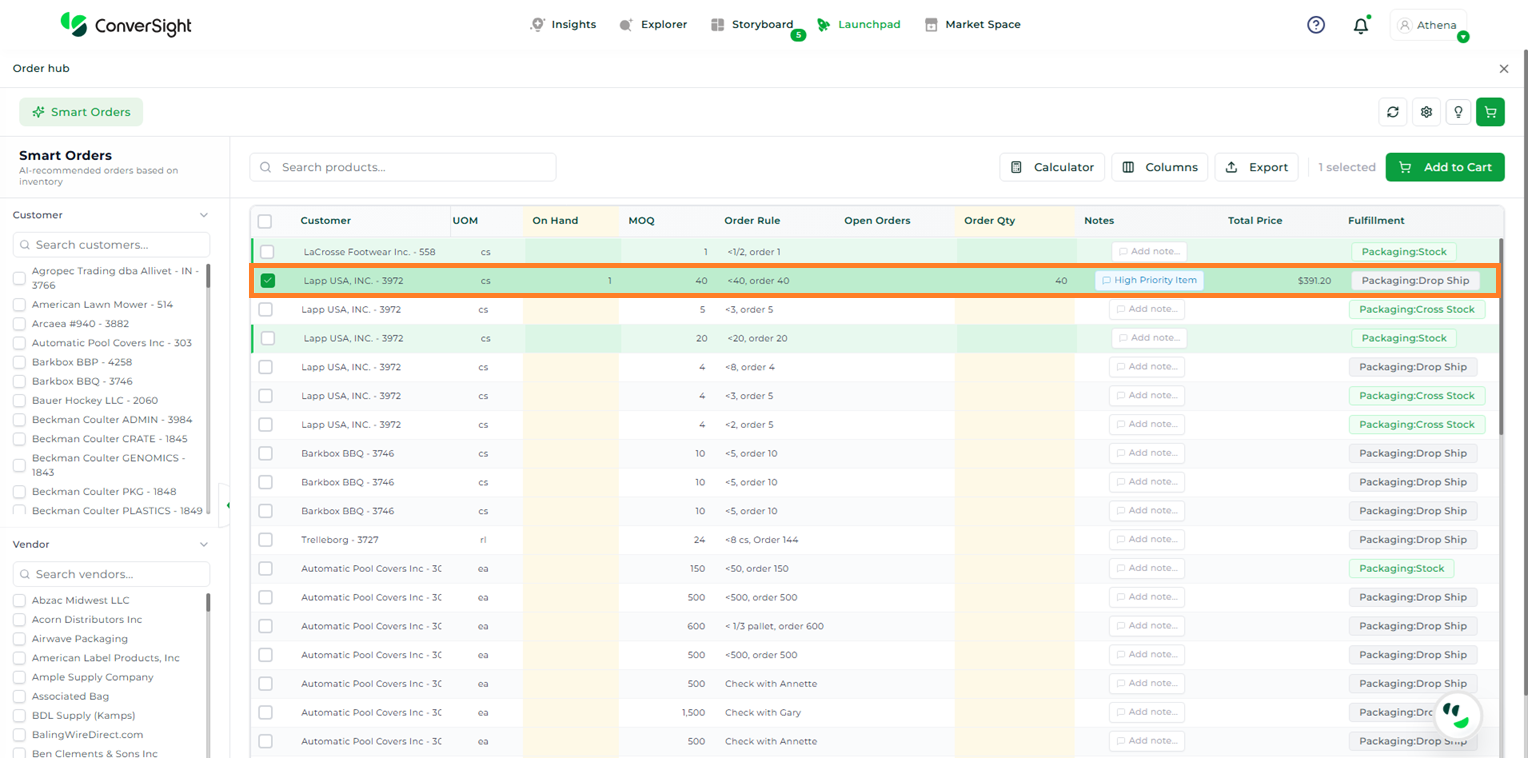
Order Placement#
After reviewing and updating the required values, users must click the Add to Cart button to proceed to the checkout stage.
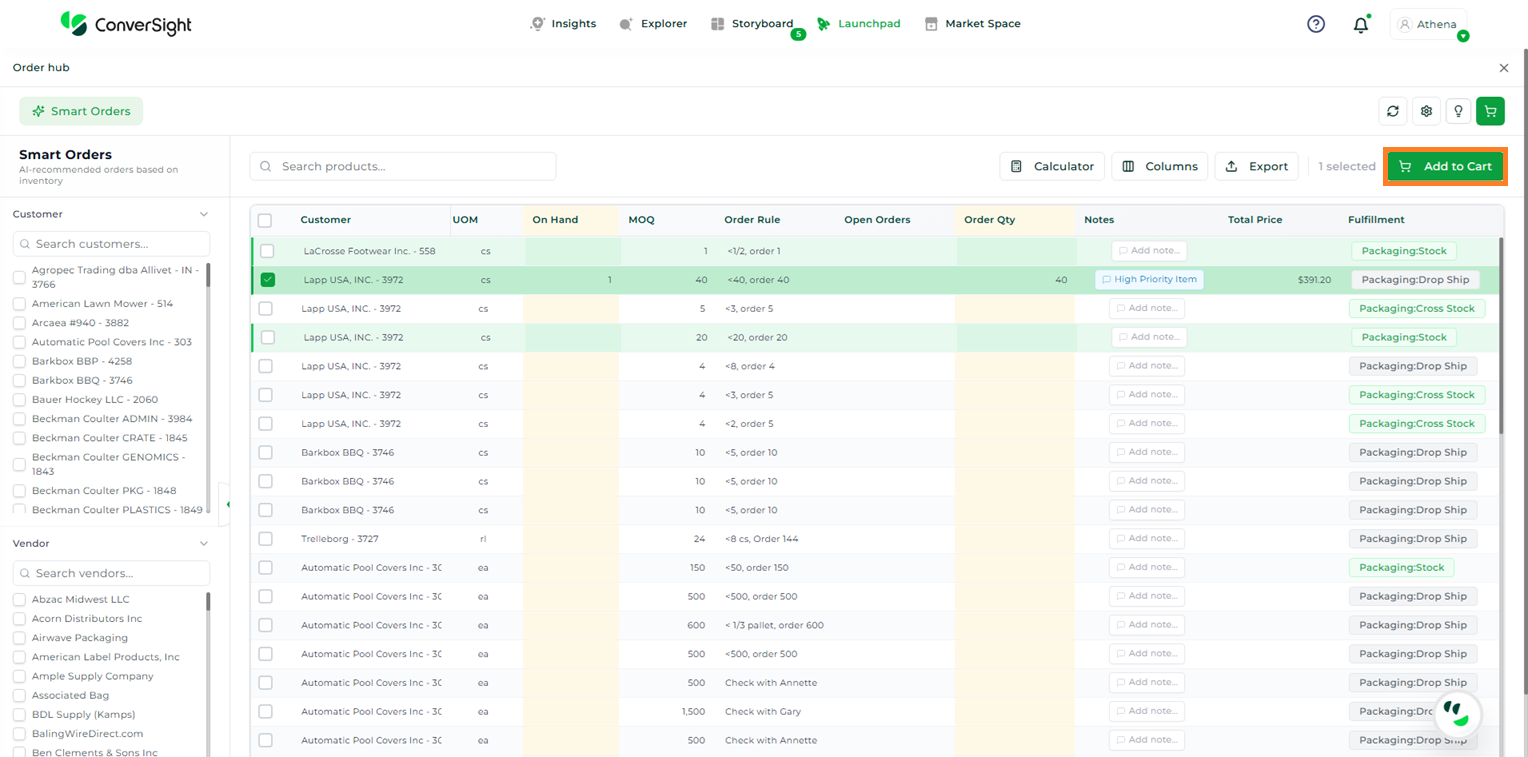
Add to Cart#
Once items are added to the cart, users can click on the Cart icon to view the purchase orders. After reviewing the order details and confirming the information, users can proceed by clicking the Email Orders button.
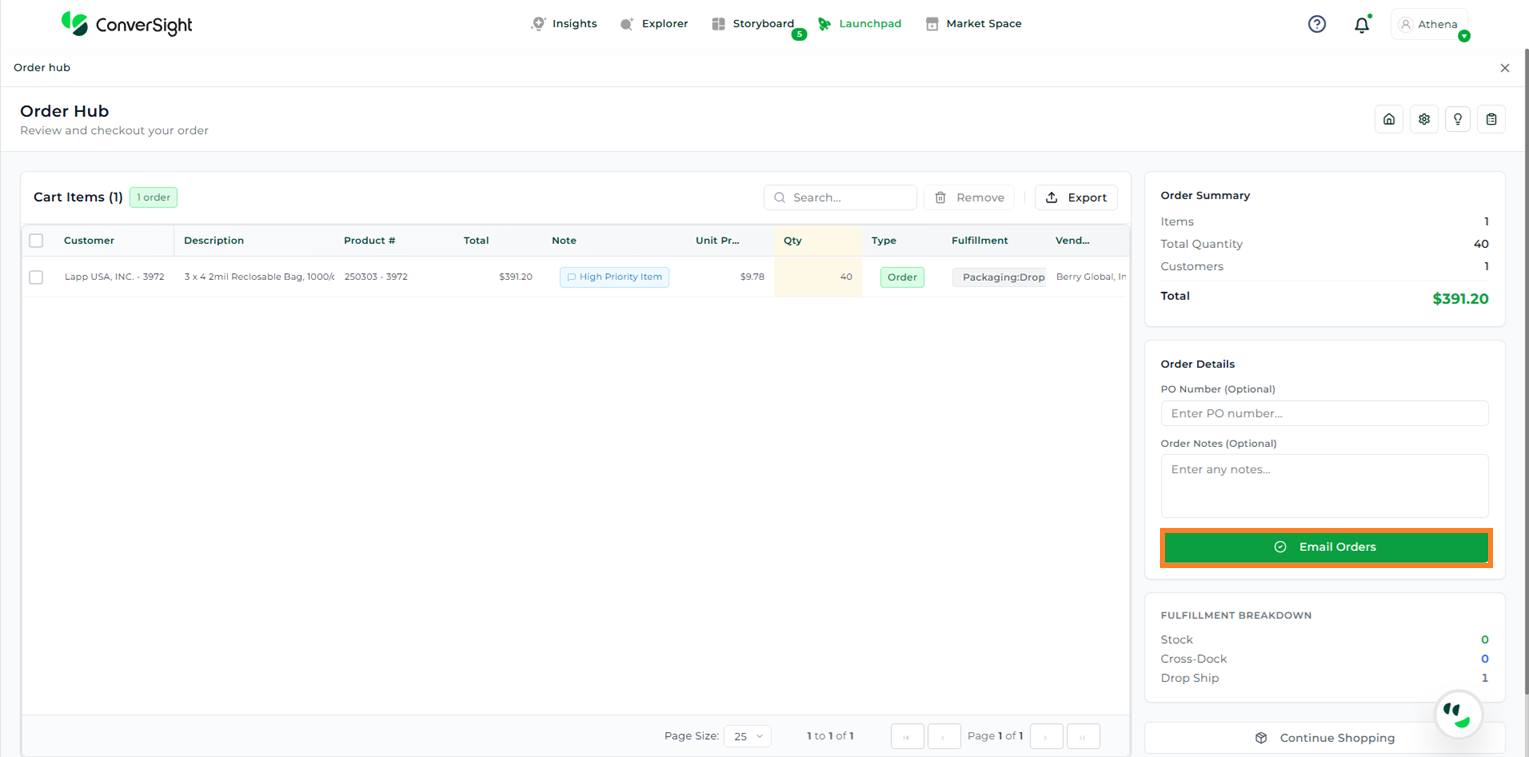
Email Orders#
If additional items need to be added, users can click on the Continue Shopping button to return and create more purchase orders.
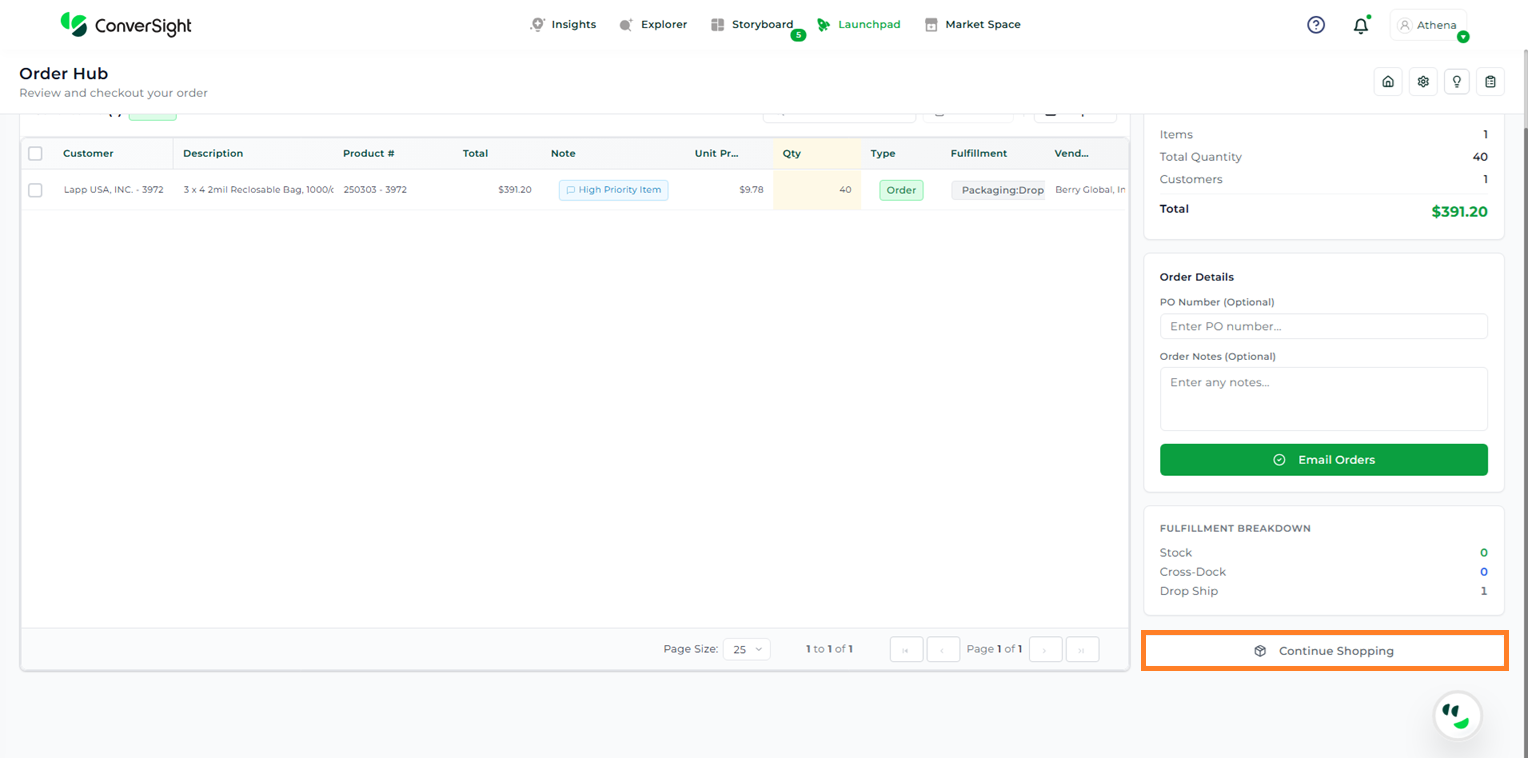
Continue Shopping#