Quick Insights#
Quick Insights is an enhanced file upload that allows users to seamlessly upload, validate, and manage Excel files within the ConverSight platform. It ensures that data is structured correctly, errors are detected early, and validated datasets are ready for reporting and analysis.
By improving performance, accuracy, and error handling, Quick Insights simplifies the process of working with Excel-based datasets and reduces dependency on manual checks.
This makes Quick Insights especially useful when:
Teams rely on Excel sheets for reporting, forecasting, or operational updates.
Datasets require validation for correct column formats, data types, or missing values.
Users want to quickly identify and fix issues before publishing data into the system.
Until now, Excel uploads often required manual data preparation. With Quick Insights, users can directly upload, validate, and confirm datasets, making the process more efficient, self-service, and reliable.
Working with Quick Insights#
The Quick Insights process works as follows:
Upload Data: Select your Excel or CSV file (.xls, .xlsx, .csv) to upload. Only one sheet is allowed, and the file size must be under 5 MB.
Smart Validation: The system automatically checks data structure, types, and missing values, highlighting any errors.
Data Explorer: After validation, the dataset is available for analysis, visualization, and exploration.
AI Chat: Query the validated dataset via AI Chat to get insights, quick reports, and interactive exploration.
The following are the steps to work with Quick Insights:
Step 1: Under Configuration section, select Quick Insights option.

Quick Insights#
Step 2: Select the Create New button.
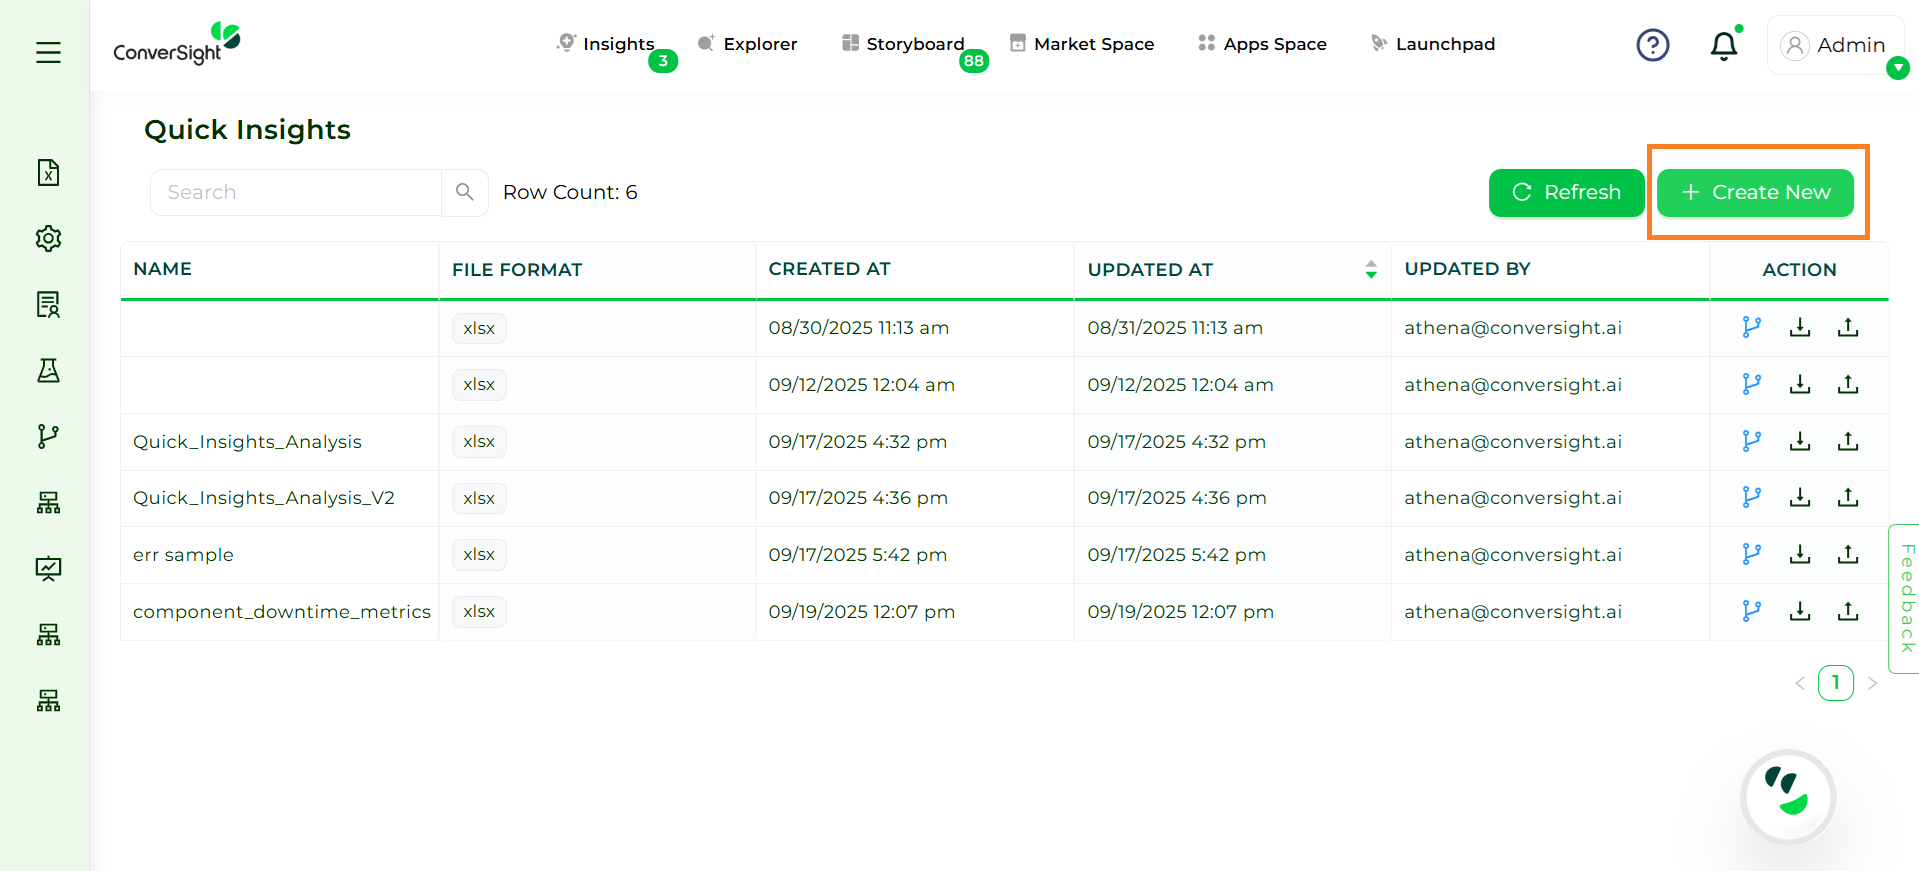
Create New#
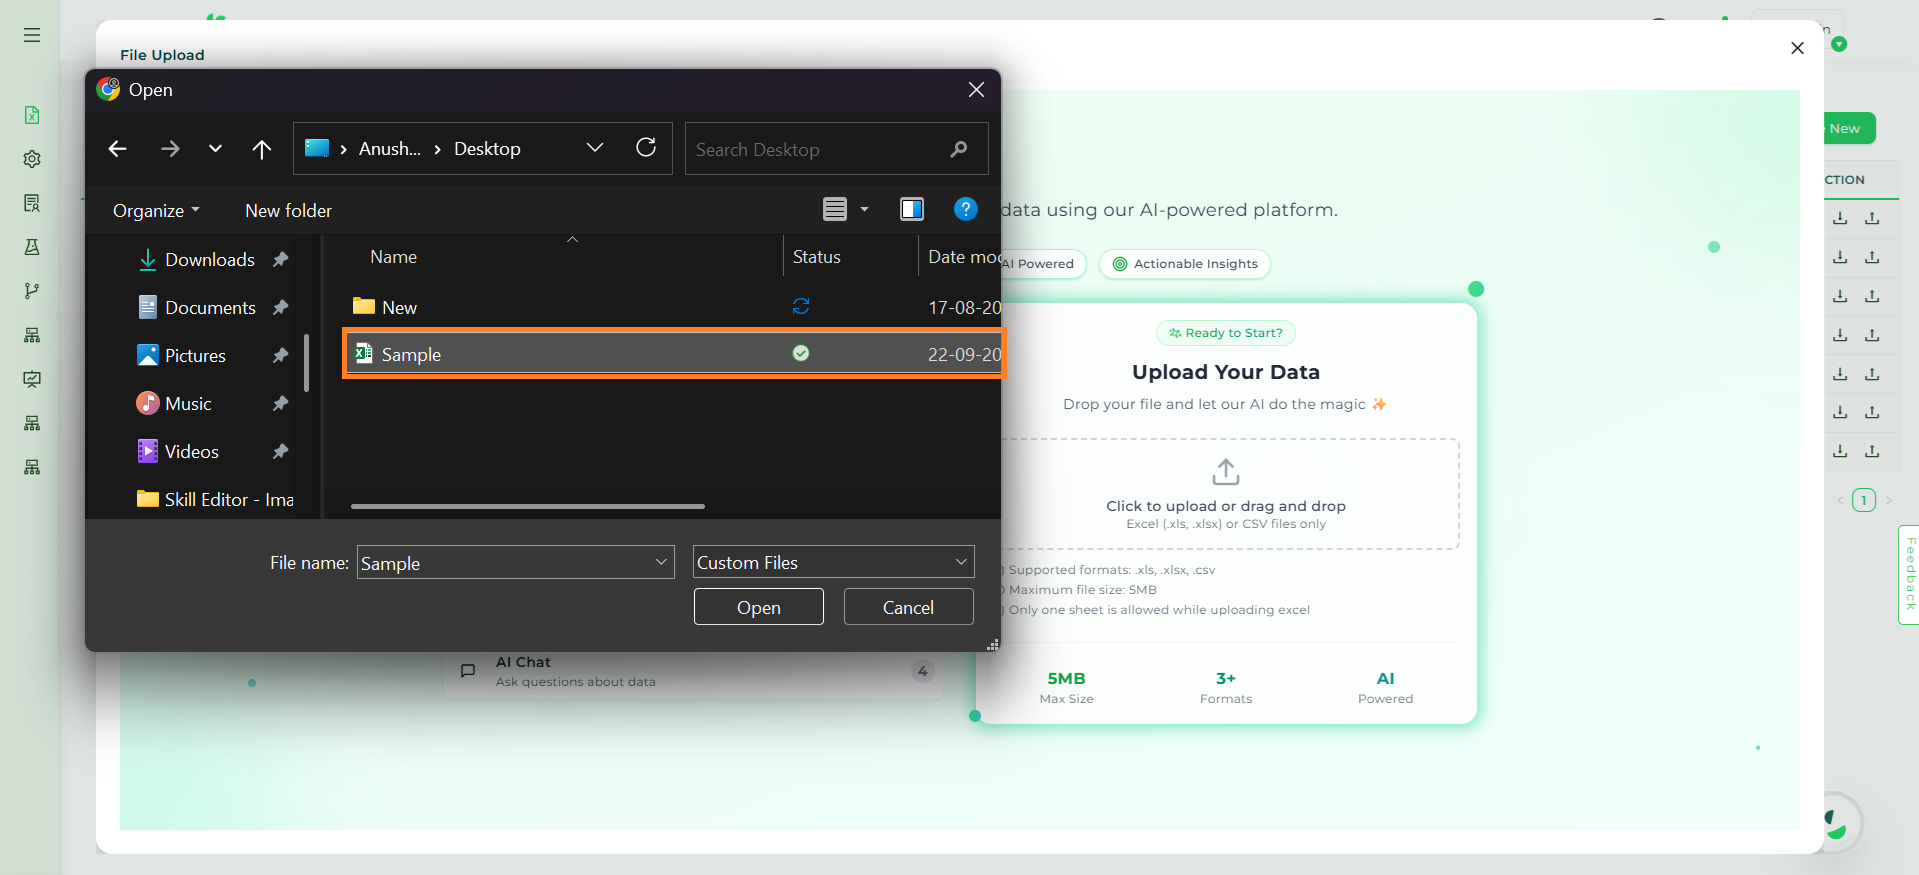
Step 3: Click on Upload File and browse to select your Excel File (.xlsx format supported).
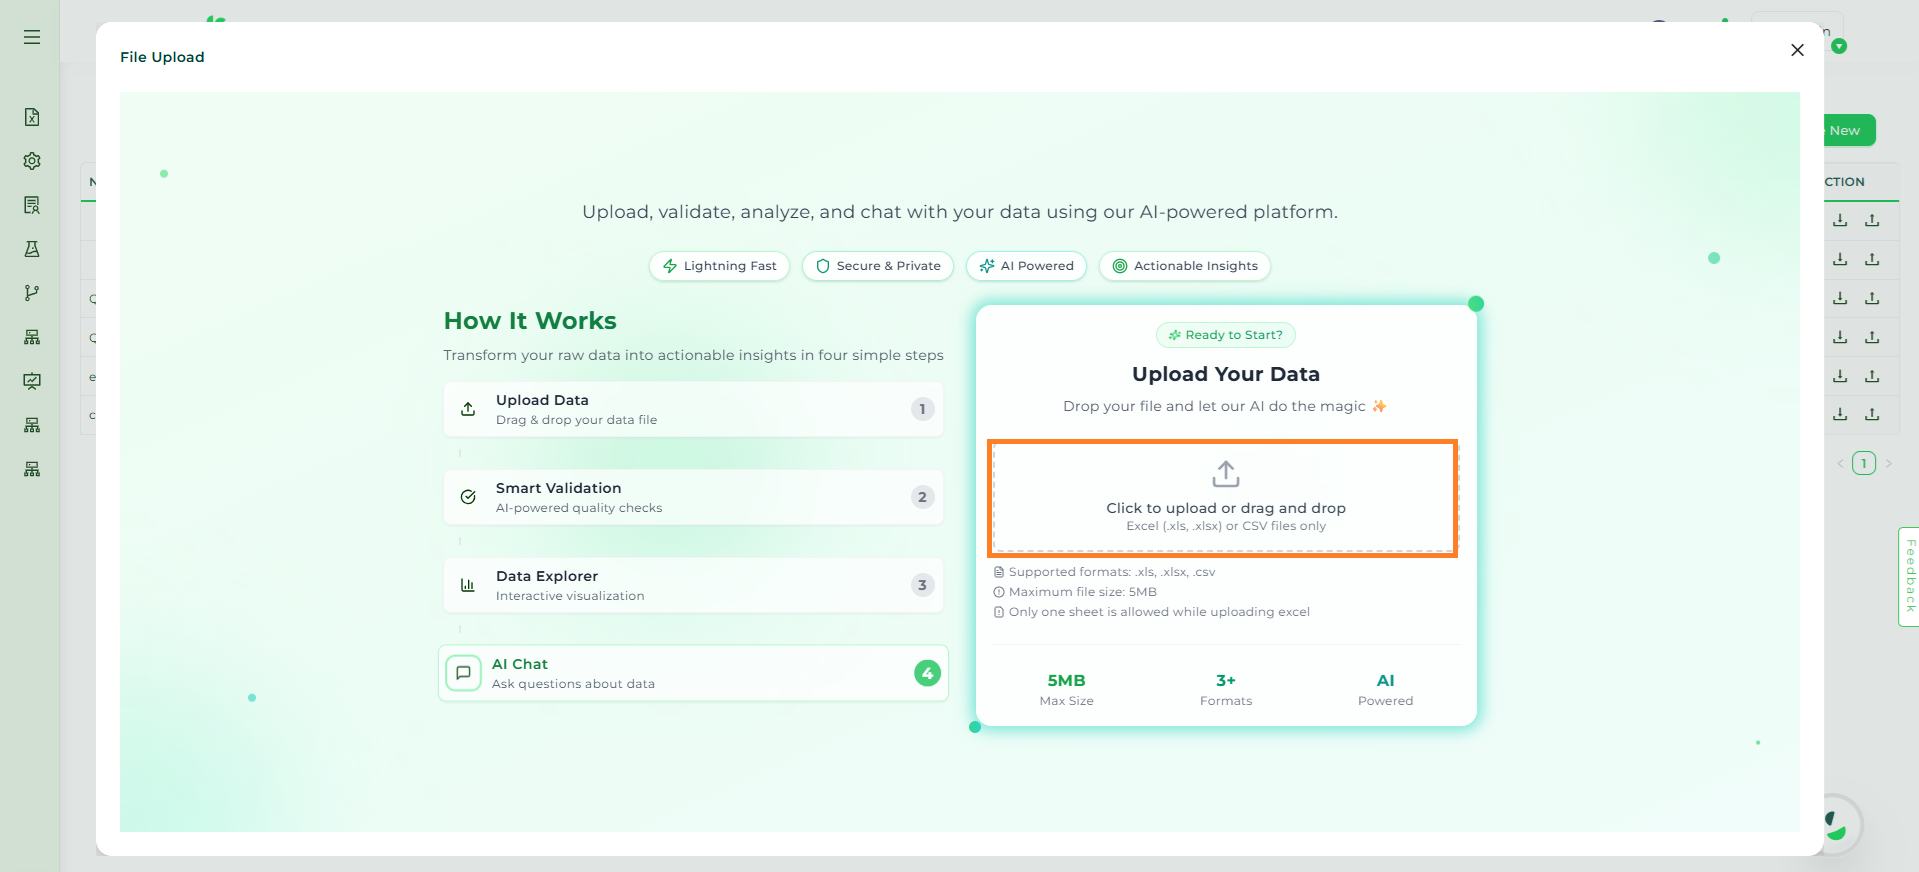
Excel Upload#
Excel Upload#
NOTE
Only files in .xls, .xlsx, or .csv formats are supported. The maximum file size allowed is 5 MB, and while uploading, only one sheet per Excel file is permitted.
Step 4: Once uploaded, the system automatically performs validation checks on the file. The Validation Report shows:
Total rows and columns
Issues found
Date columns detected
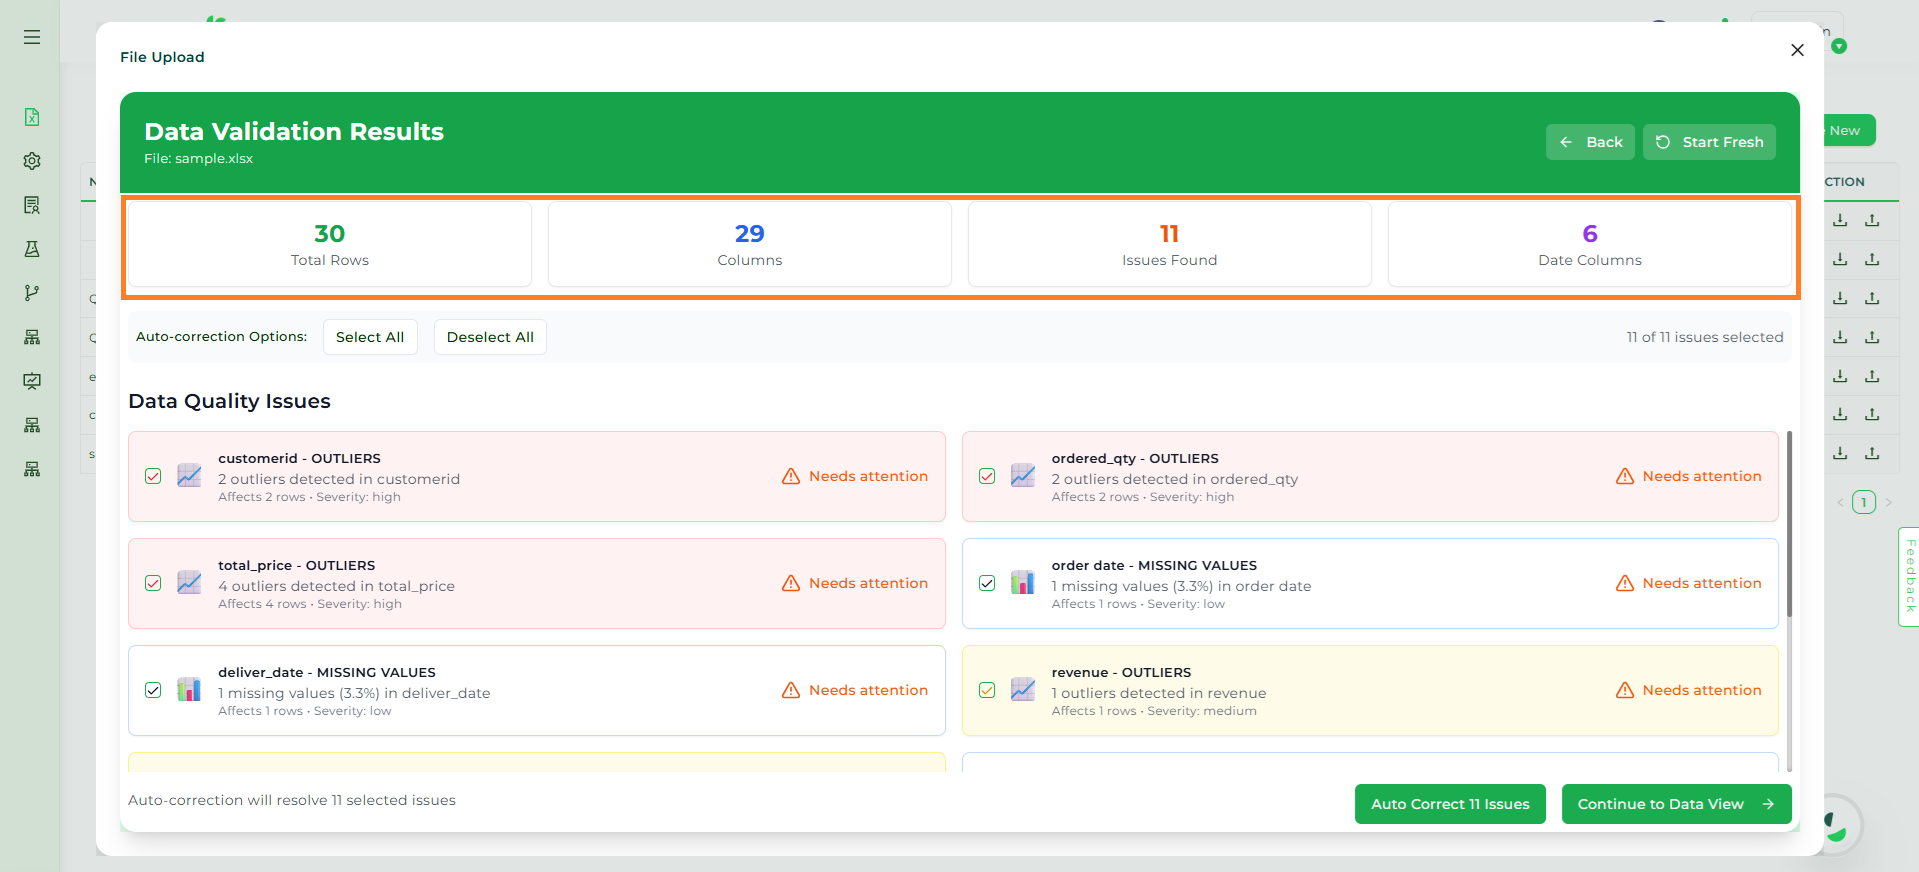
Data Validation#
If any issues are present, they are listed clearly under Data Quality Issues. To fix the issues automatically, select the issues with the Select All button and click the Auto Correct Issue button.
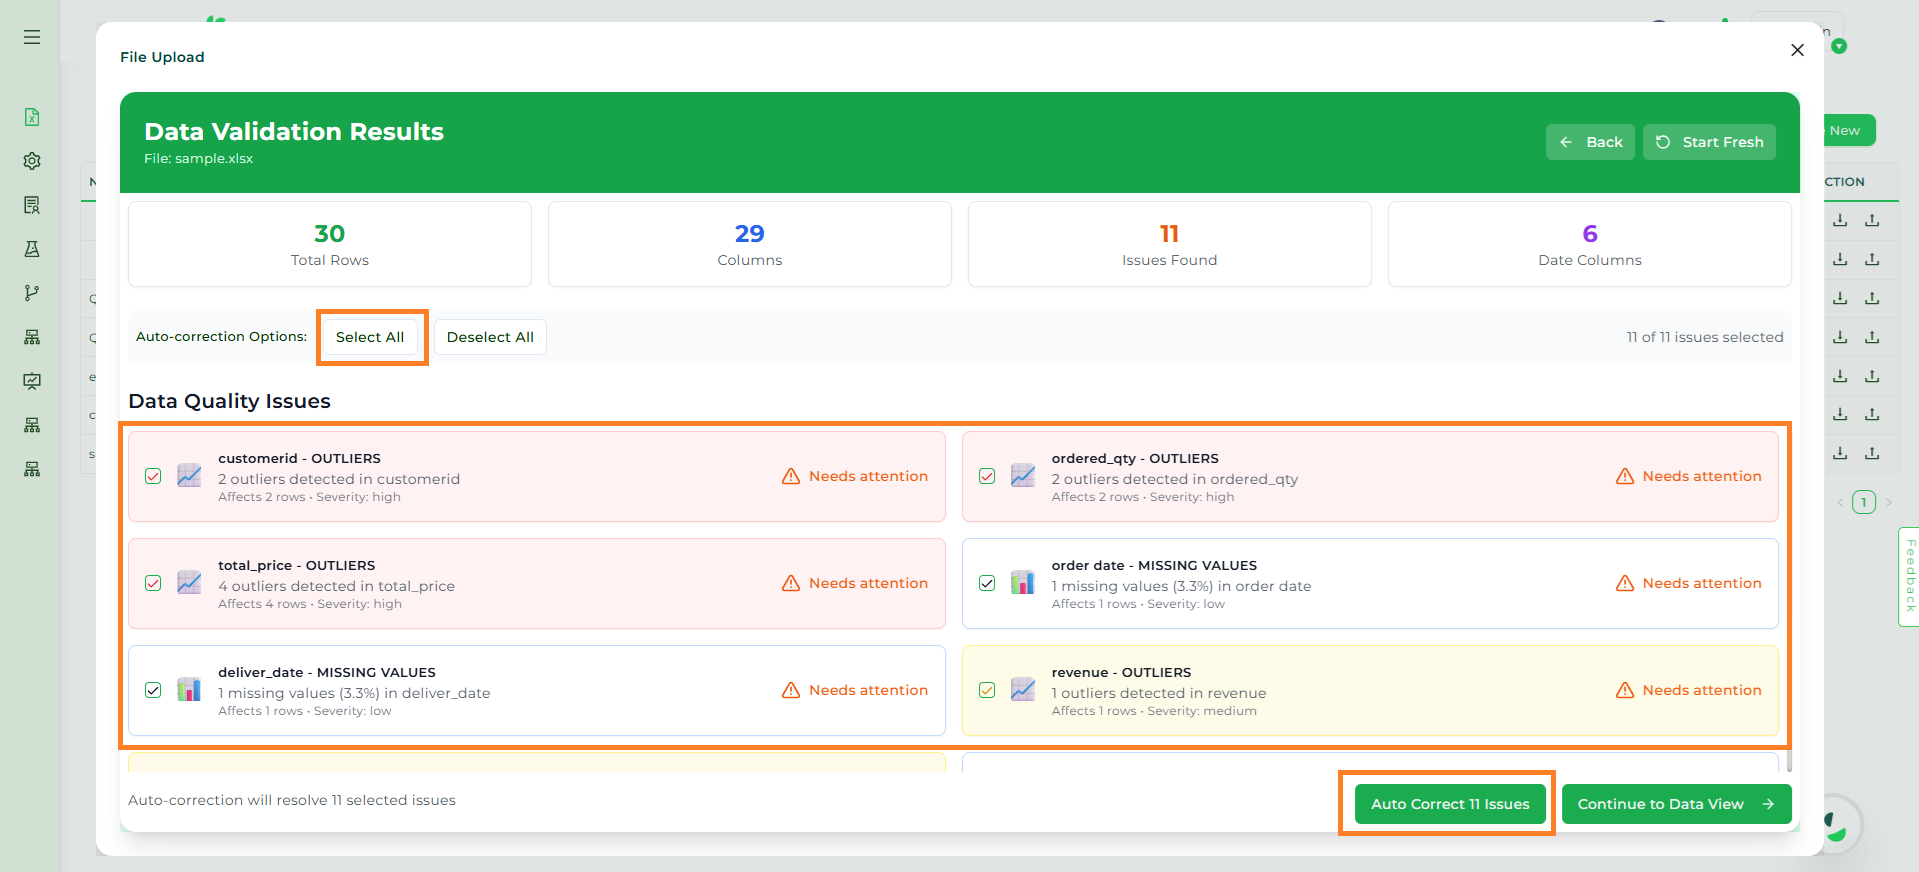
Data Quality#
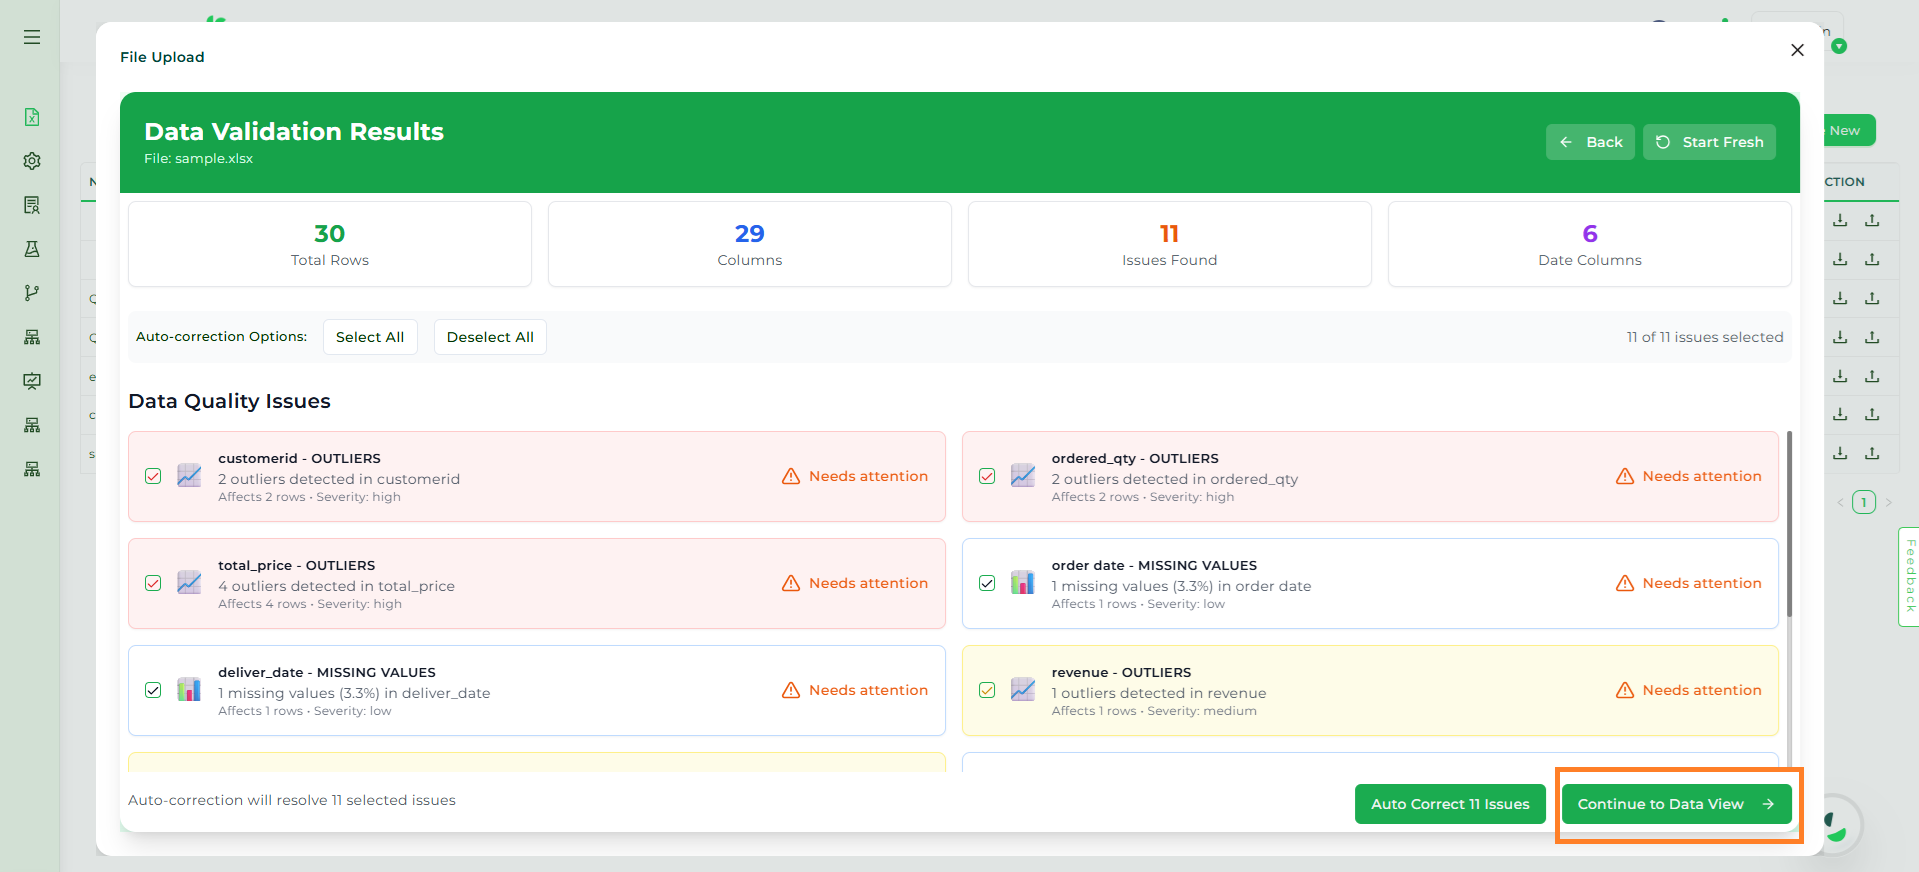
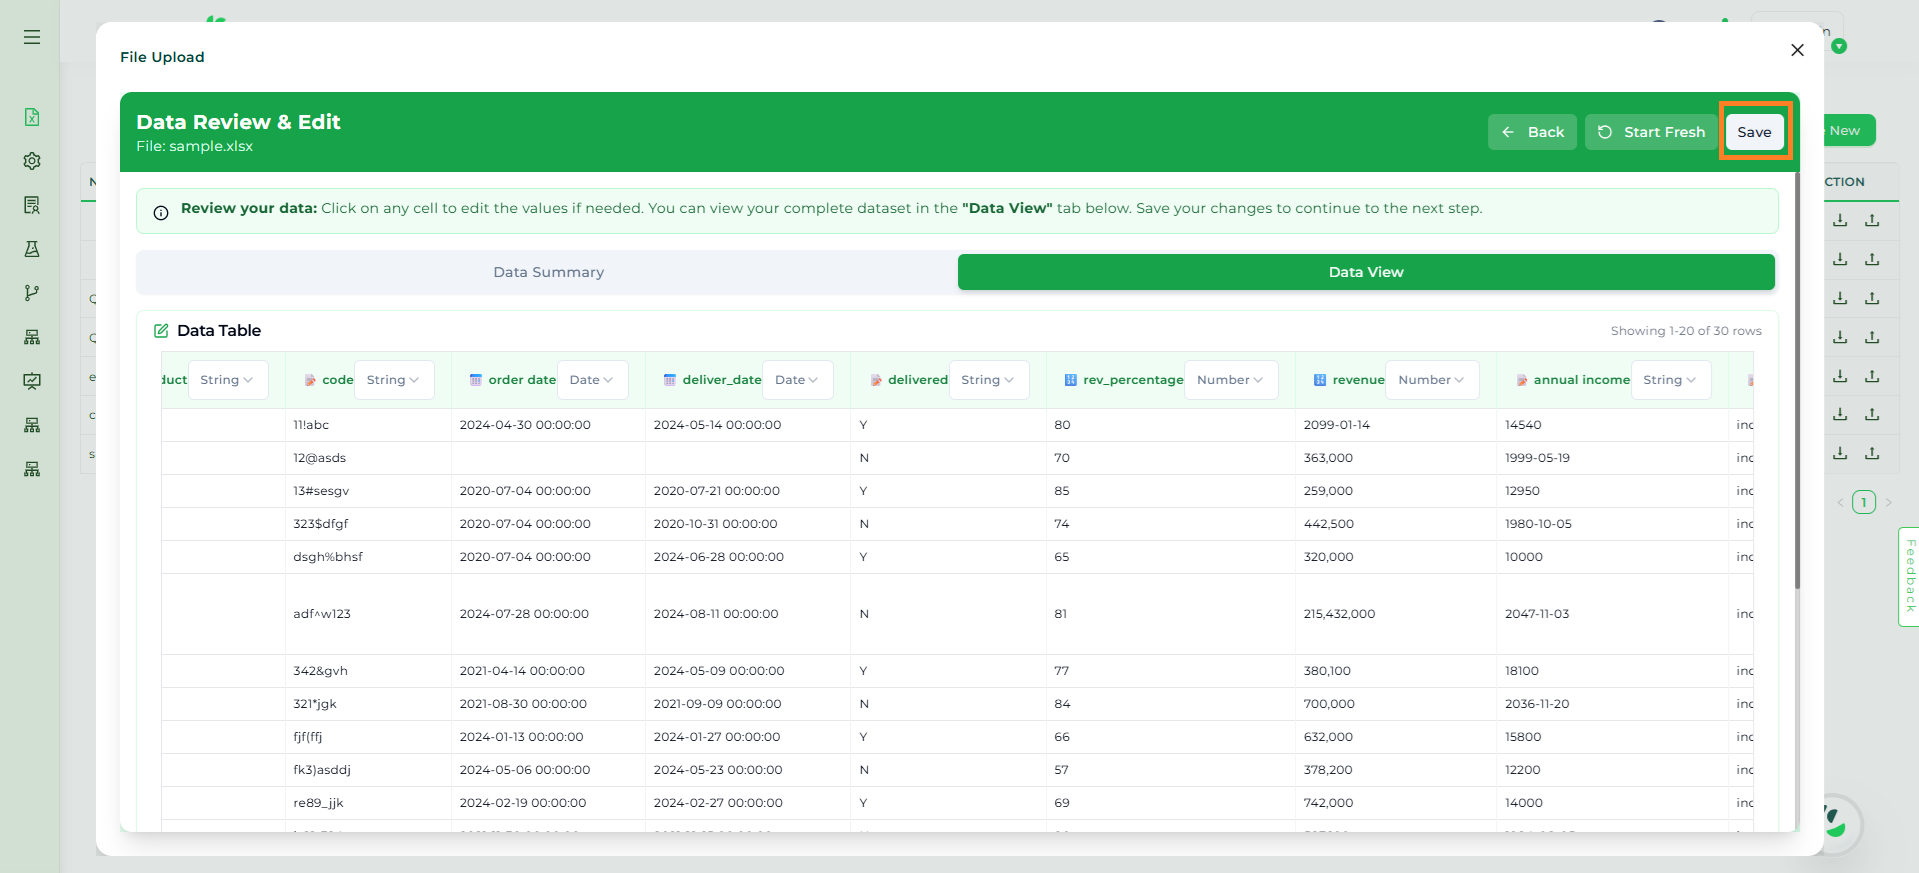
Step 5: After validation, you can review and edit your data by clicking the Continue to Data View button.
Data View#
The Dataset Summary displays total rows and columns, data quality and database status.
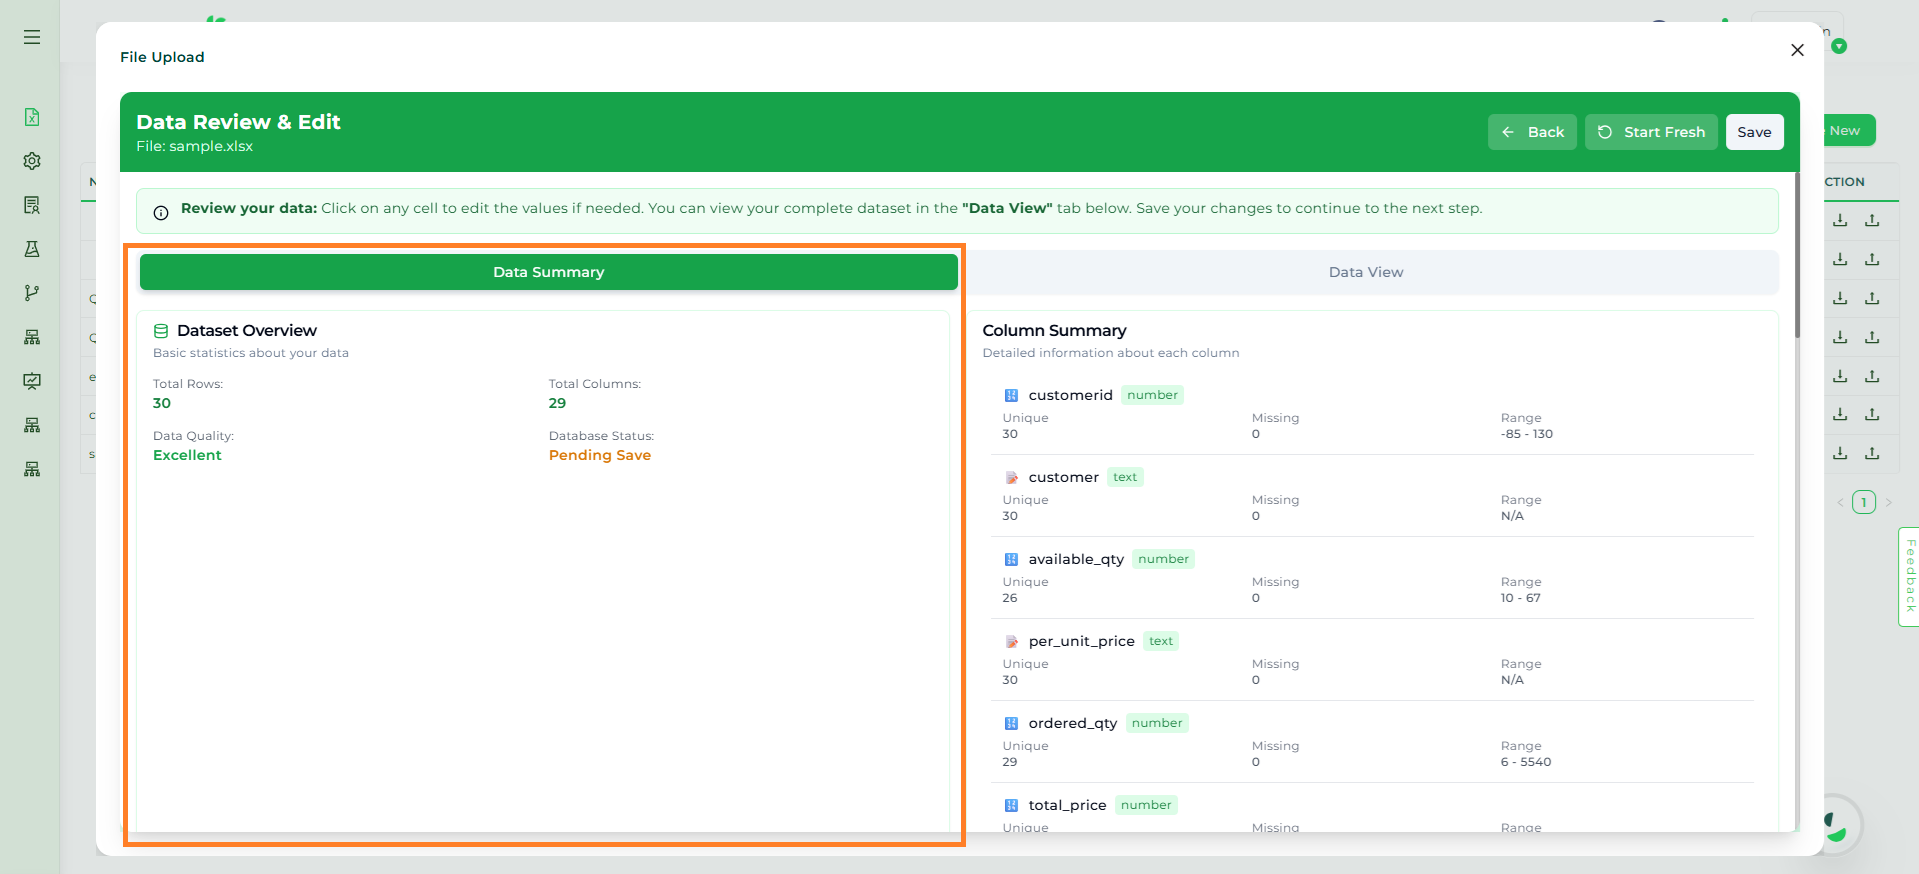
Dataset Summary#
Users can view the dataset in Data View and make edits directly if needed and click Save Changes to apply updates.
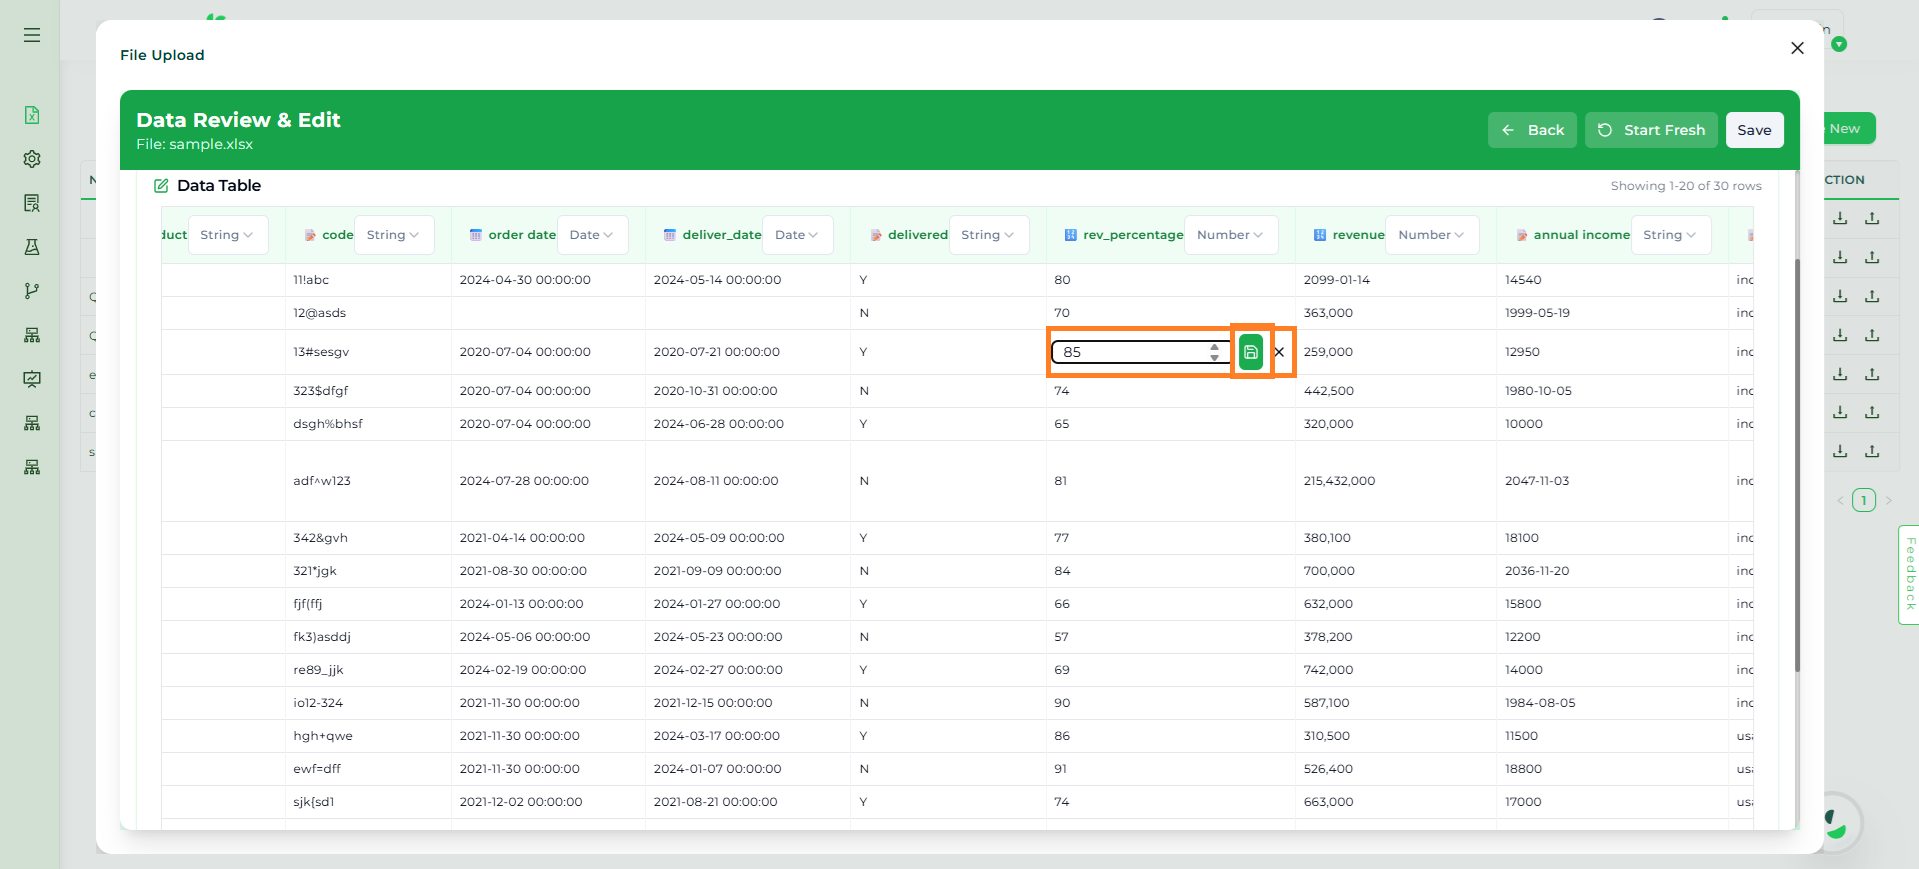
Data View#
Step 6: To add the file to a Dataset, click the Save button in the top-right corner.
Save Button#
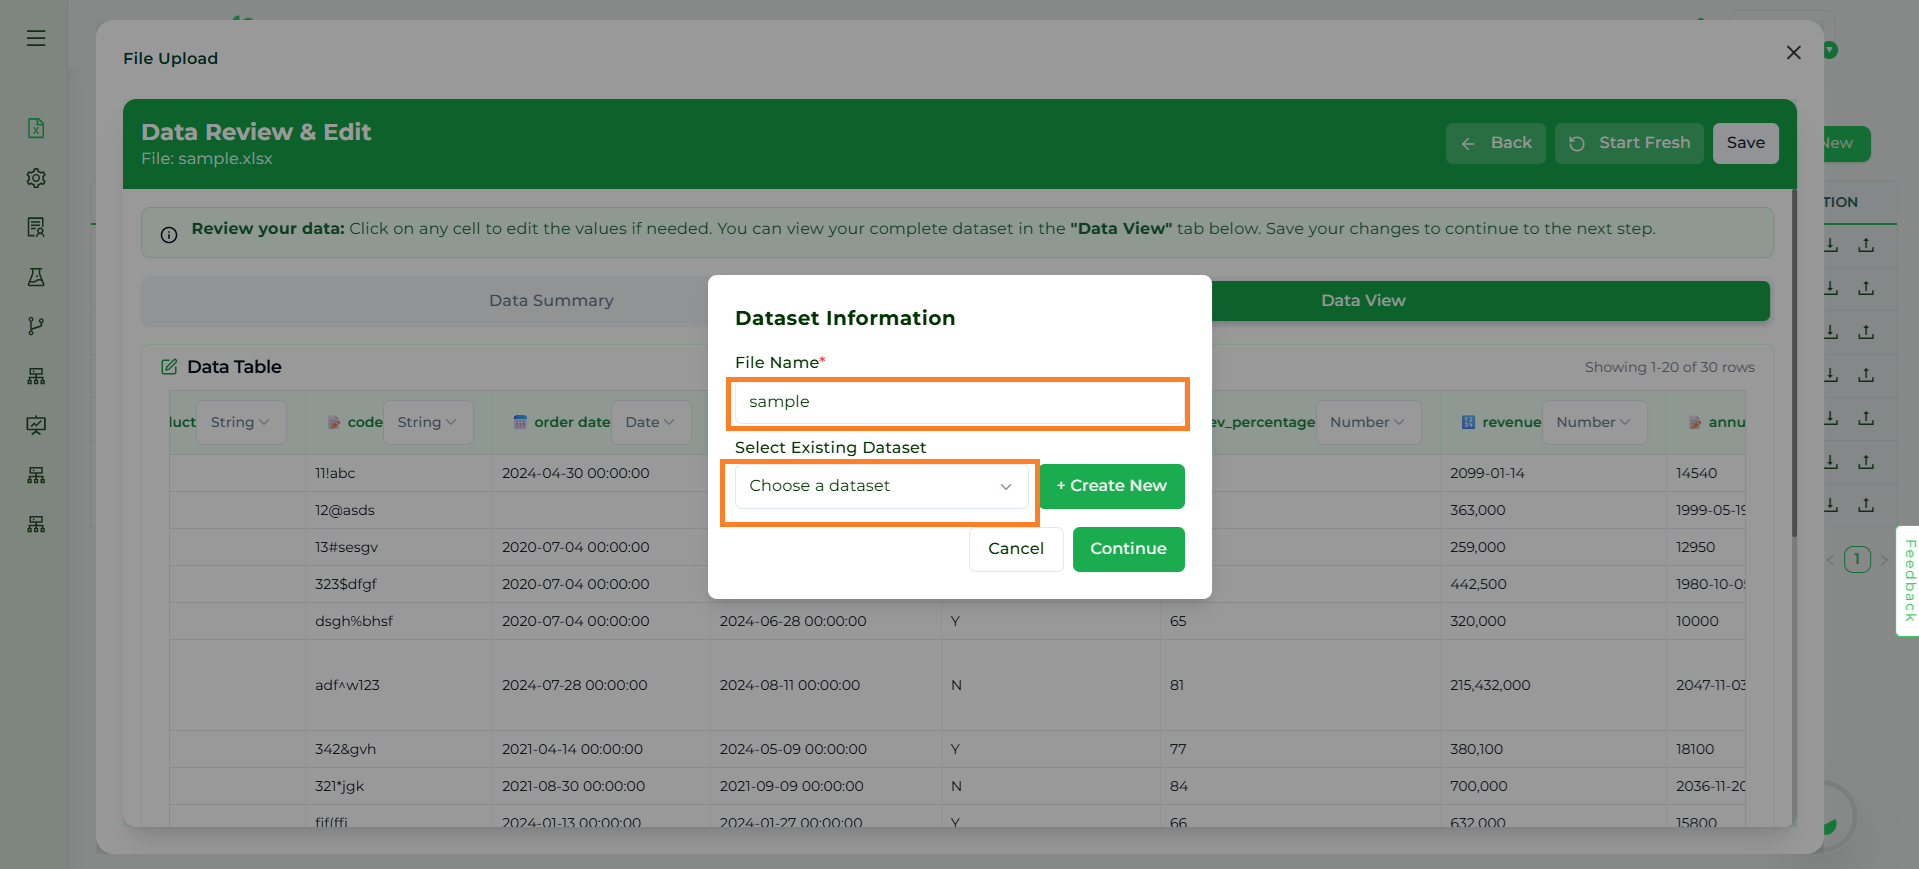
Provide a File Name and choose a Dataset to add the file to an existing dataset.
Existing Dataset#
NOTE
When adding an Excel file to an existing dataset, only storage connector datasets are supported for Quick Insights.
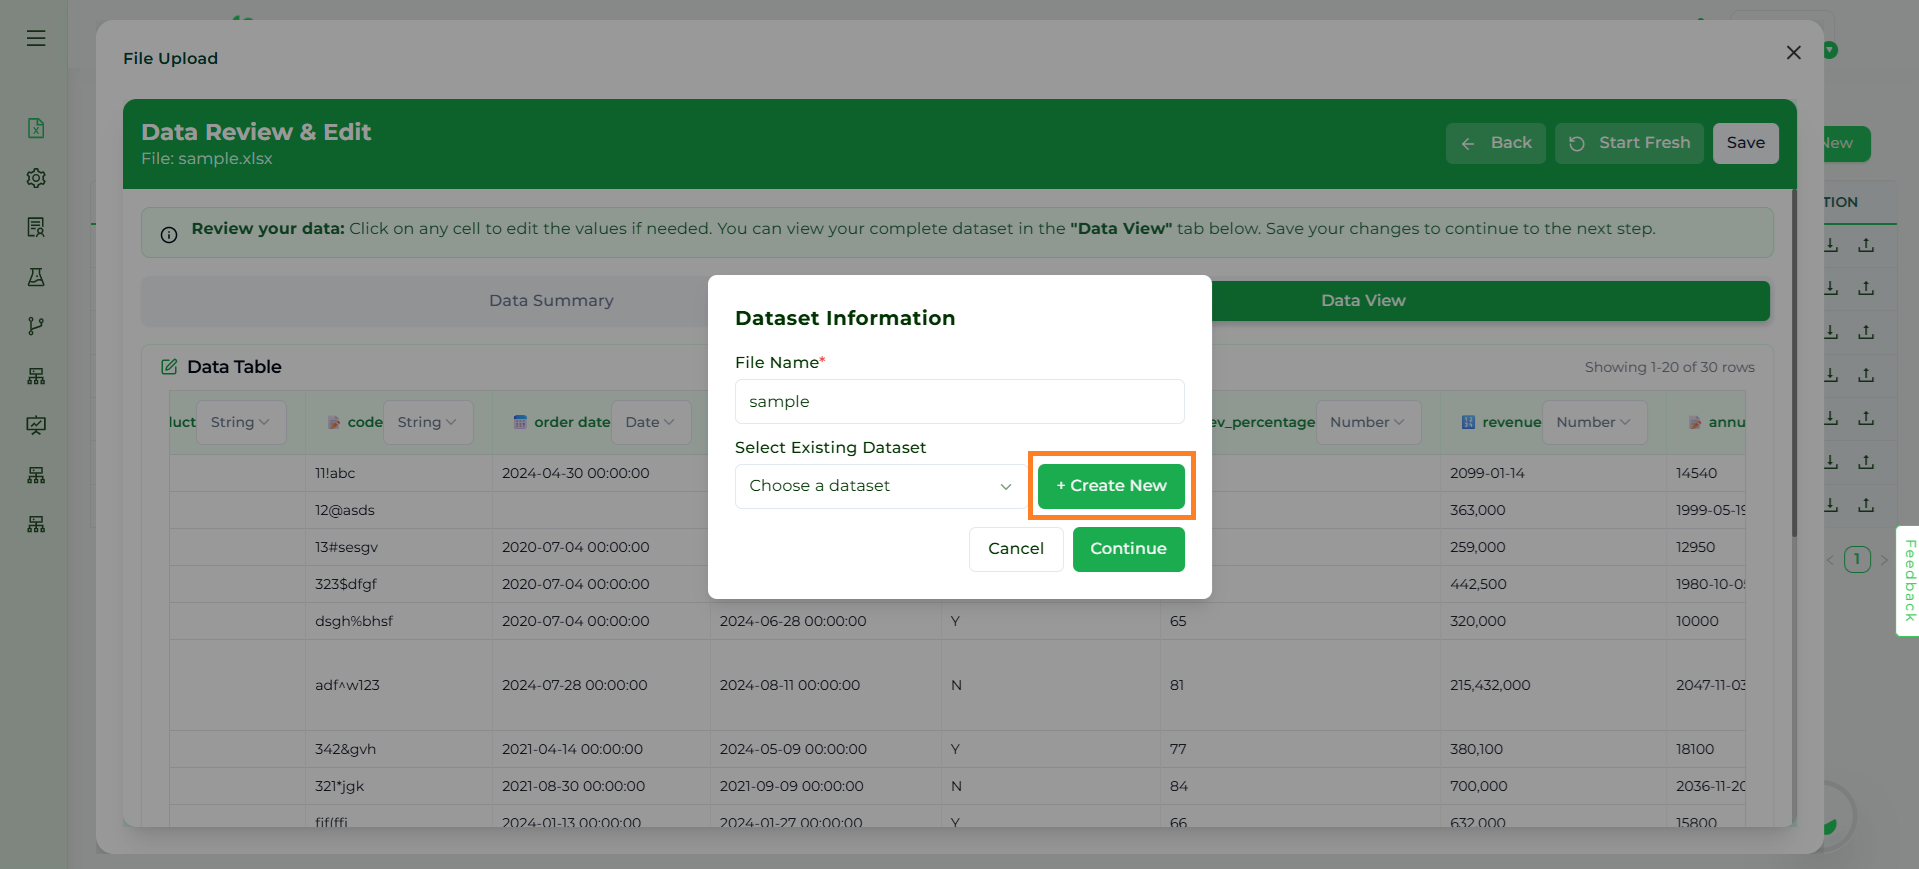
To create a New Dataset, select Create New and provide Dataset Name, Description, Country, and Time Zone and click the Continue button.
New Dataset#
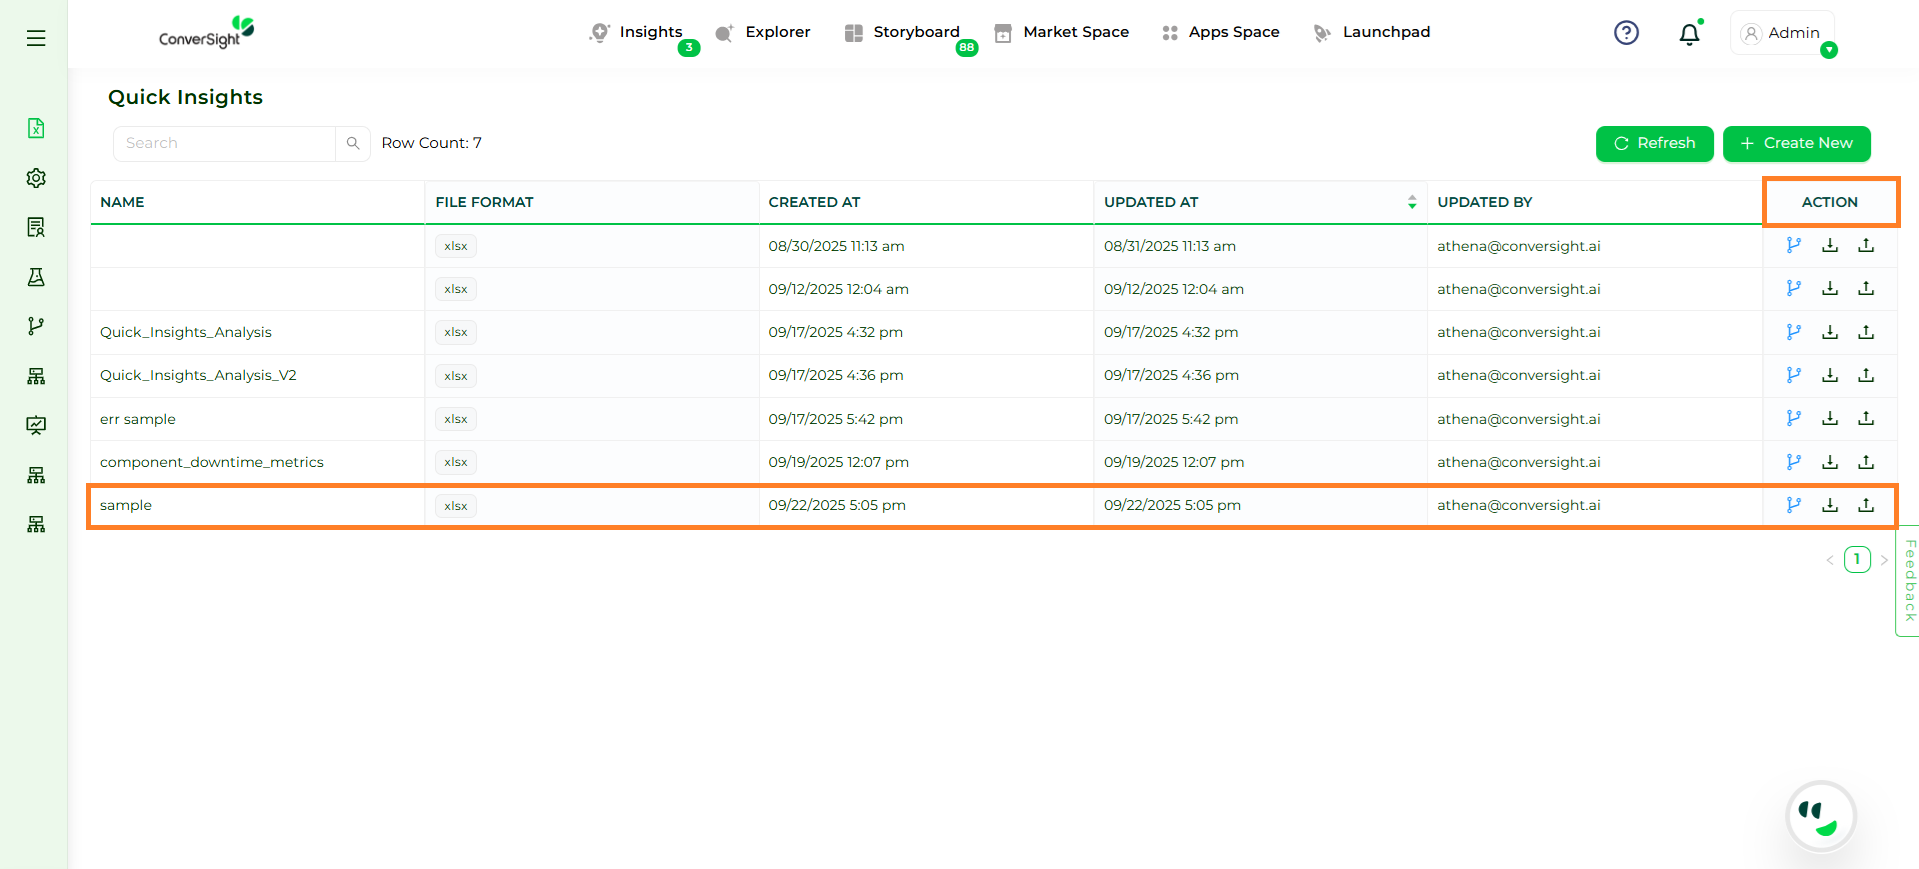
Step 7: After all the configurations are done, the dataset is ready for use in Athena, allowing you to query, generate insights and perform interactive exploration. In the Action column, users can Re-Upload, Download, or Manage dataset.
Action Column#
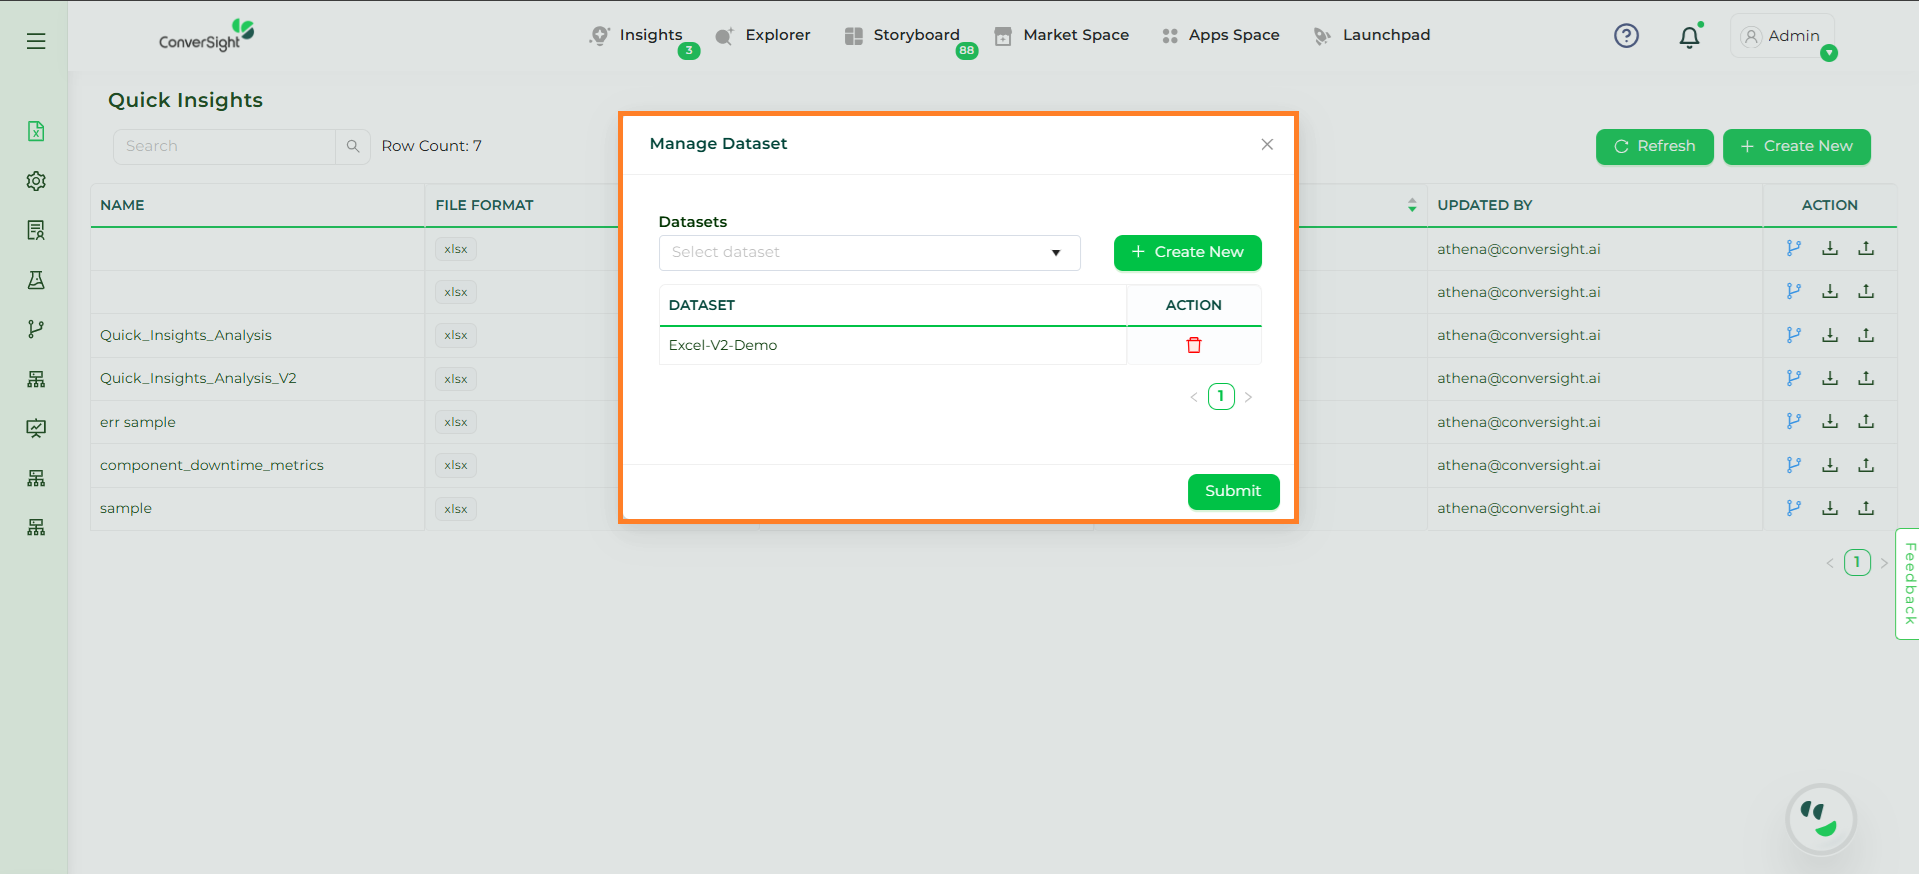
In Manage Dataset, users can check to which dataset the file is mapped to.
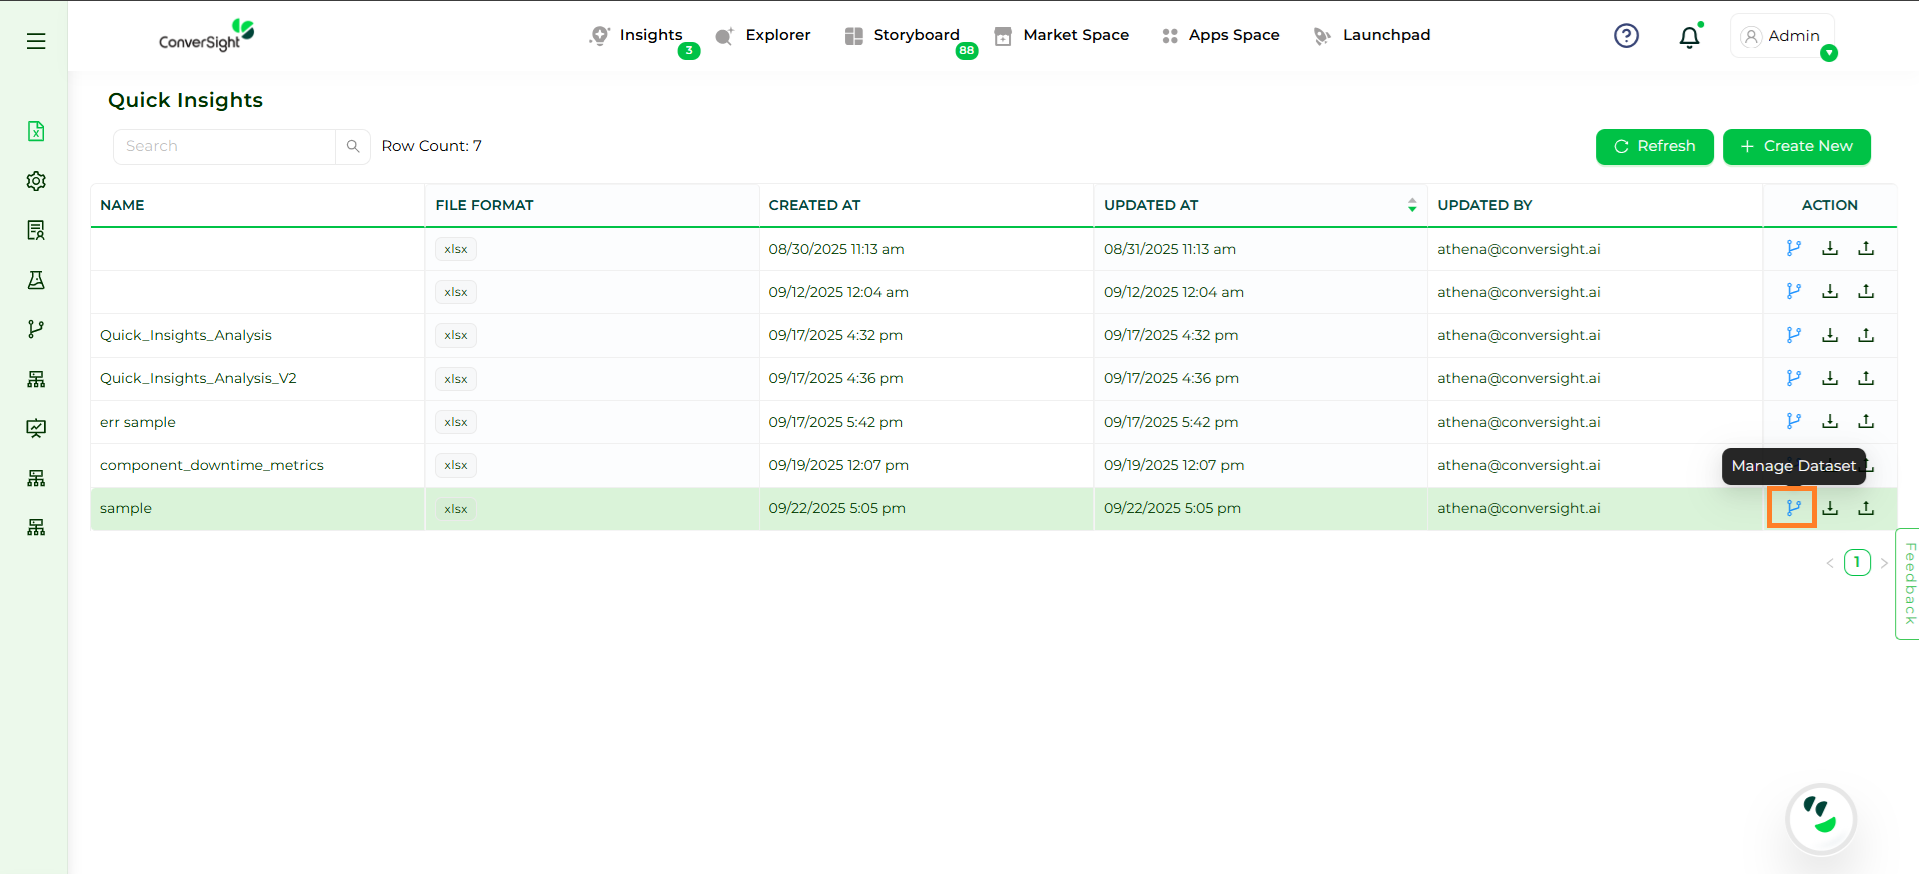
Manage Dataset#
Manage Dataset#
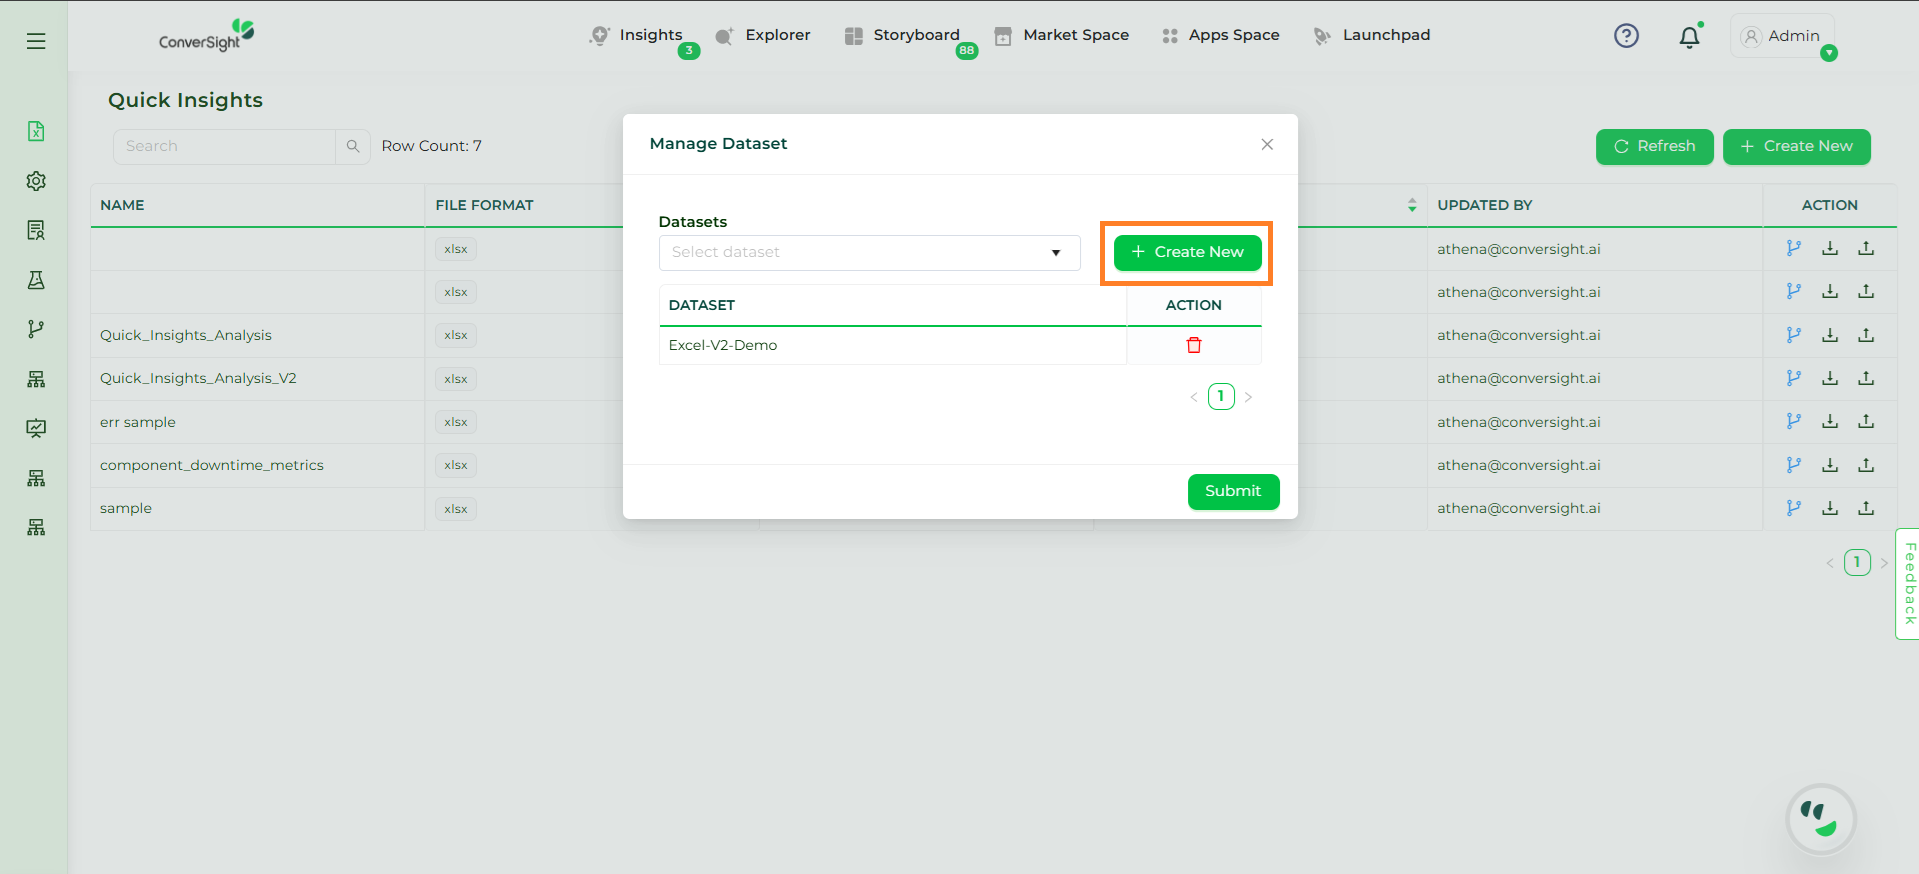
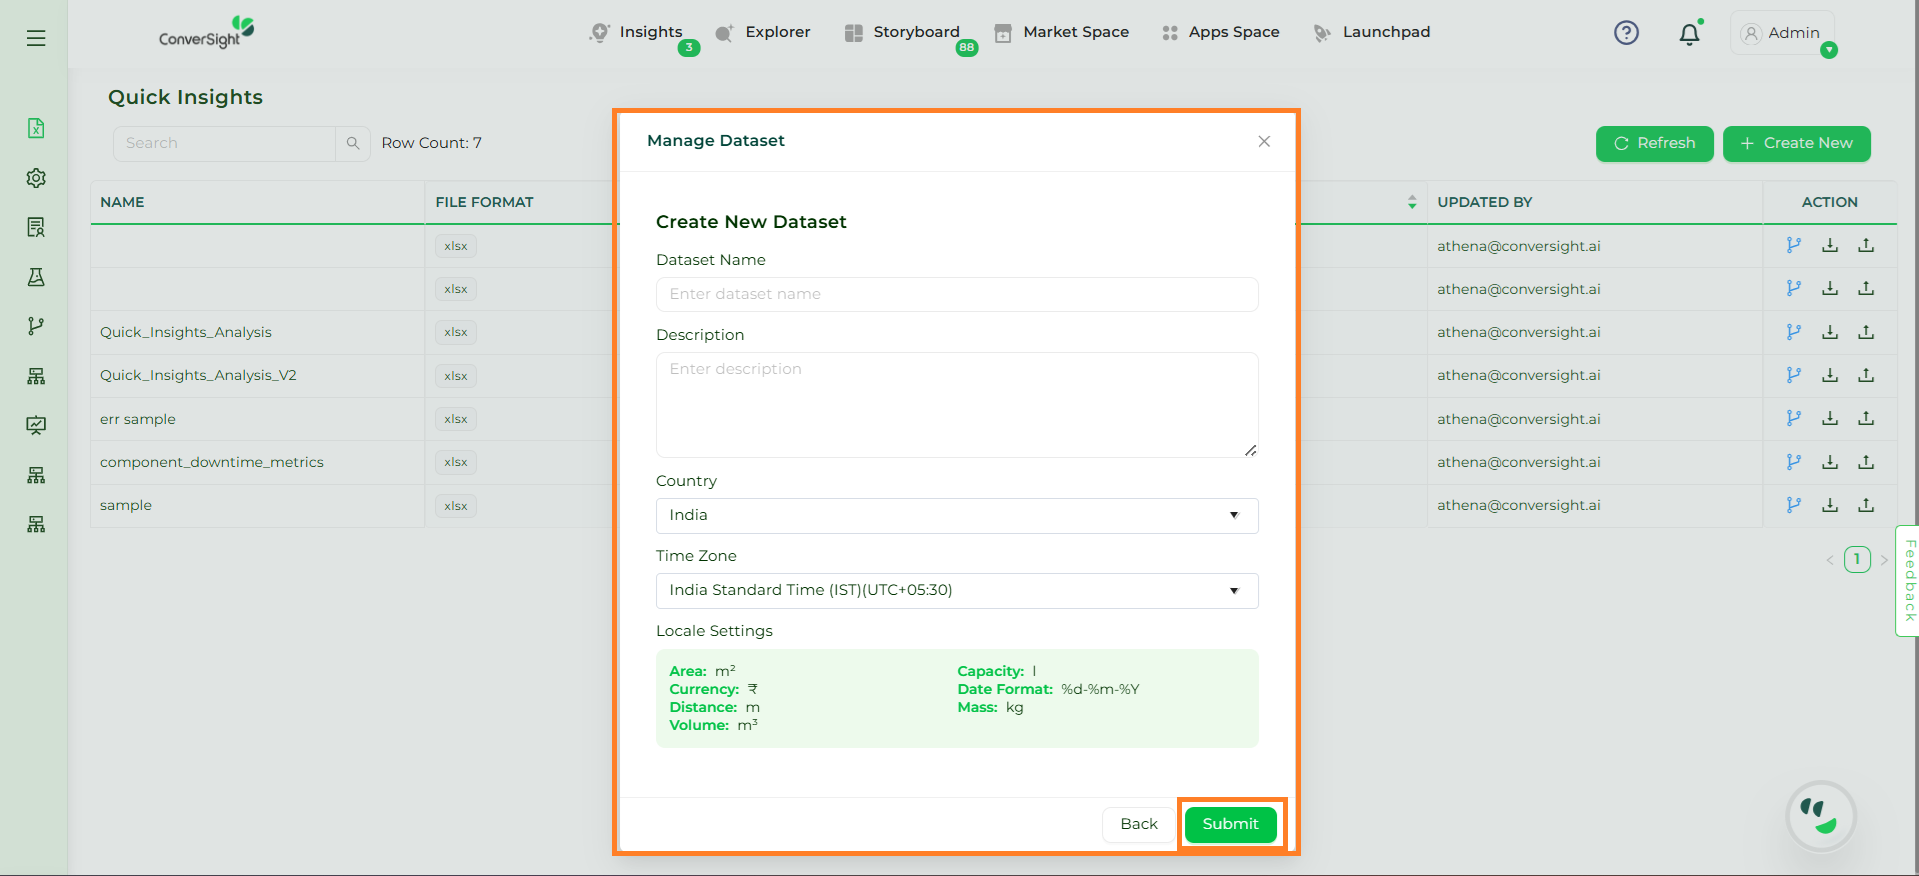
In addition, users can also map it to additional datasets by clicking Create New and then provide Dataset Name, Description, Country and Time Zone and click the Submit button.
Create New Button#
Submit Button#