Subscribed Flows#
Subscribed Flows refers to a feature that allows a user to manage all the flows that they have created. Additionally, it provides an option for the user to subscribe to any available flows, which gives them extended flexibility to work with and utilize other flows. By subscribing to available flows, users can access and integrate pre-existing flows into their own workflows, thereby reducing the amount of time and effort required to create new ones from scratch. This feature is especially useful for users who want to streamline their workflow and optimize their productivity.
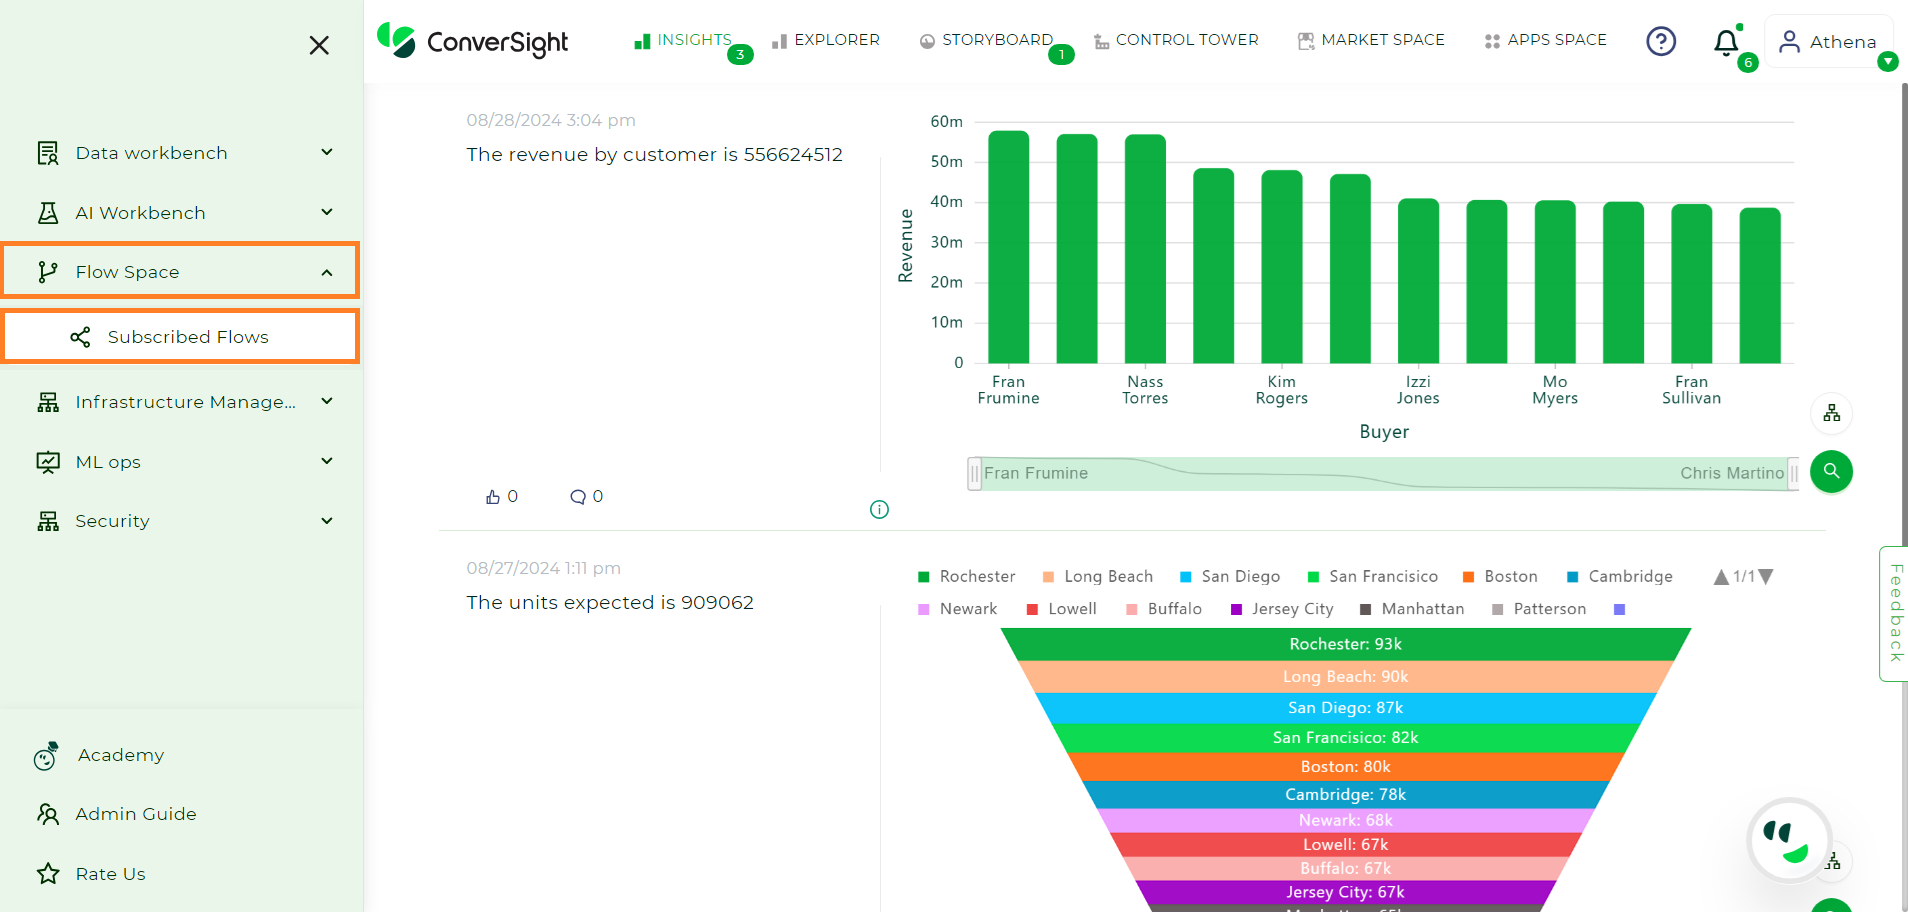
To access the Subscribed Flows, you can navigate to the Flow Space and click on the Subscribed Flows.
Flow Space#
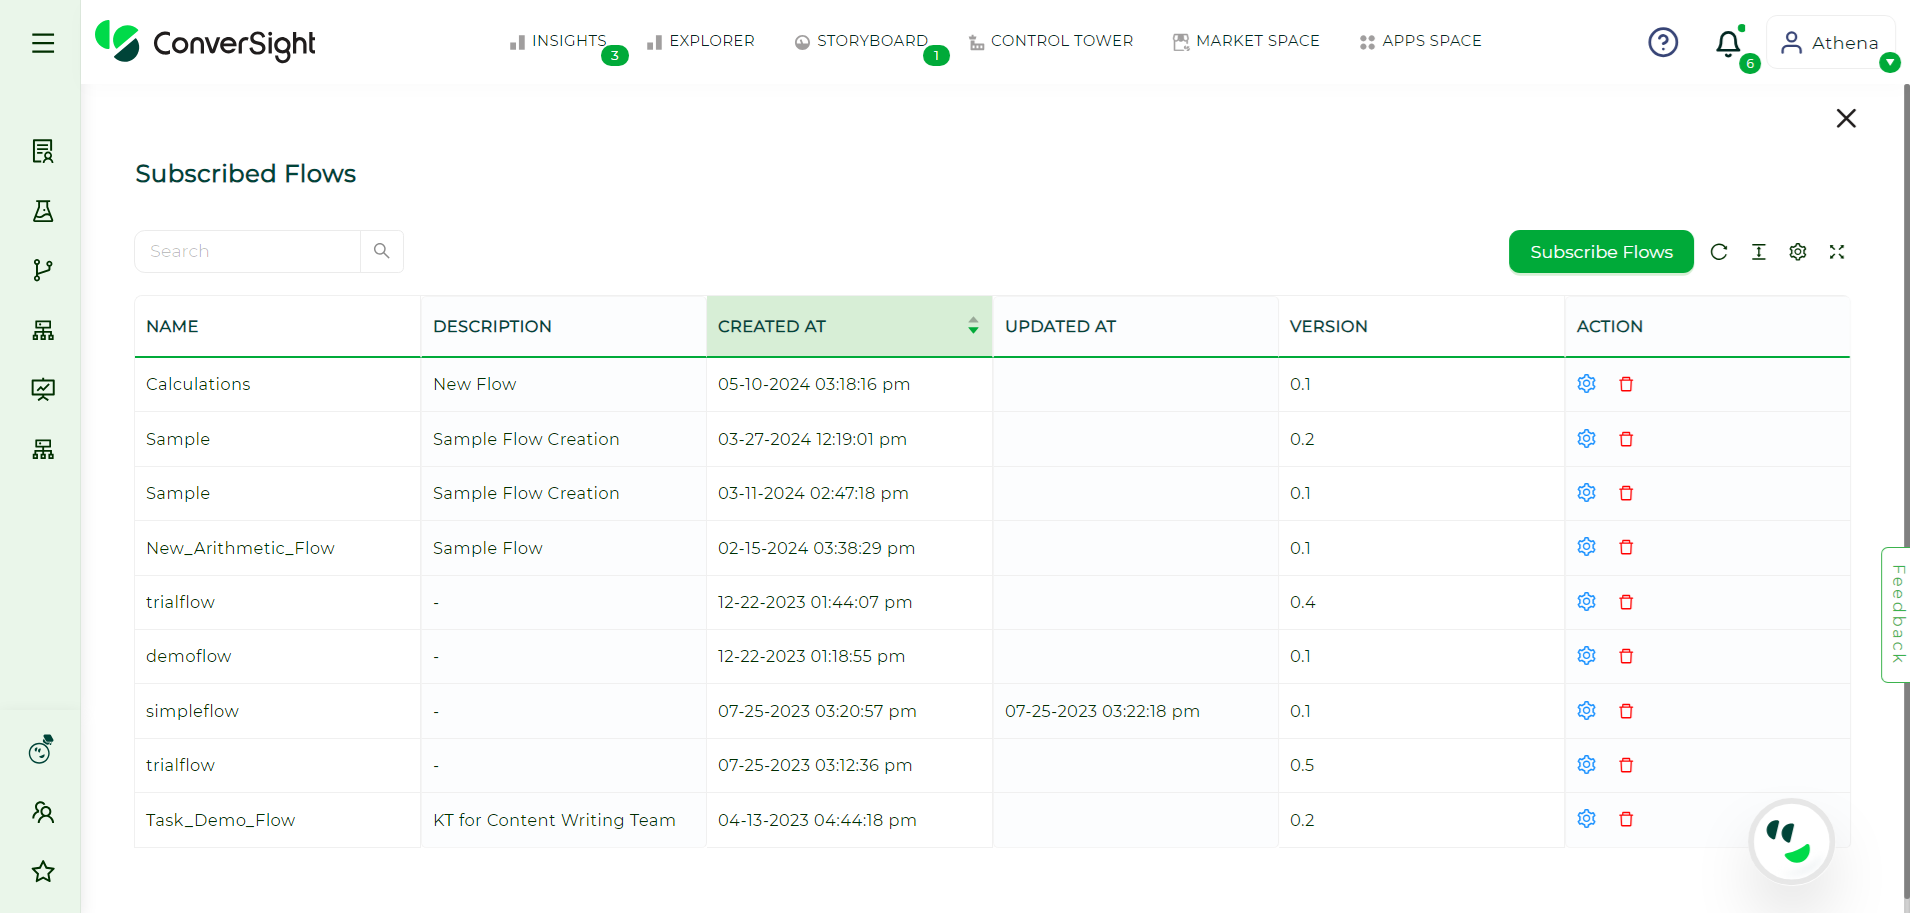
After accessing the Subscribed Flows page, users can view their flows in a tabular format. This table typically includes information such as the name of the flow, its description, created and updated time, available versions and an action column containing run configuration features and a delete option.
Subscribed Flow Page#
Subscribing a Flow#
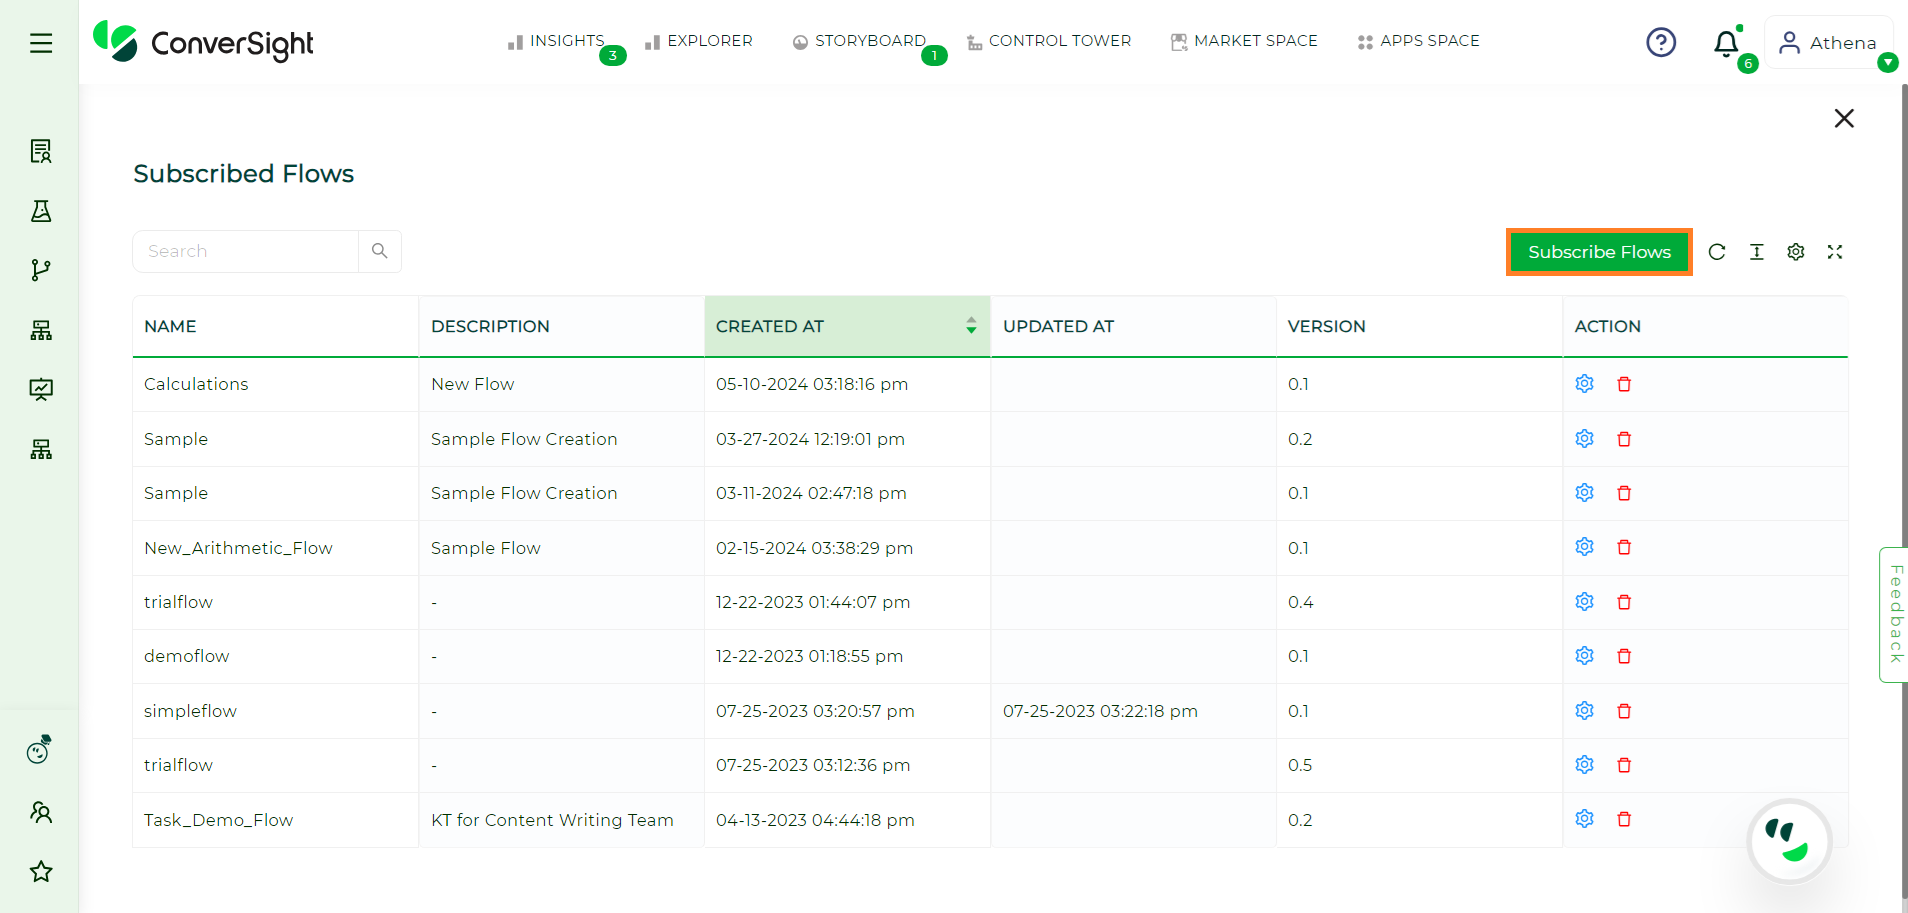
By clicking on the Subscribe Flows button located on the right-hand side of the page, it navigates to Subscribe new page. User can subscribe to available flows that they have access to. These flows are typically listed and can be selected from the available options.
Subscribed Flow Button#
Subscribe New Page#
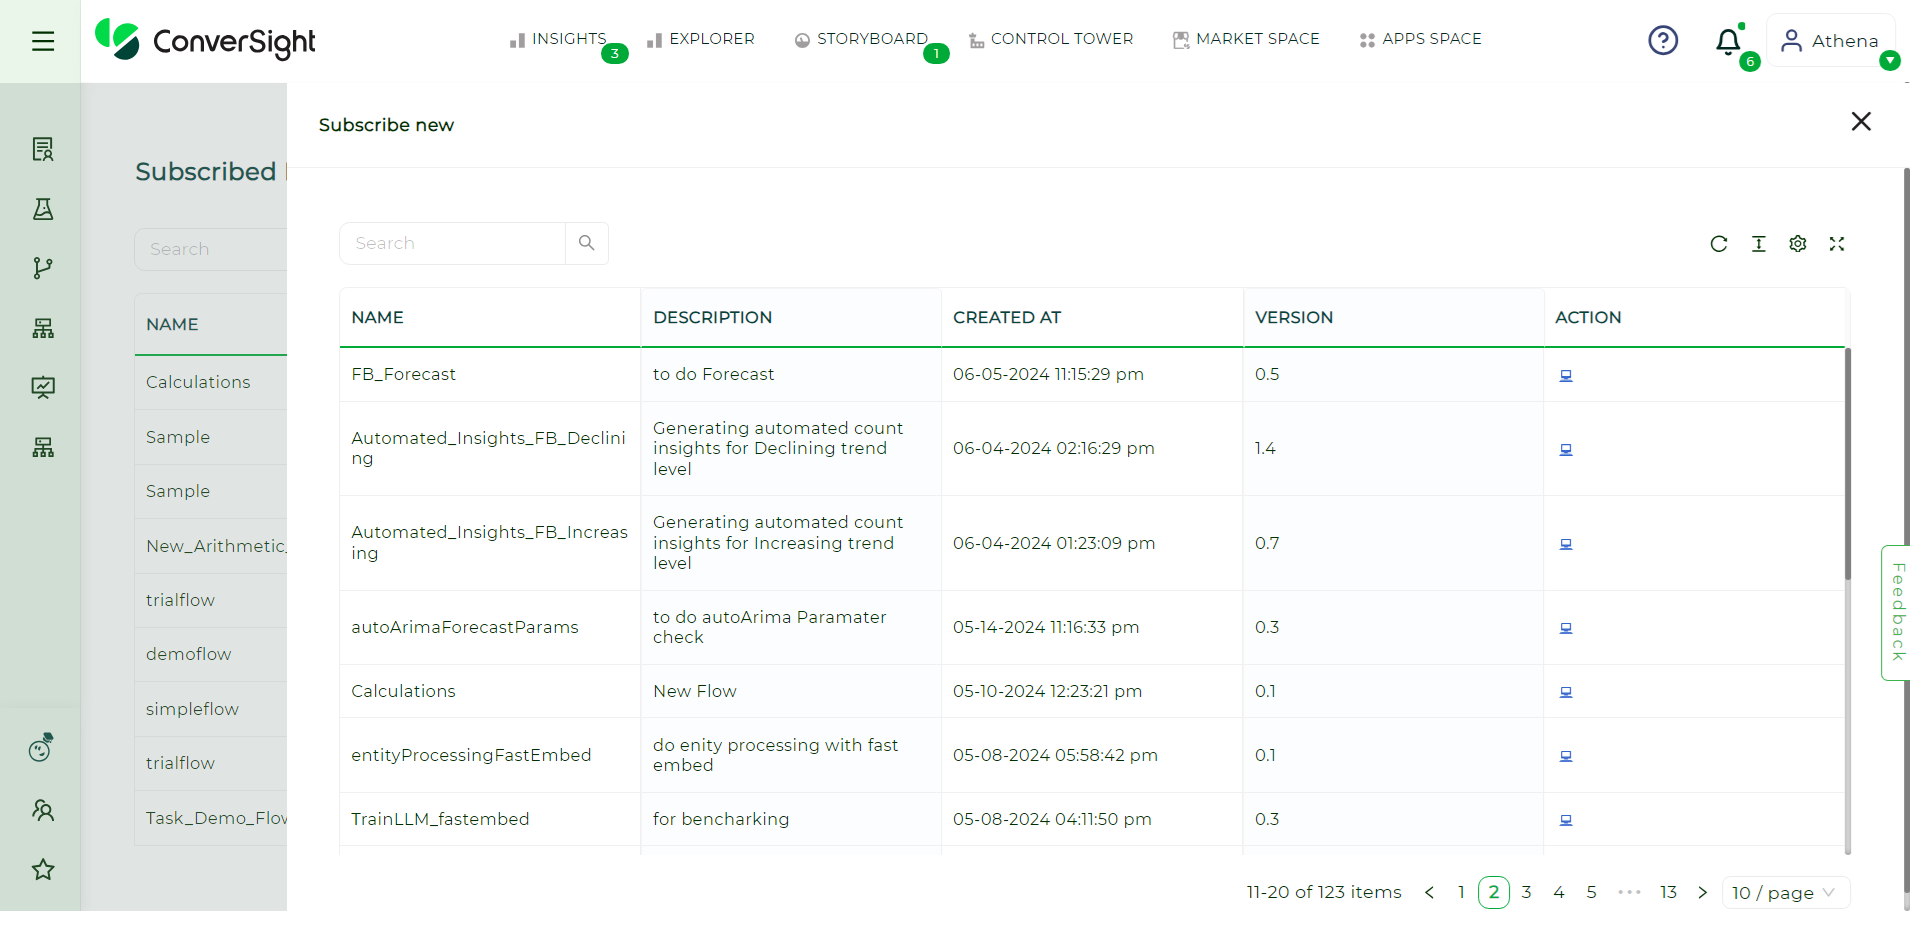
By clicking on the ![]() icon located in the Action column, users can access the flow feature in the New Subscription form.
icon located in the Action column, users can access the flow feature in the New Subscription form.
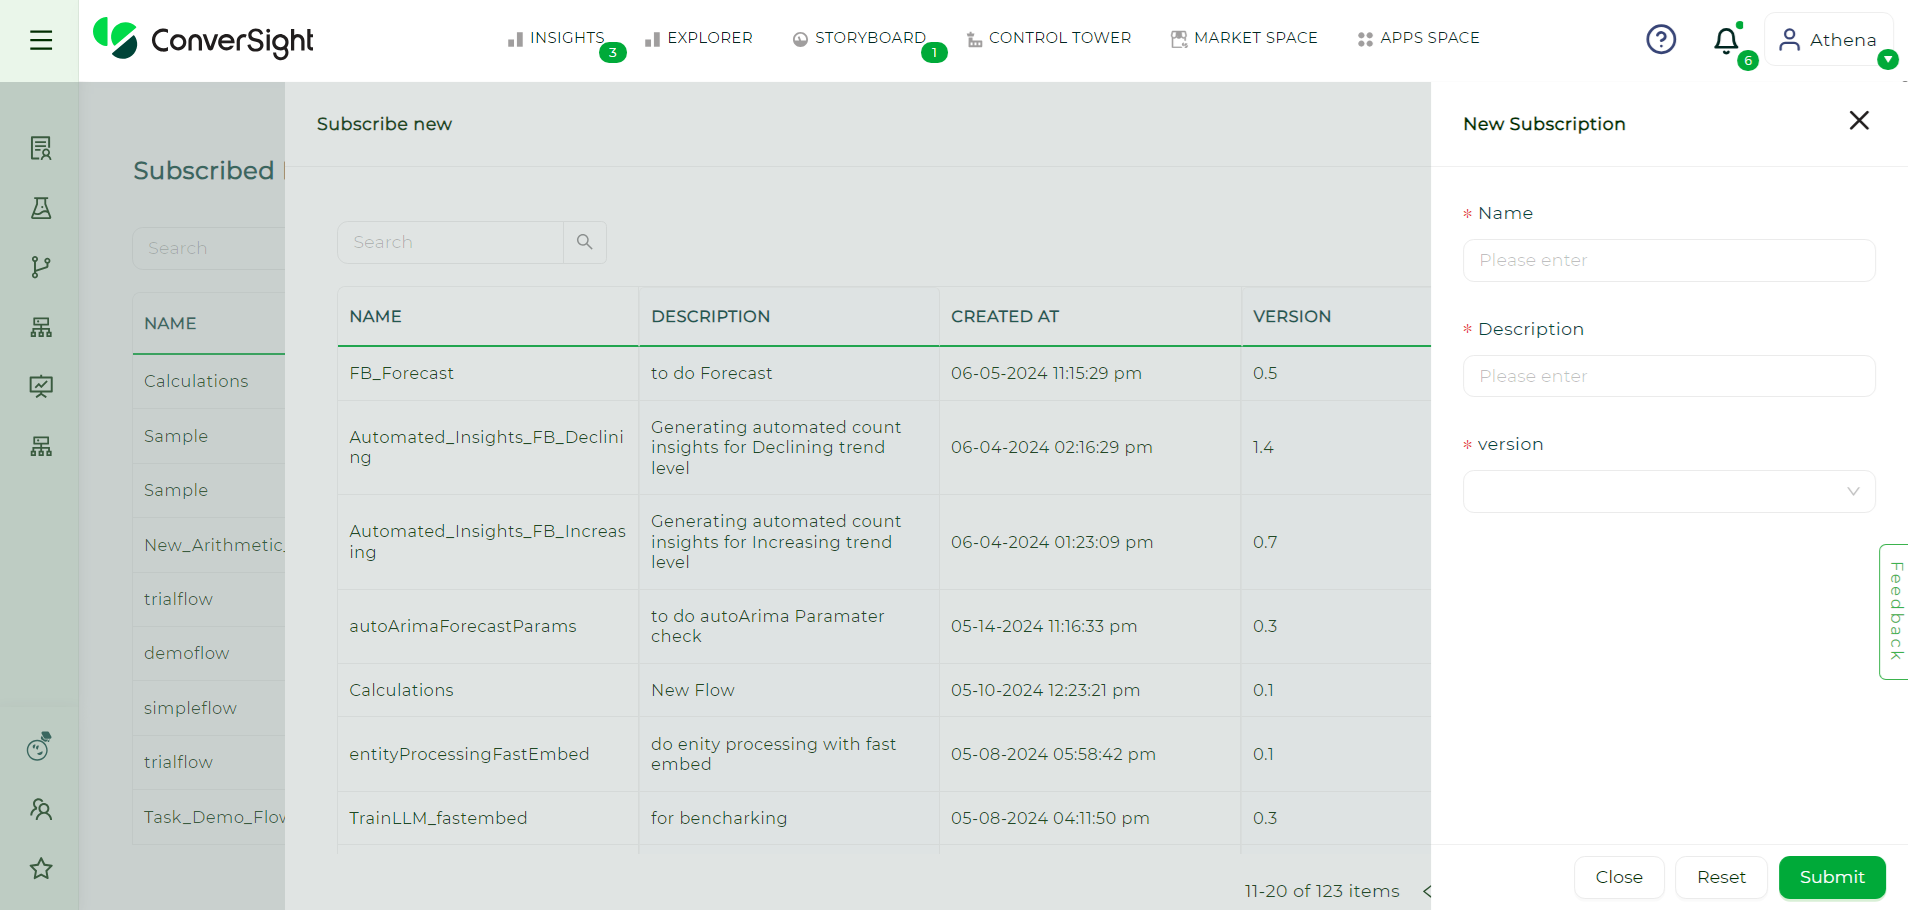
New Subscription#
In New Subscription form, the user can assign a name to it and provide a description to understand its purpose. Additionally, the user can select a particular version of the process, which comes with pre-set parameters that have been determined based on the chosen version. However, the user can modify these parameters, allowing for greater customization and flexibility.
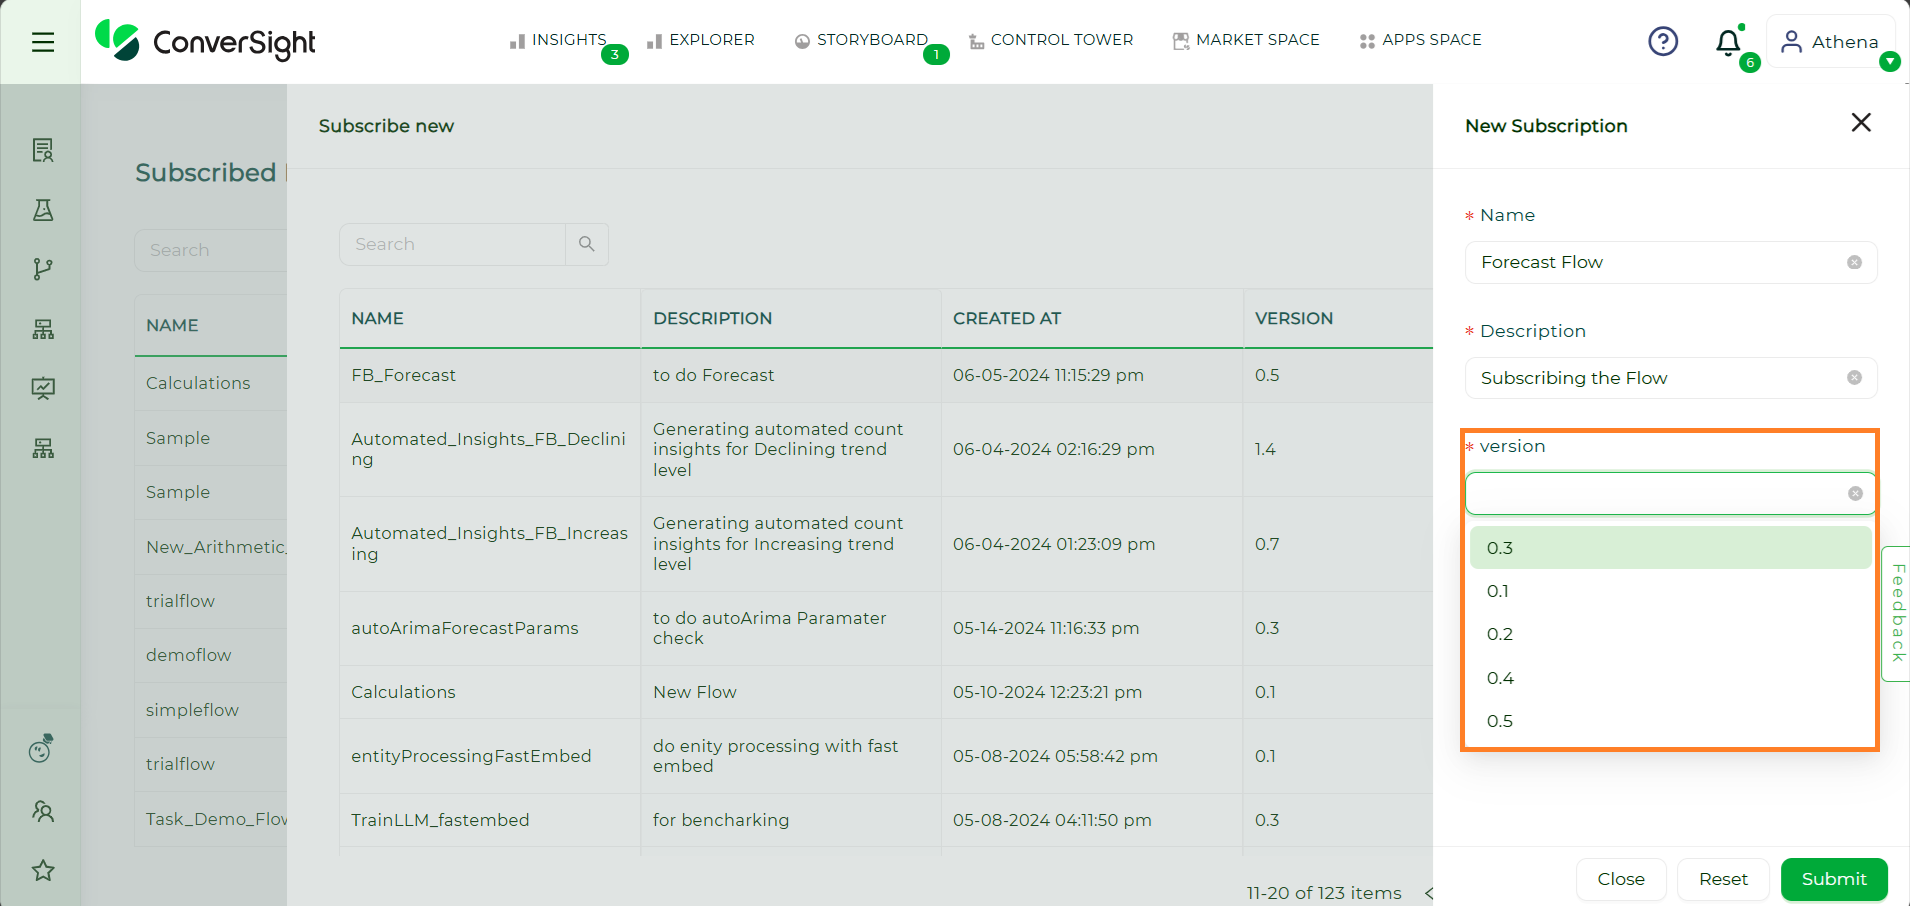
Version#
After filling out the form, users can Submit it to gain access to the flow, which will then be added to the Subscribed Flows tab for easy reference.
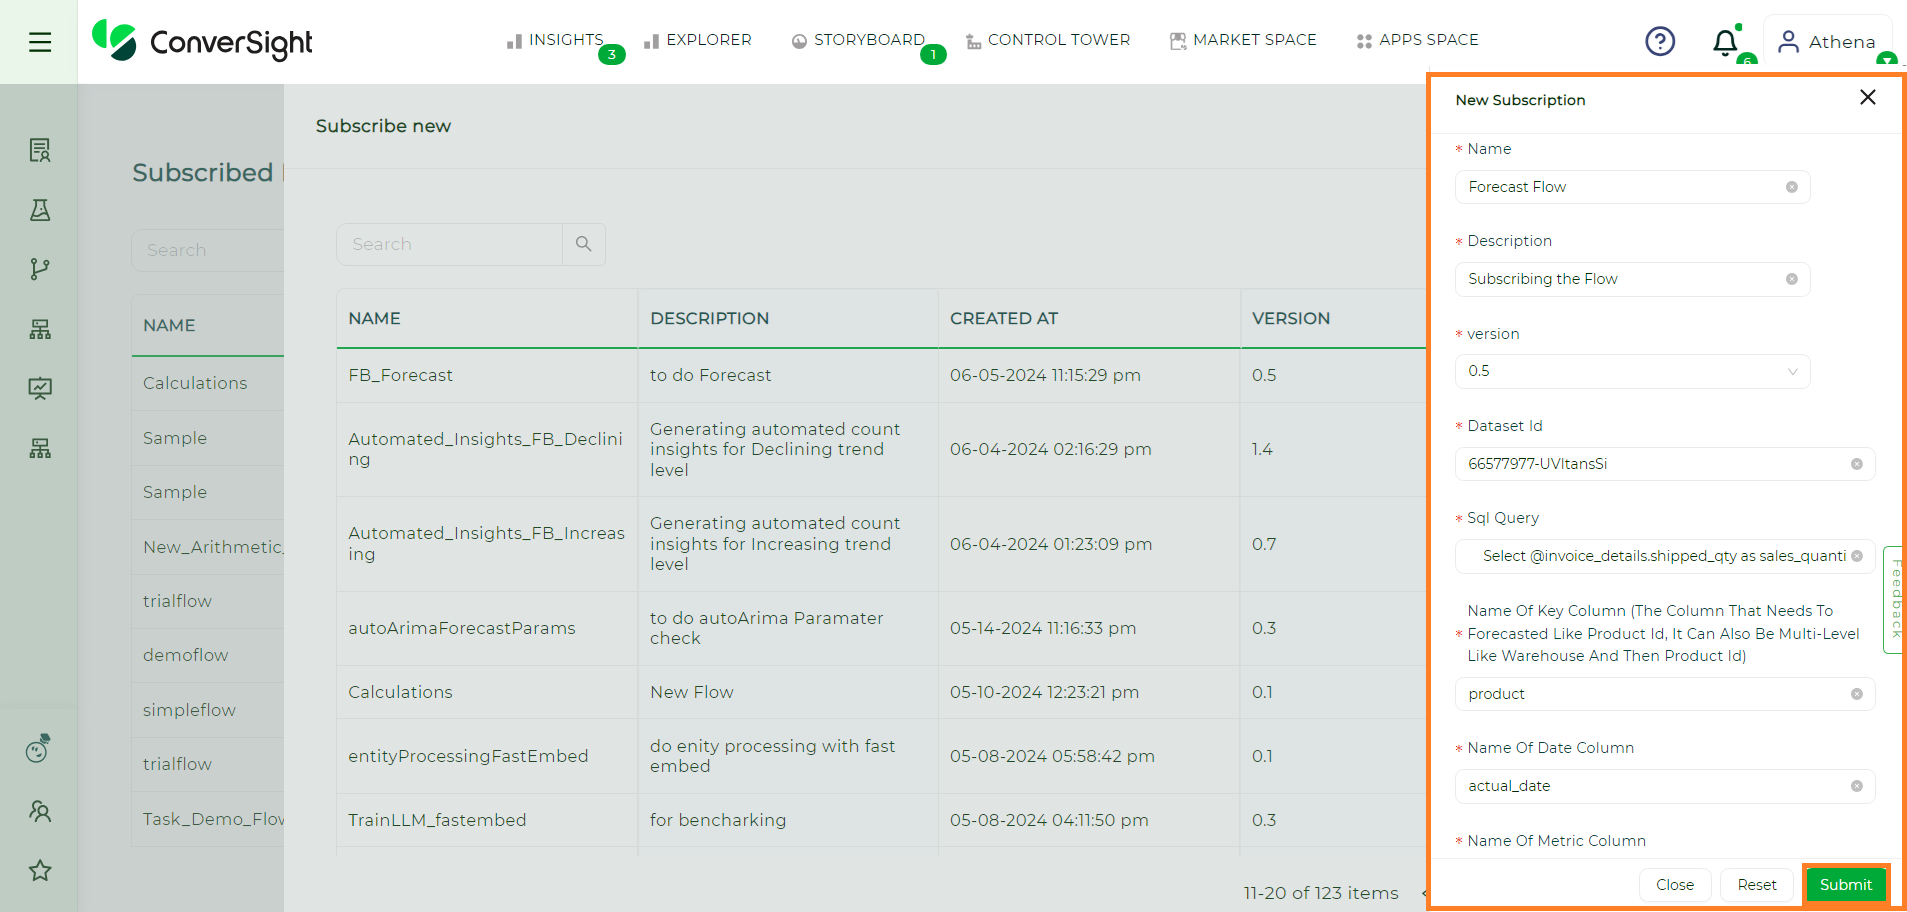
Submit#
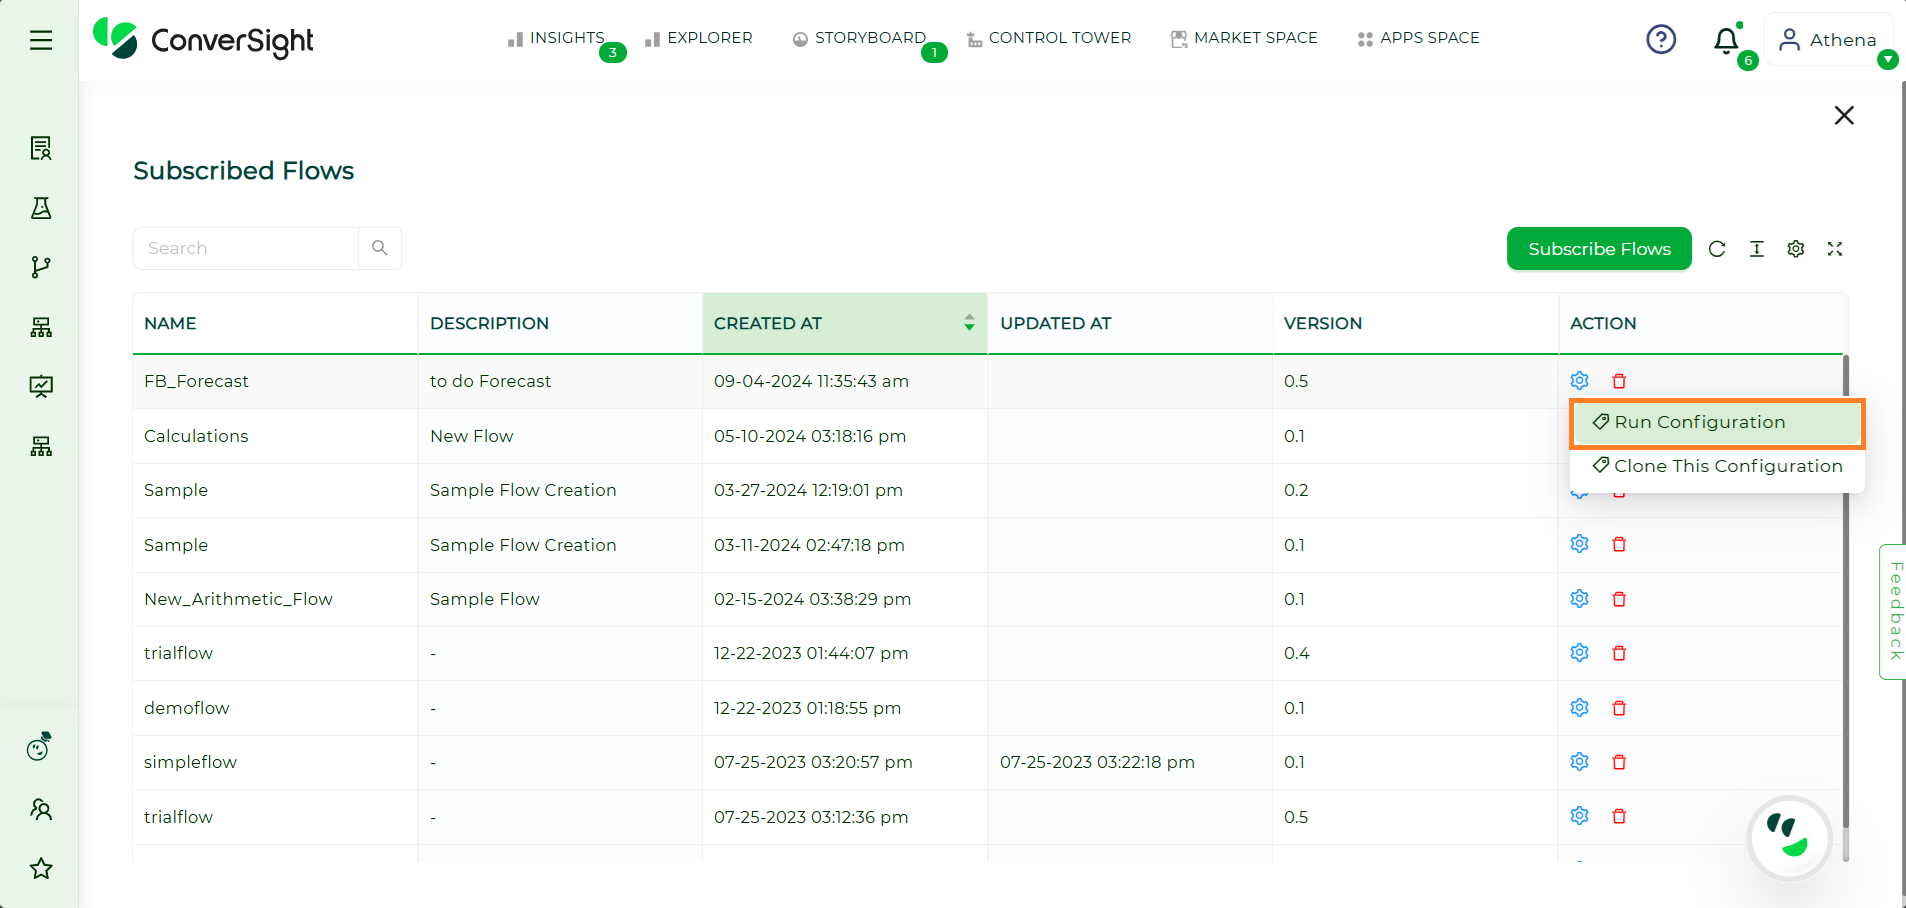
Run Configuration#
The Run Configuration feature is primarily utilized to execute a workflow or produce varying configurations of a specific workflow with diverse parameters provided. These created configurations are also saved on the Run Configuration page in a tabular format.
To access the Run Configuration feature, you can click on the ![]() icon located within the Action field.
icon located within the Action field.
Run Configuration#
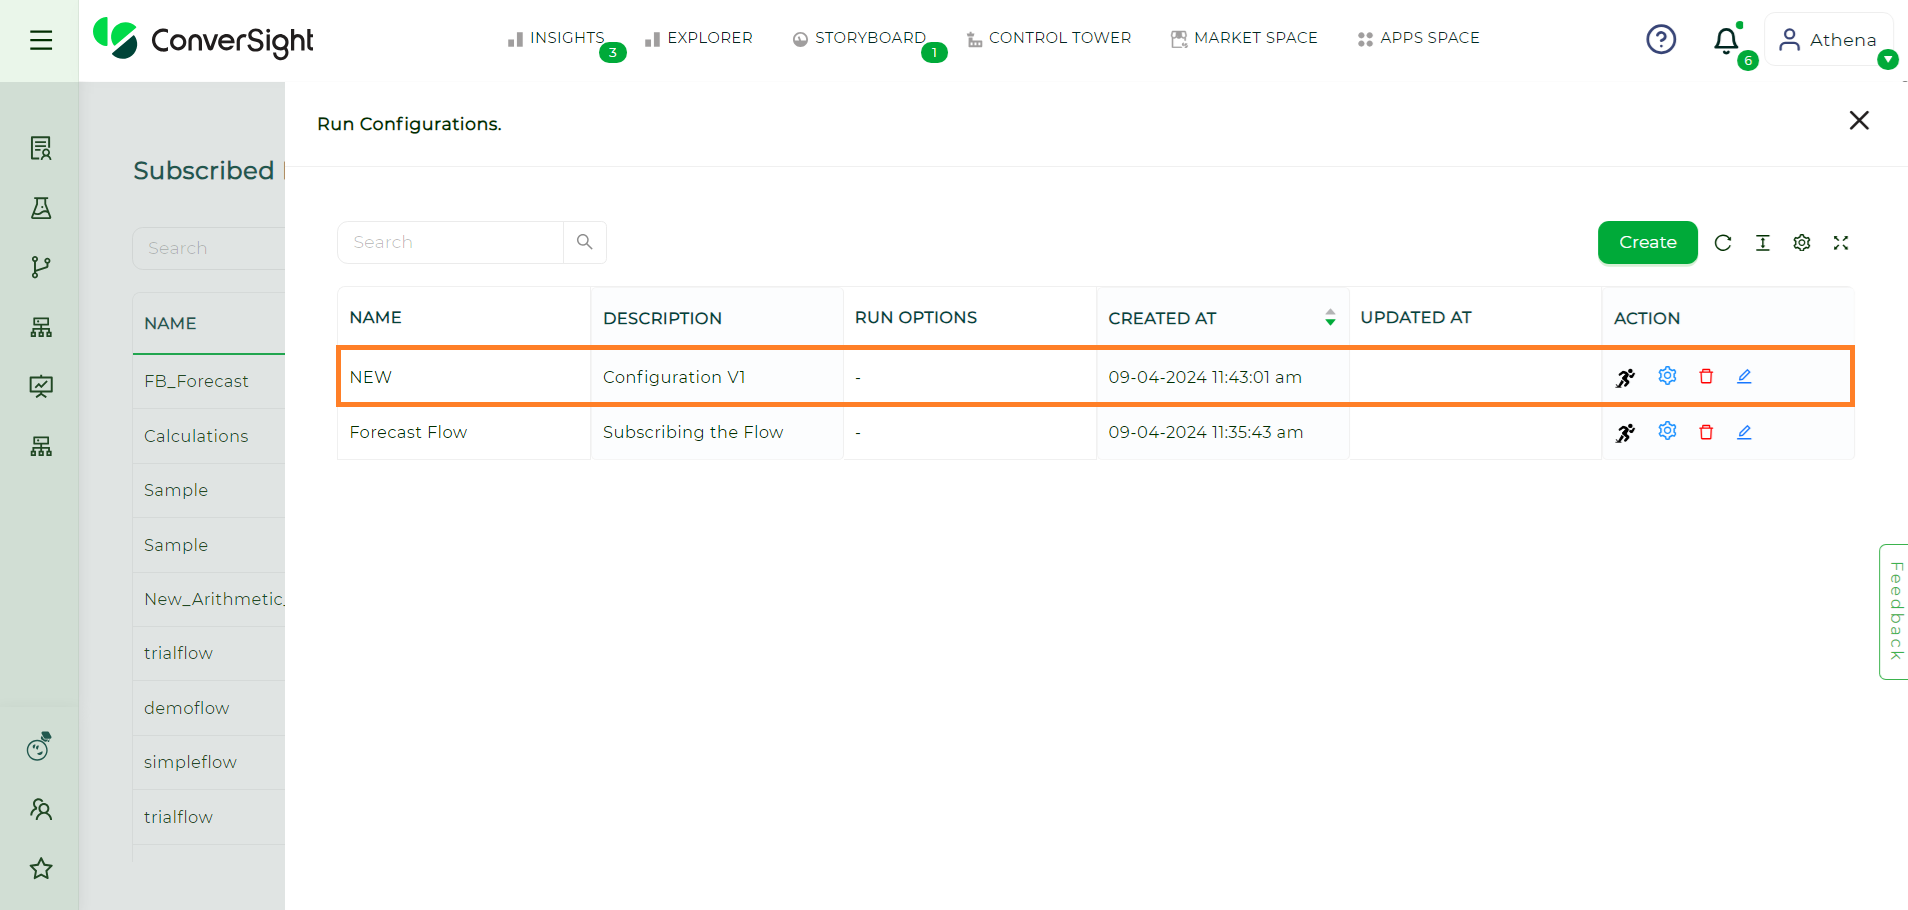
The Run Configuration page displays a comprehensive list of available configurations, including details such as the configuration name, description, run options, created and updated time and an action field.
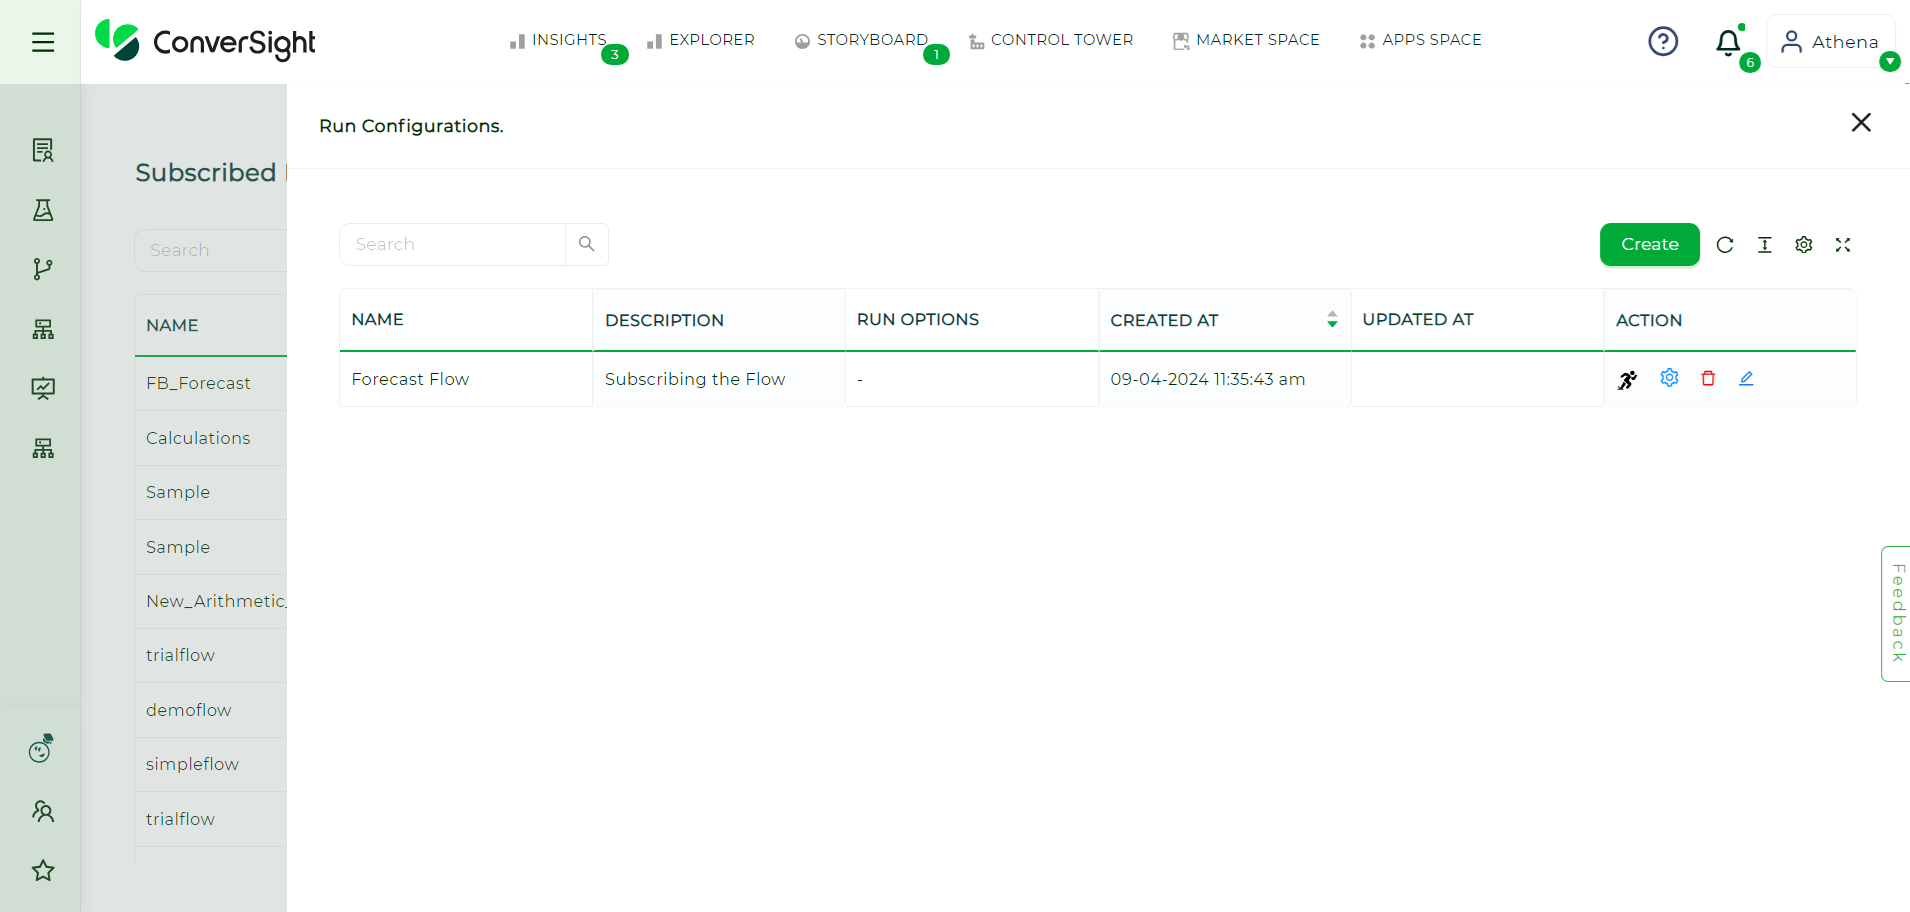
Run Configuration Page#
To initiate a flow configuration, simply click on the ![]() icon. Conversely, to remove a configuration, select the corresponding
icon. Conversely, to remove a configuration, select the corresponding ![]() icon.
icon.
Furthermore, users can utilize the Edit function to adjust the parameters and switch the cluster if necessary. Click on this ![]() icon to modify the parameters and cluster as needed.
icon to modify the parameters and cluster as needed.
Create a New Configuration#
The user can establish a New Configuration with existing flow, thereby enabling them to create various configurations with differing parameters.
By clicking on the Create button located on the right side, the user can generate a New Configuration.
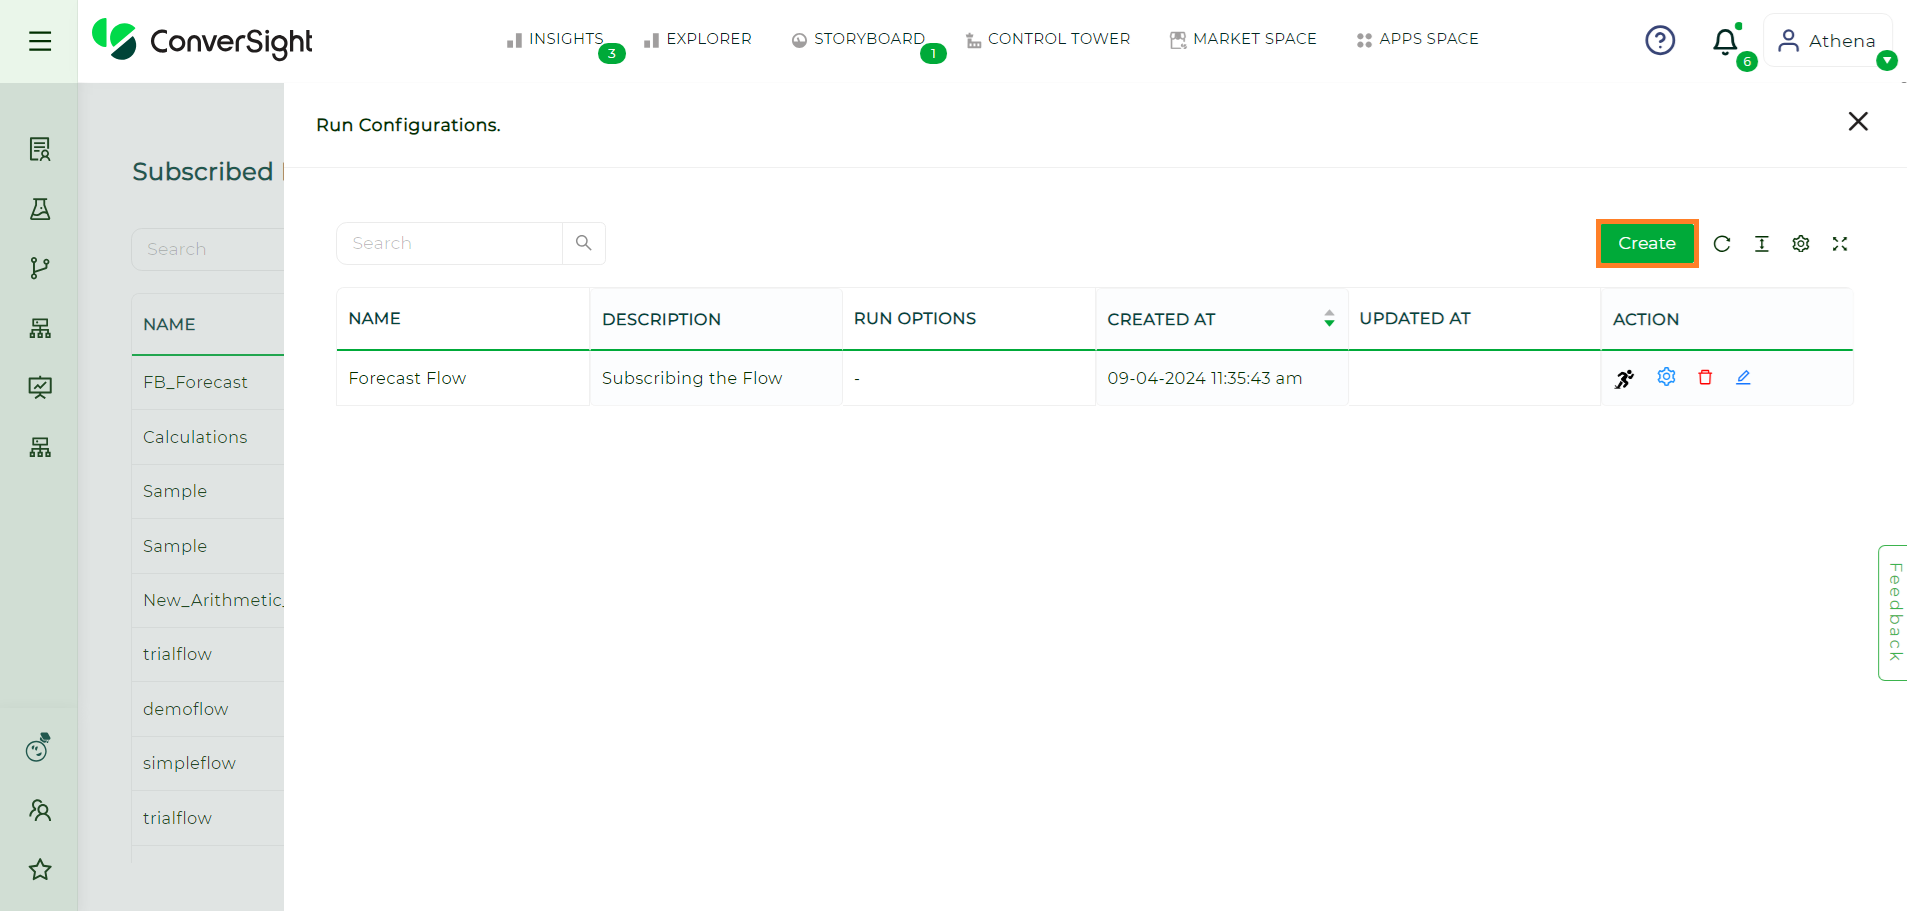
Create New Configuration#
On the Create Configuration form, the user can specify a name for the New Configuration and provide a description. They can also modify the existing parameters and choose a cluster from the available options for the desired operation.
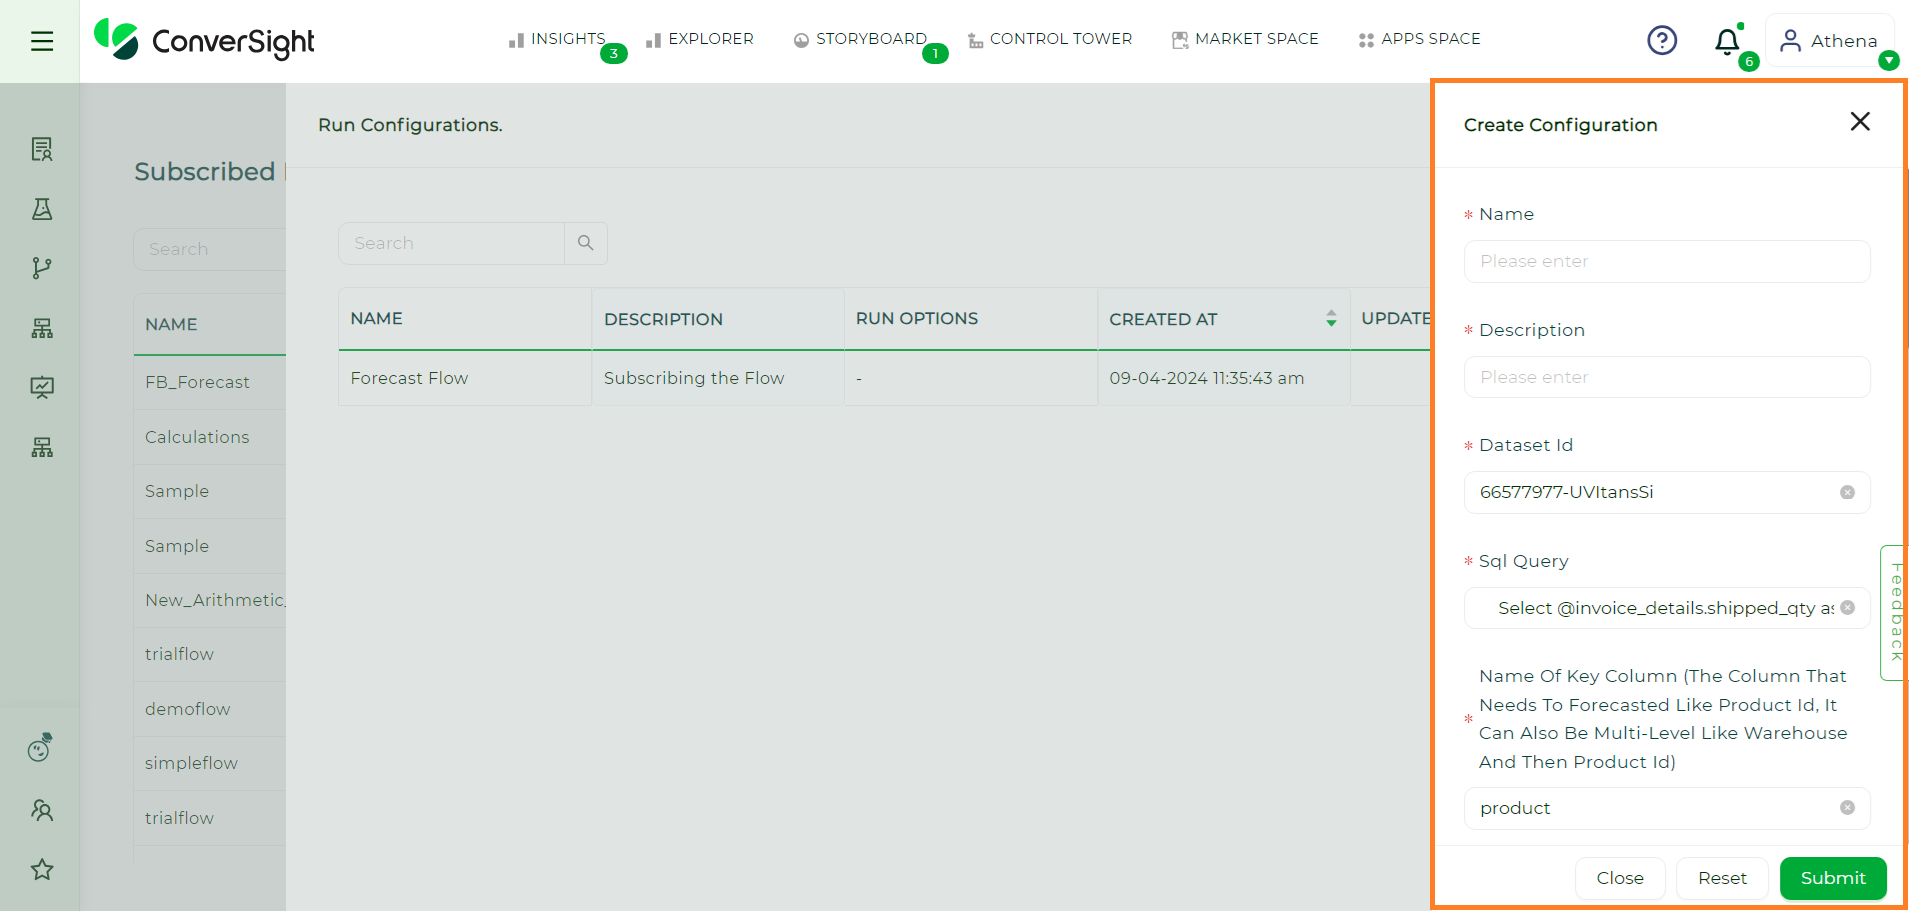
New Configuration Form#
Once all the required details have been entered, the user can click on the Submit button to add the newly created configuration.
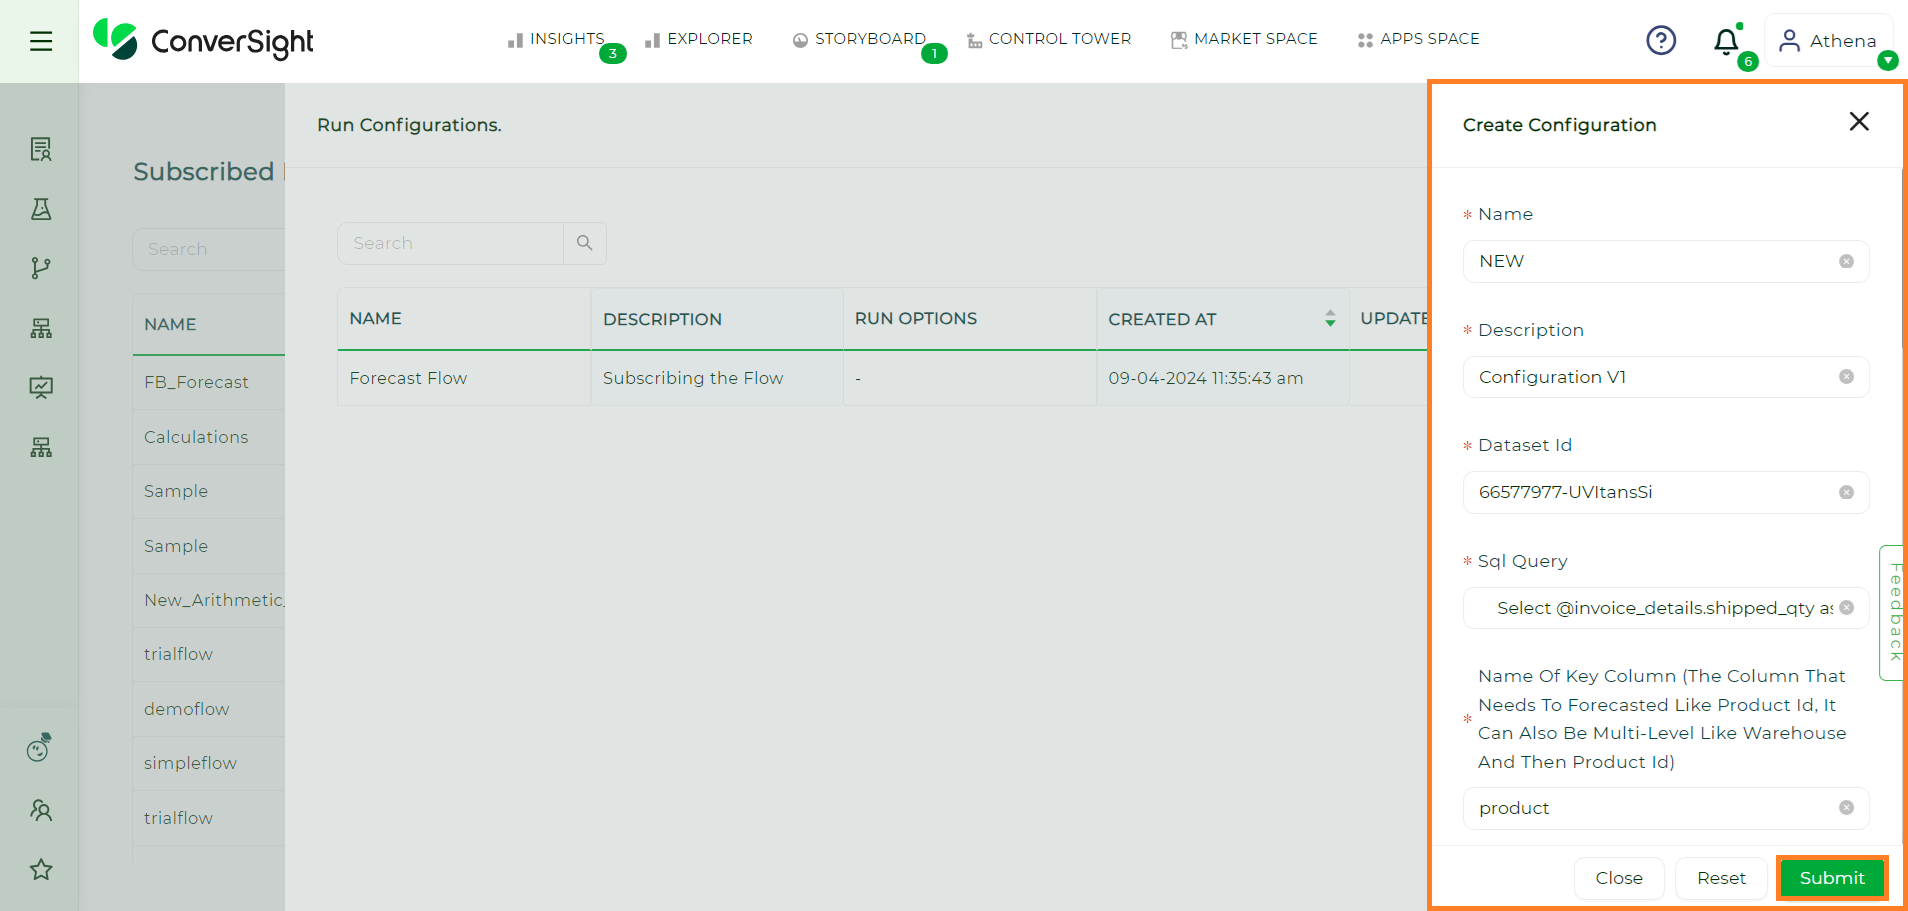
New Configuration Form#
New Configuration#
Clone This Configuration#
The primary purpose of the Clone This Configuration feature is to duplicate configurations from one version of the flow to another.
To access the Clone This Configuration feature, you can click on the Settings icon located within the Action field of the respective flow.
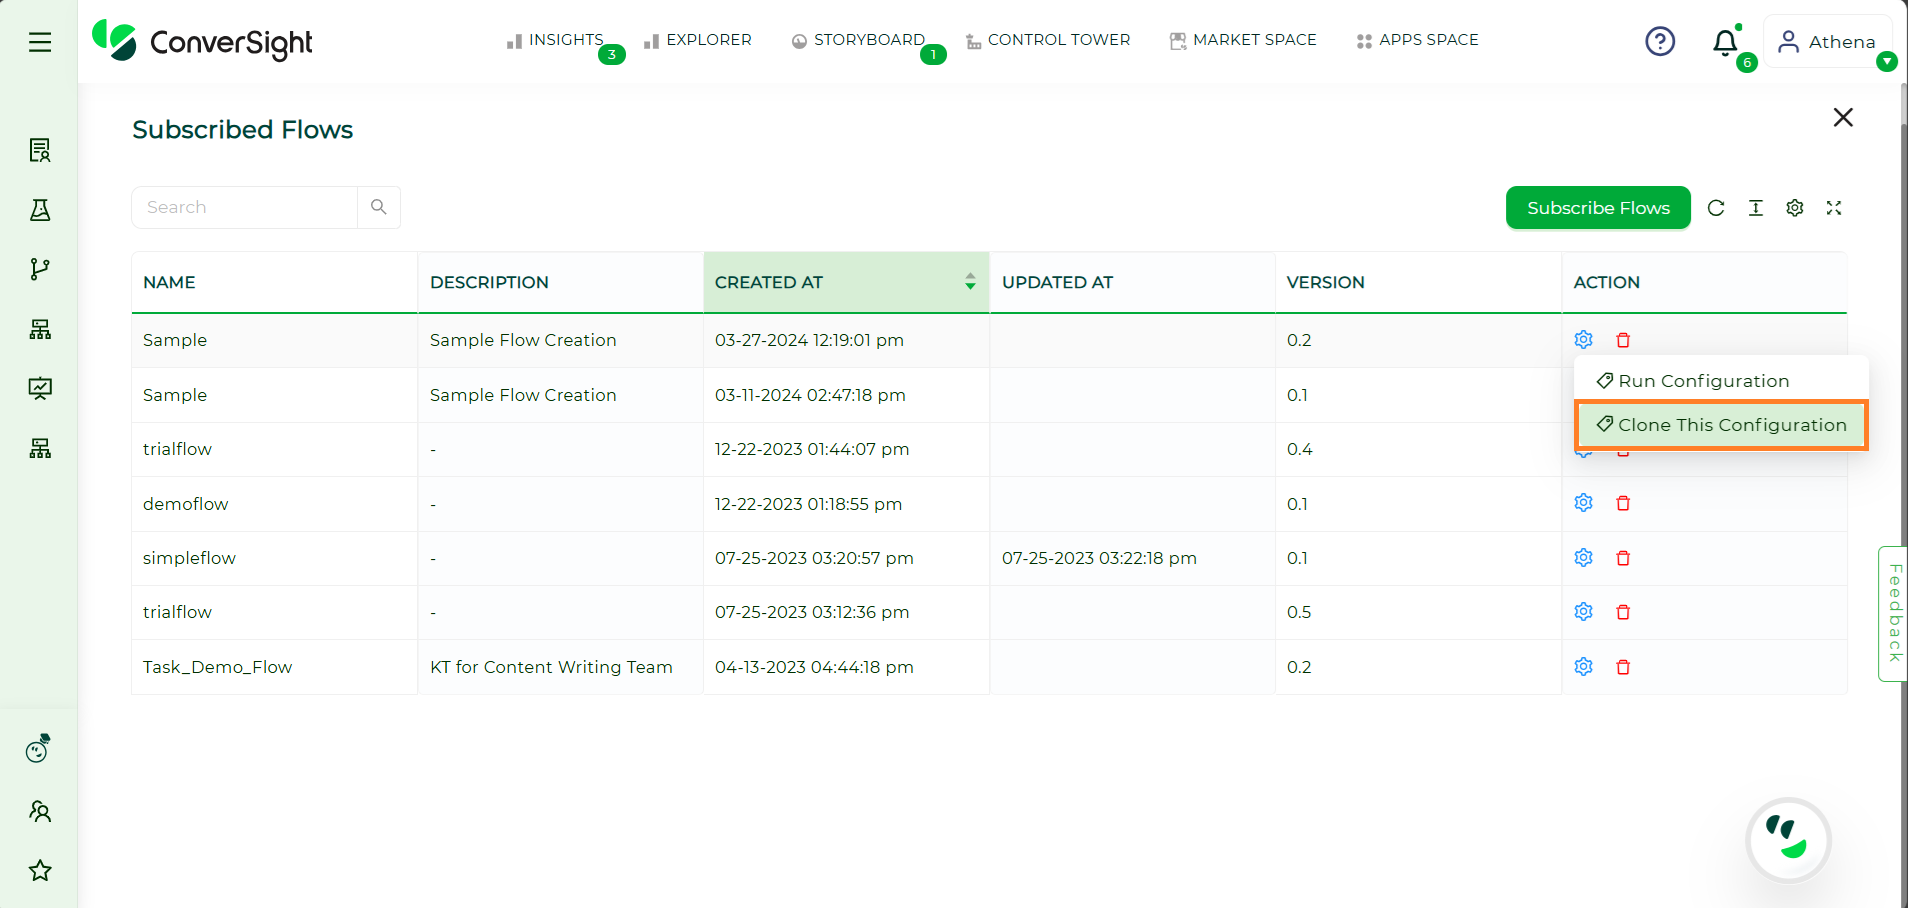
Clone Configuration#
The following inputs are required to Clone a Configuration.
Name |
Description |
|---|---|
Clone Version To |
Users can choose the specific version of the flow to which they want the configurations cloned. |
Configurations |
It shows the configurations that are accessible within the chosen flow. |
Clone the Notifications |
This toggle allows users to clone the Notifications of the created configurations. |
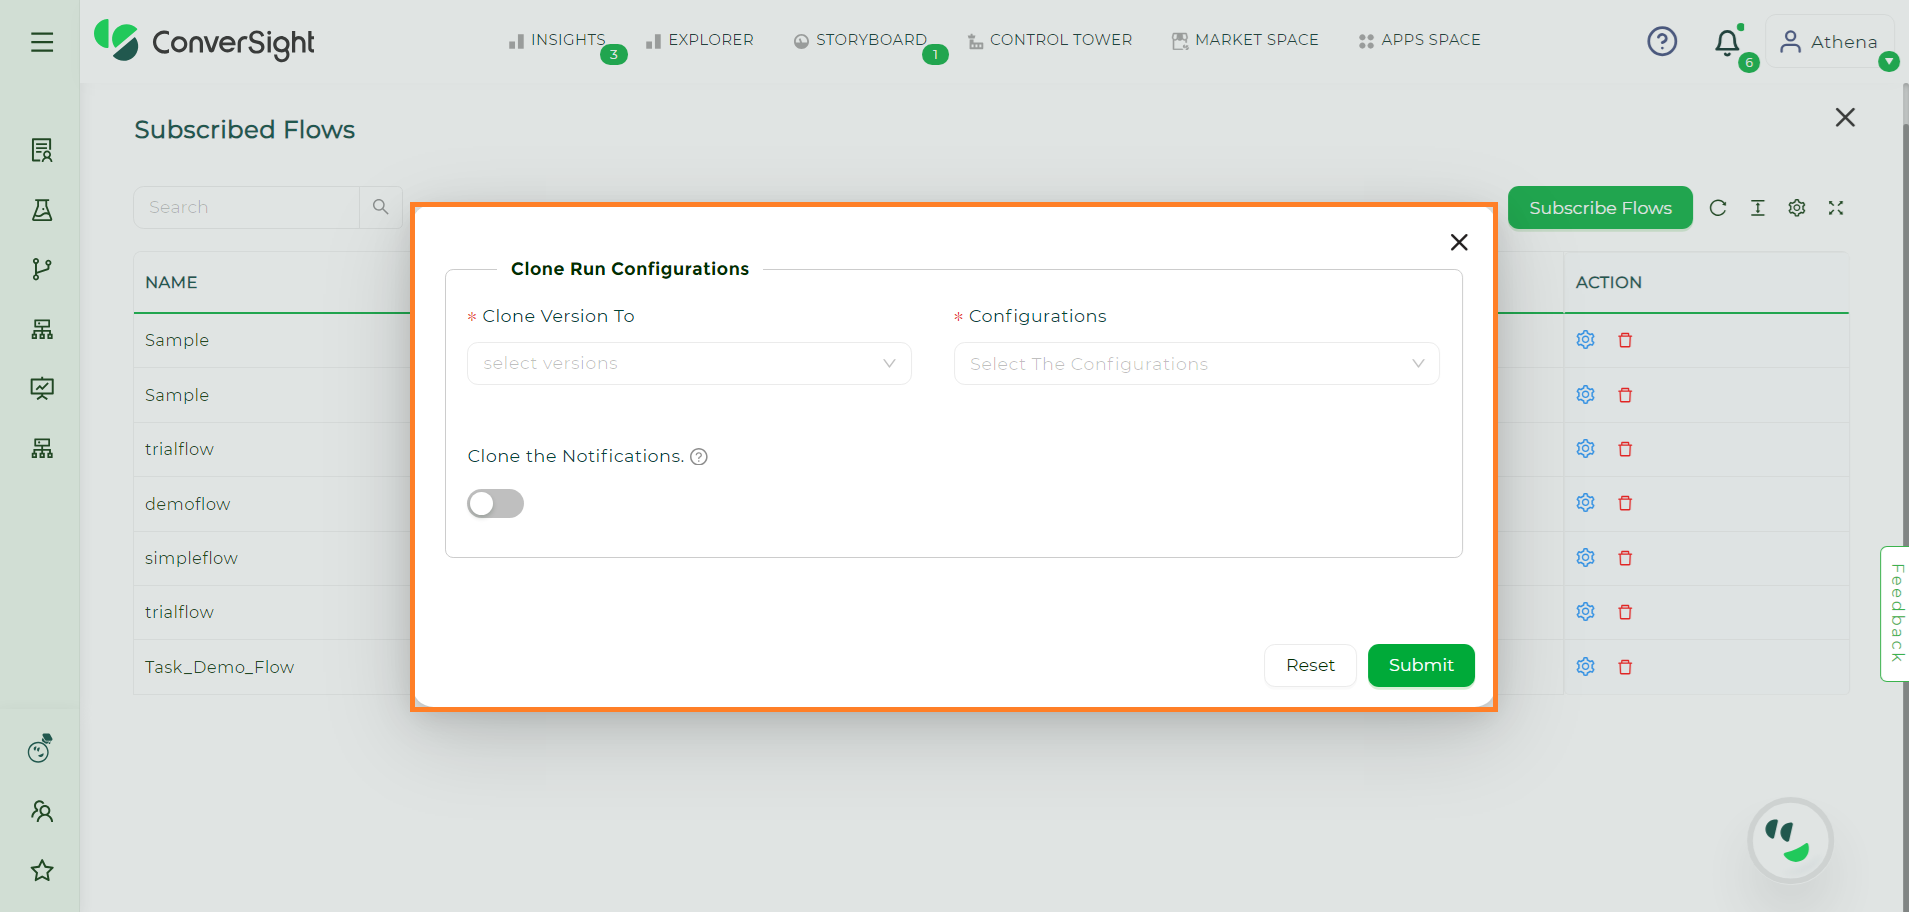
Clone Configuration Page#
Once all the required details have been entered, the user can click on the Submit button to add the newly created configuration.
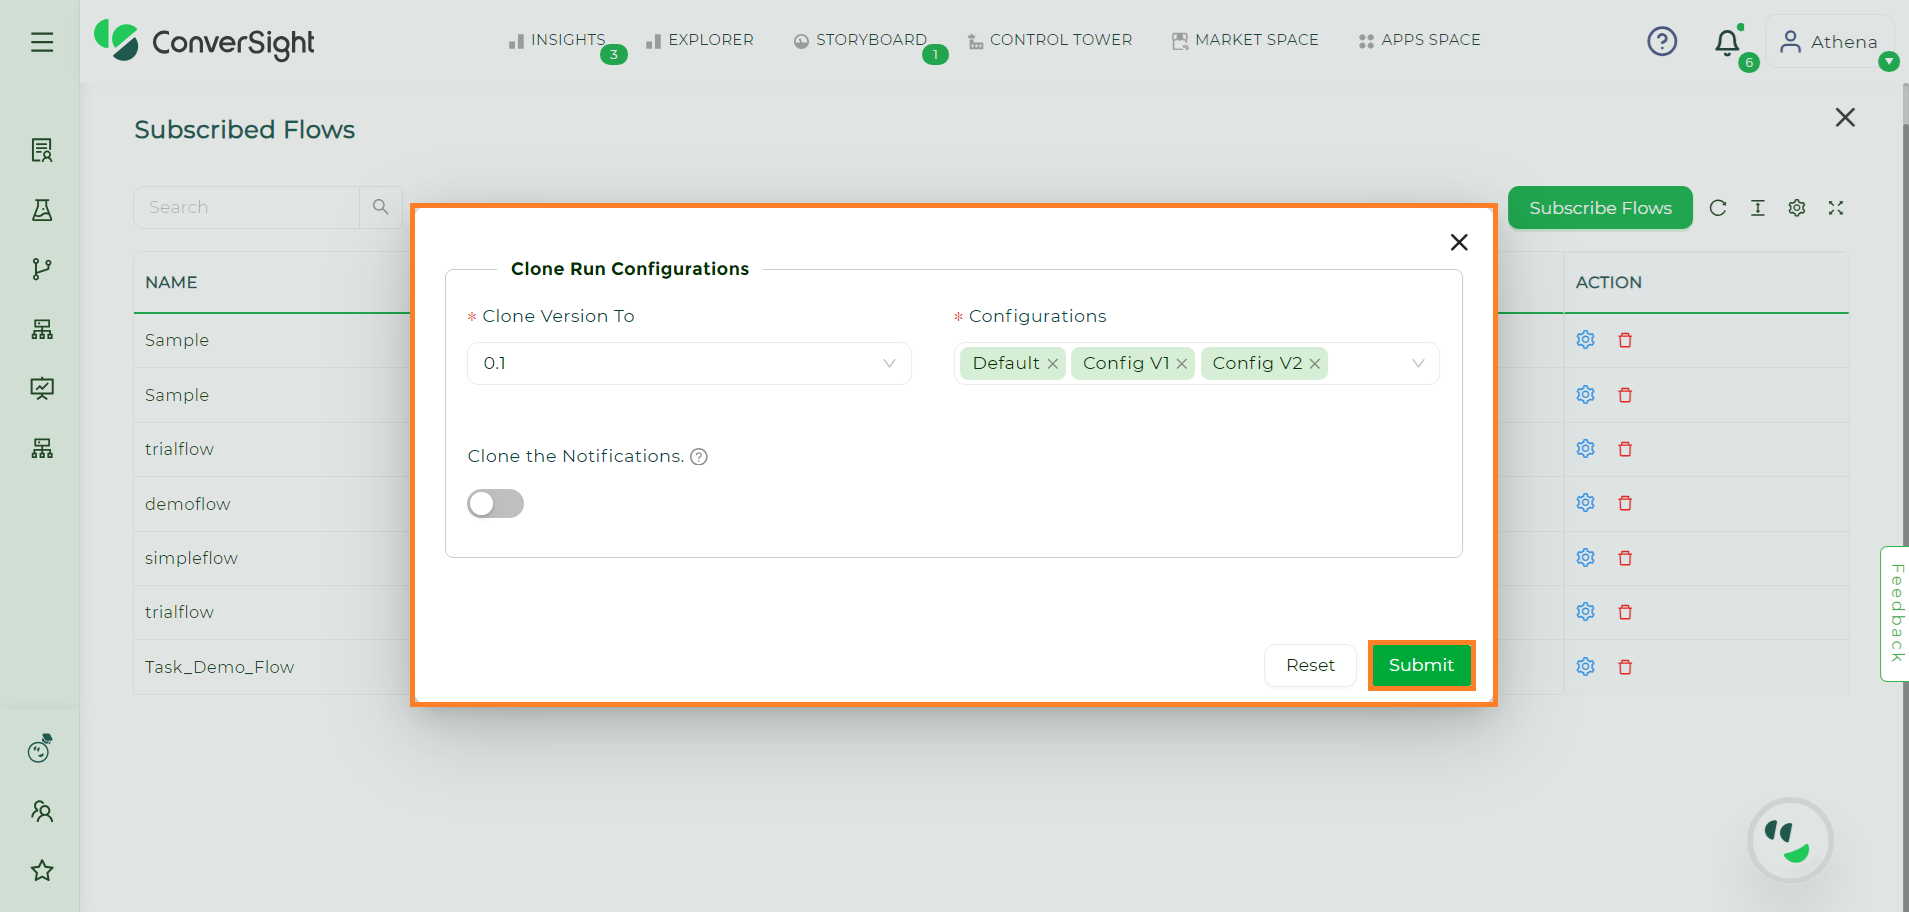
Clone Configuration Page#
To ensure successful configuration cloning, users can select the target flow, click Run Configuration and verify all configurations, including clones, on the Run Configuration page.

Cloned Configurations#
Schedule Flow#
The user has the flexibility to determine when a flow should be executed, either through a scheduled time interval, a trigger function or as a routine task. For example, if modifications are required after a data load, the user can schedule a trigger to initiate the flow once the data has been loaded. For instance, if the date format is different on a dataset and it needs to be corrected all as one format for our platform, instead of manually making the changes, running the flow would be a more efficient and manageable solution for the user.
To establish a schedule for a flow, click on the ![]() icon located under the action field of the specific flow in Run Configuration page and select the Schedule option, this action will lead to the Manage Schedules page.
icon located under the action field of the specific flow in Run Configuration page and select the Schedule option, this action will lead to the Manage Schedules page.
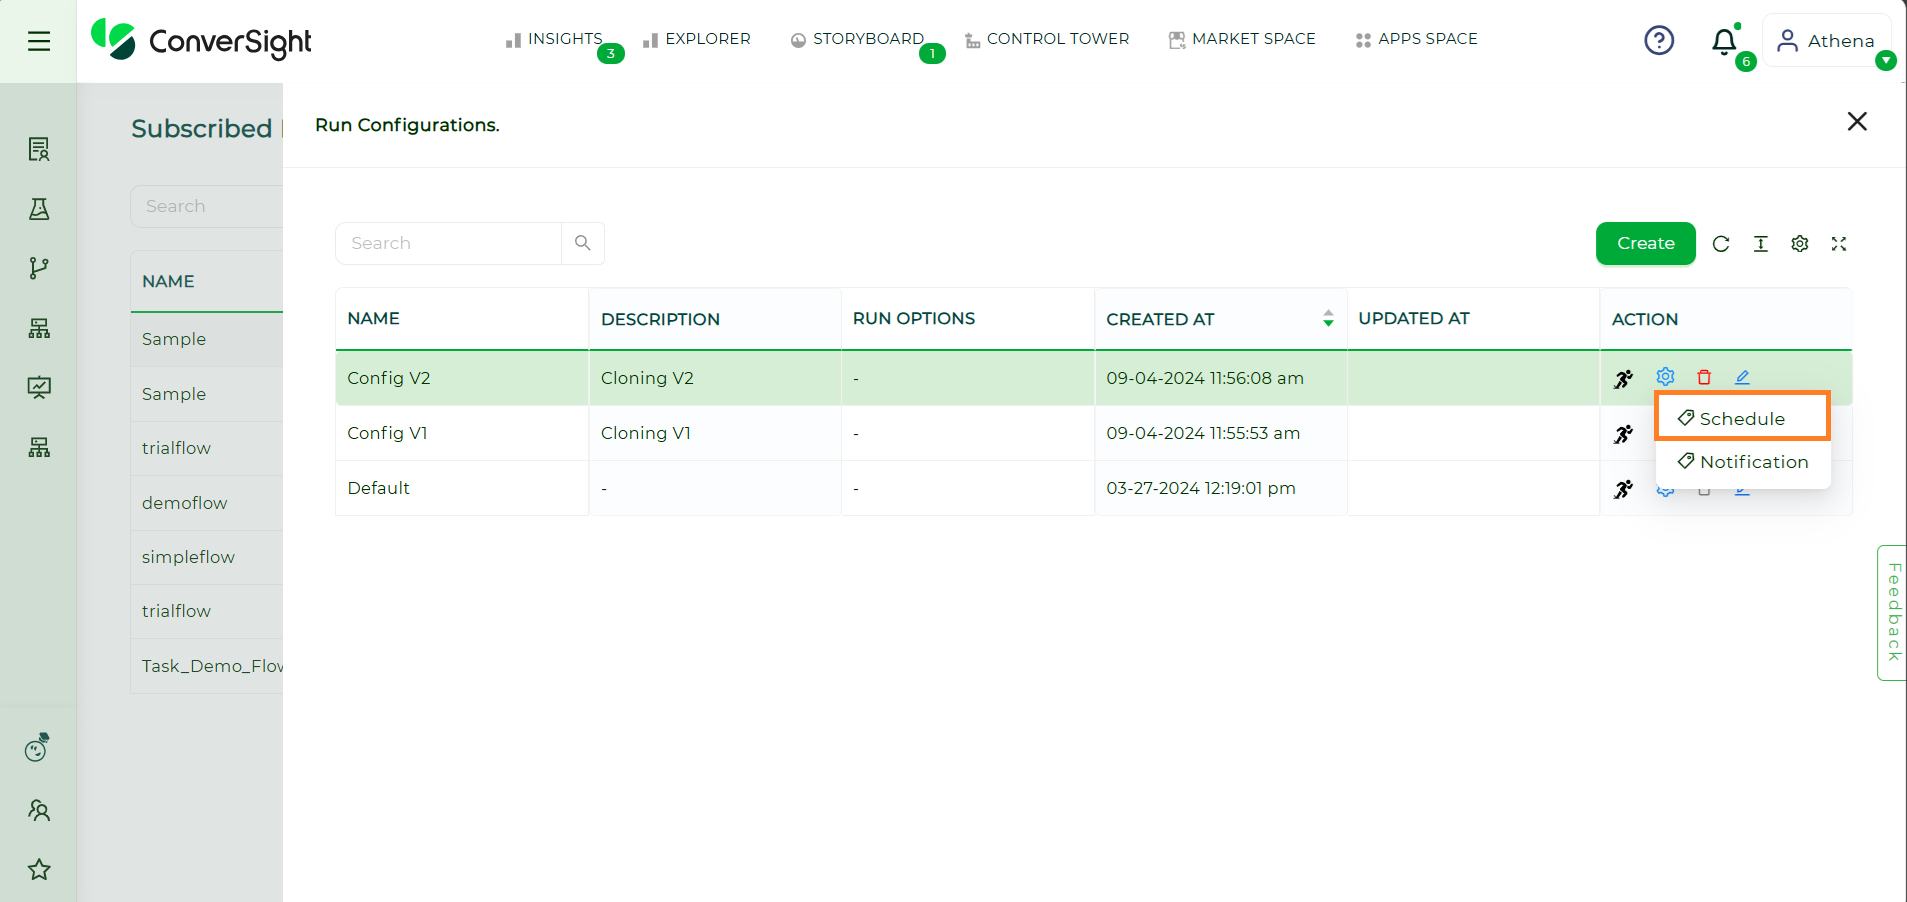
Schedule#
The Manage Schedule page exhibits a tabular representation of all the schedules pertaining to a specific flow. This includes the schedule type, name, last run time, next run time, dataset and action column which provides the option to delete.
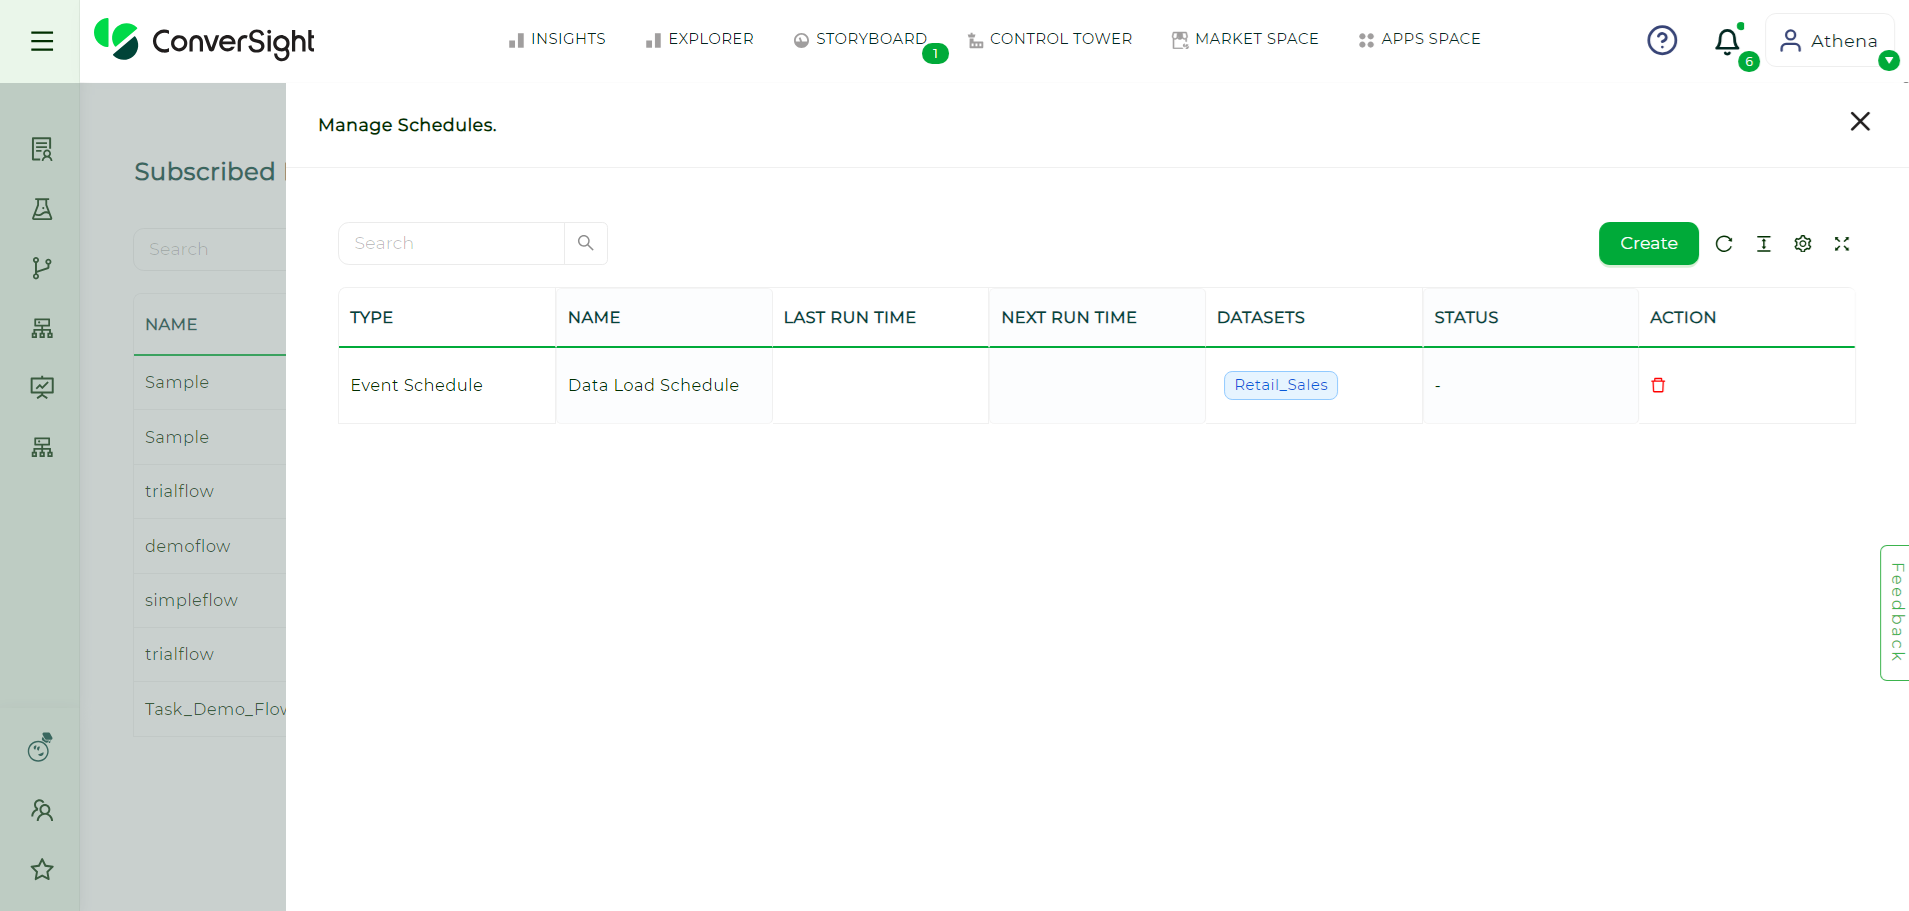
Manage Schedule Page#
Create a Schedule#
To create a schedule, click on the Create button in Manage Schedules page.

Create Schedule#
When creating a schedule, the initial step is to choose the Schedule Type, which can either be time-based or event-triggered.
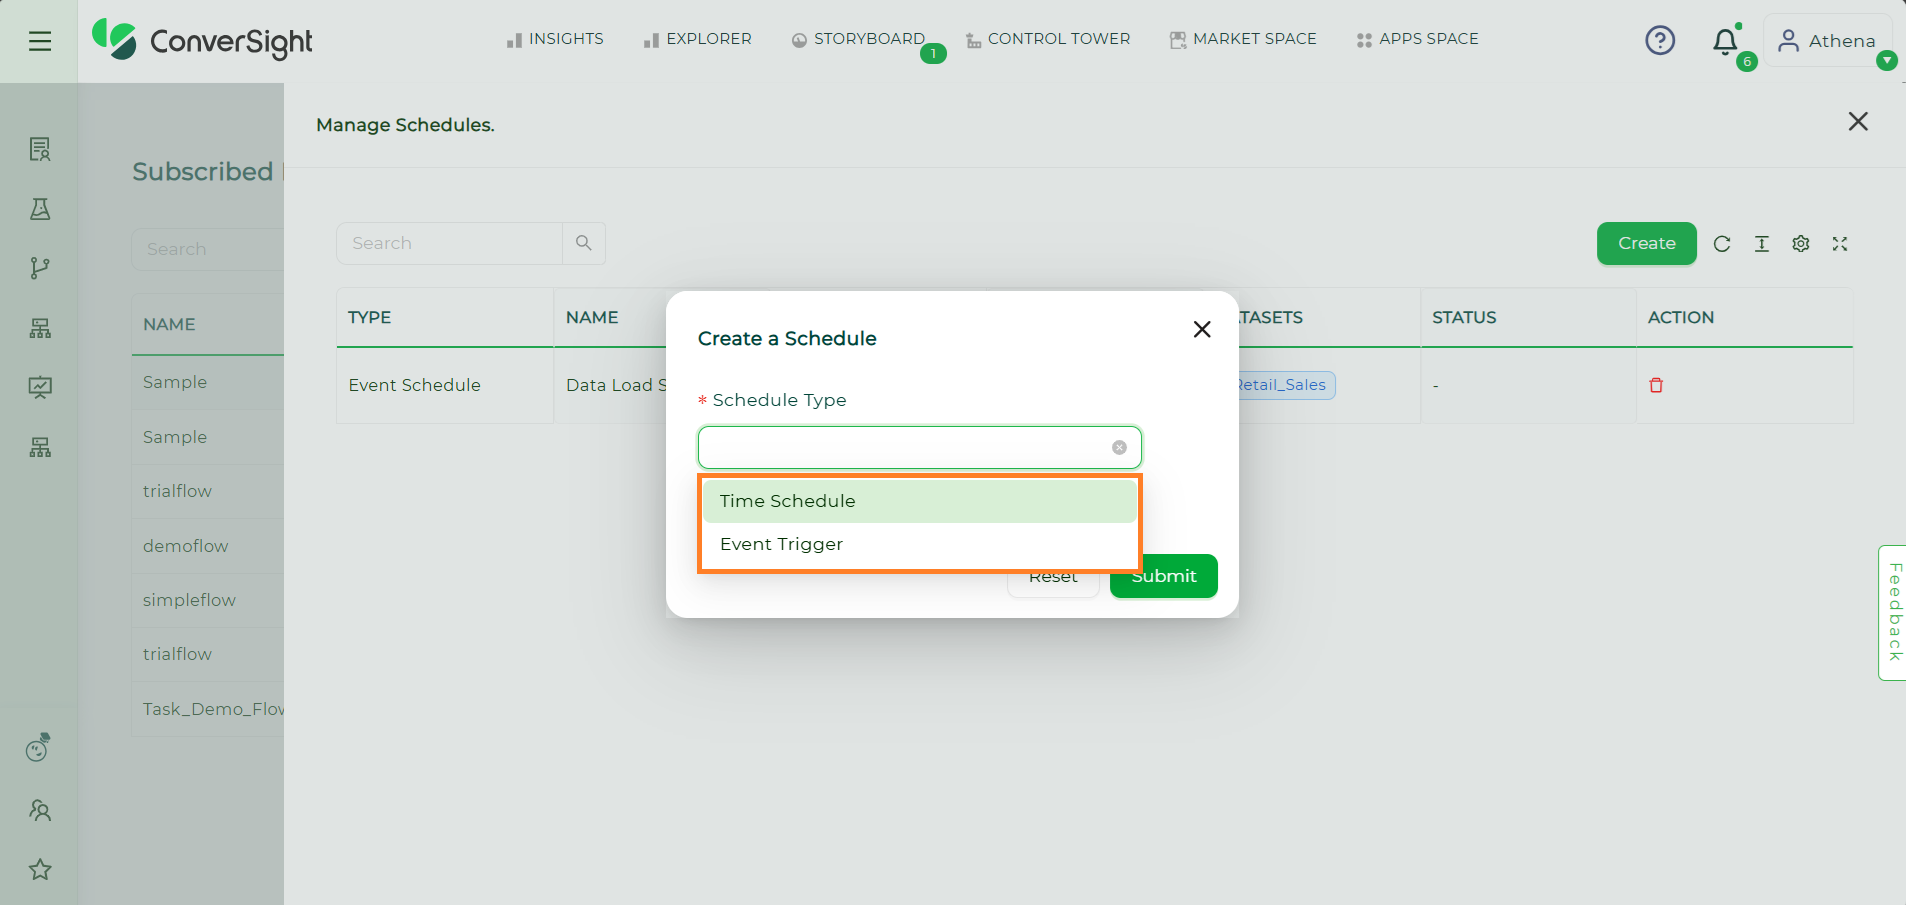
Schedule Type#
For a Time Schedule, the user can create a Time Schedule by giving it a name and adding a description for better understanding. They can set the schedule to be hourly, daily, weekly or monthly. For each option, they can specify the time and days on which it should be executed, as well as the frequency of repetition. Additionally, the user can select a time zone for the scheduler.
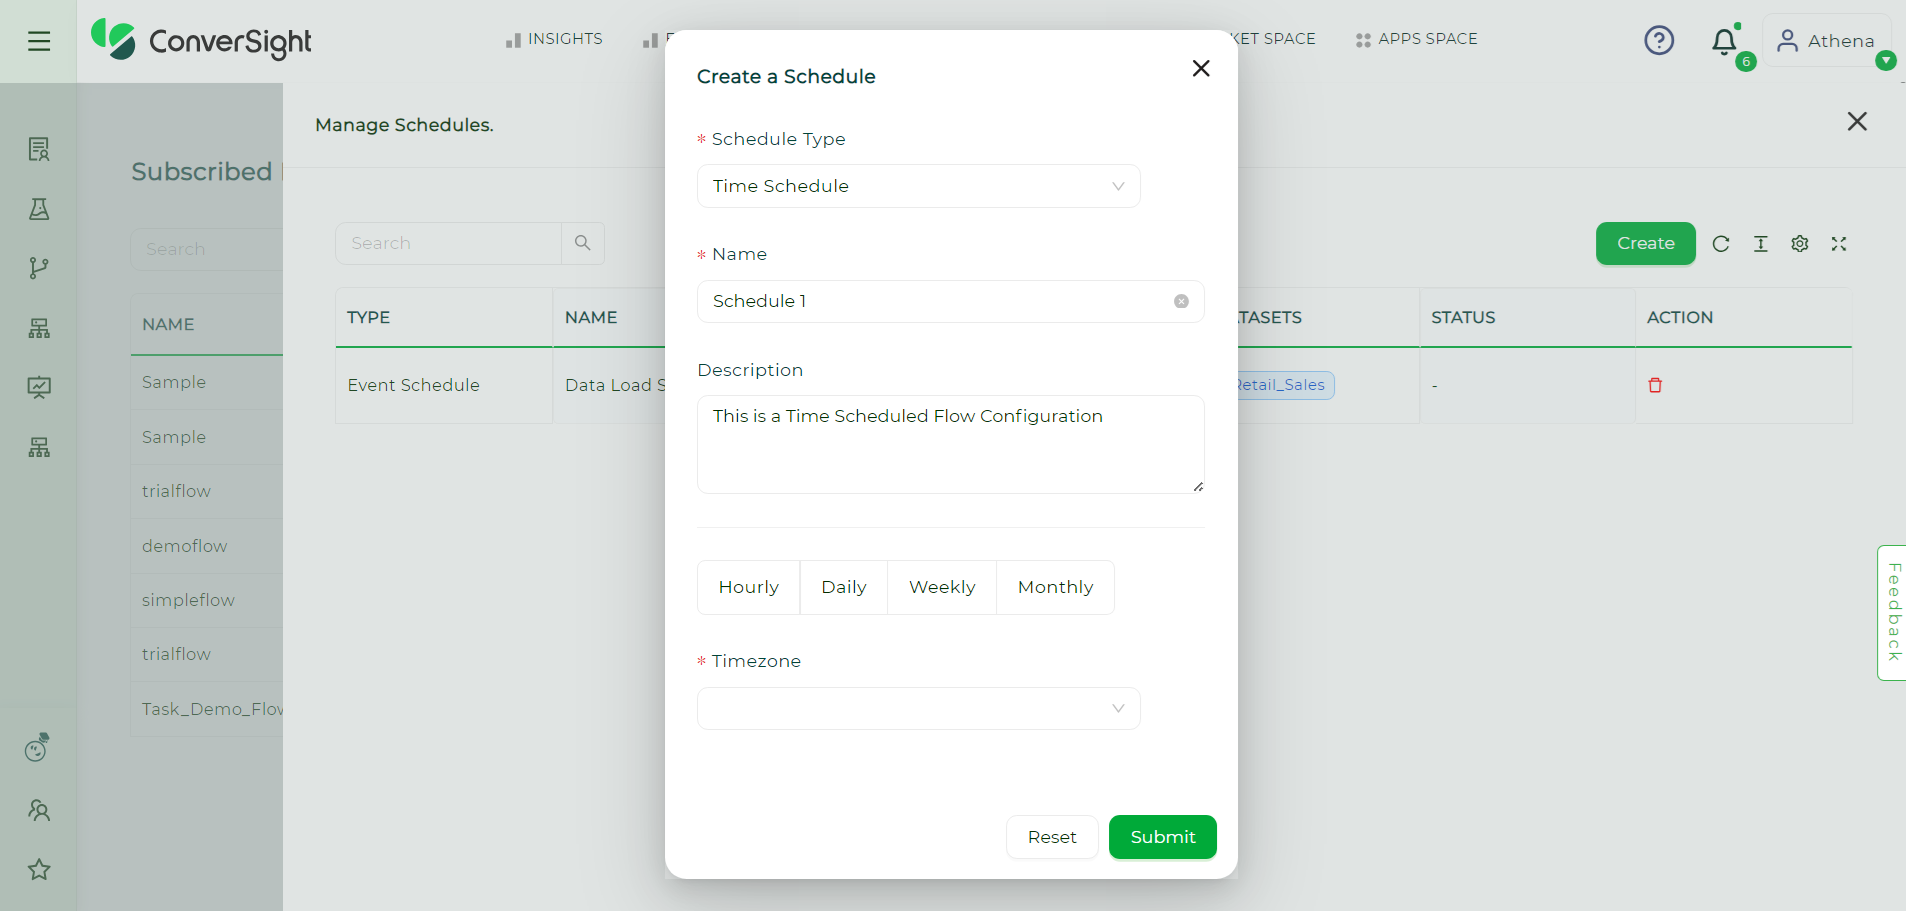
Time Schedule#
For an Event Trigger schedule, the user can name the trigger and select the type of trigger either Data Load or Republish. They can also choose event keys and the relevant dataset. If the trigger is based on data load, the scheduled flow will be triggered each time the selected dataset is loaded. Similarly, for a republish trigger, the scheduled flow will be triggered every time the data is republished.
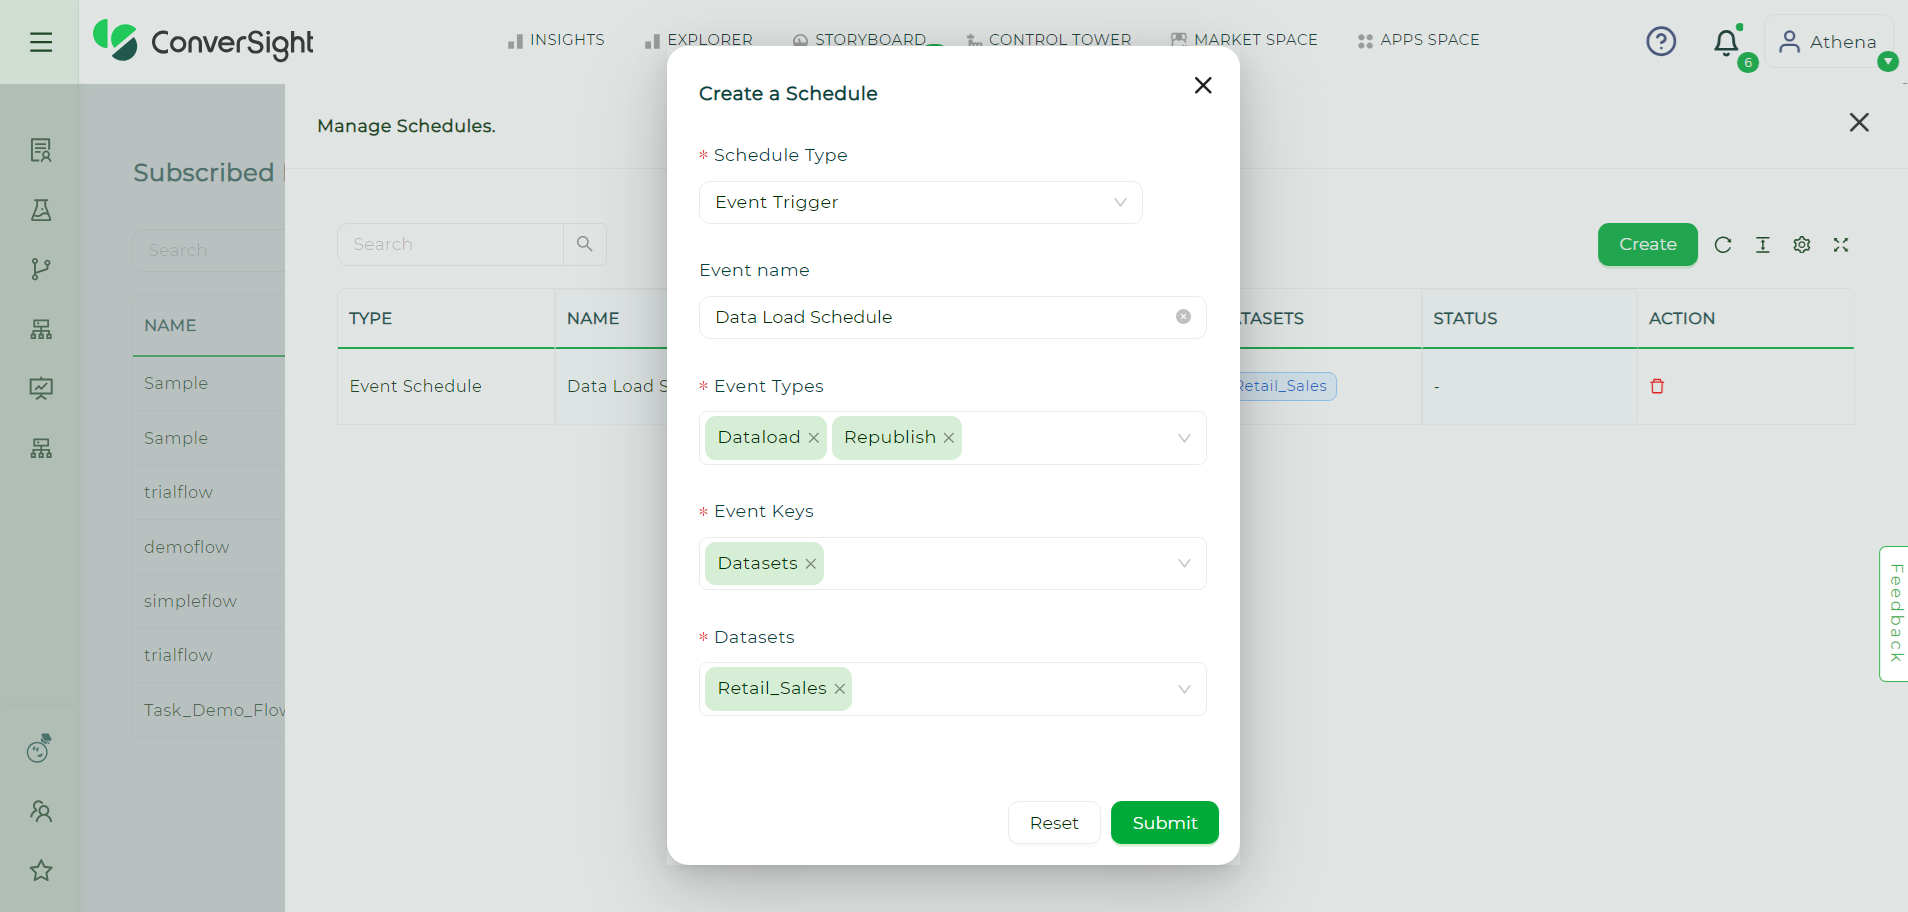
Event Trigger#
Notification#
The Notification feature allows you to generate alerts for your flows. You can specify the alert message for the flow status. Notifications can be set up either individually for each flow or for all flows simultaneously.
To set a Notification for a flow, click on the ![]() icon located under the action field of the specific flow and select the Notification option in Run Configuration page. This action will lead to the Manage Notification page.
icon located under the action field of the specific flow and select the Notification option in Run Configuration page. This action will lead to the Manage Notification page.
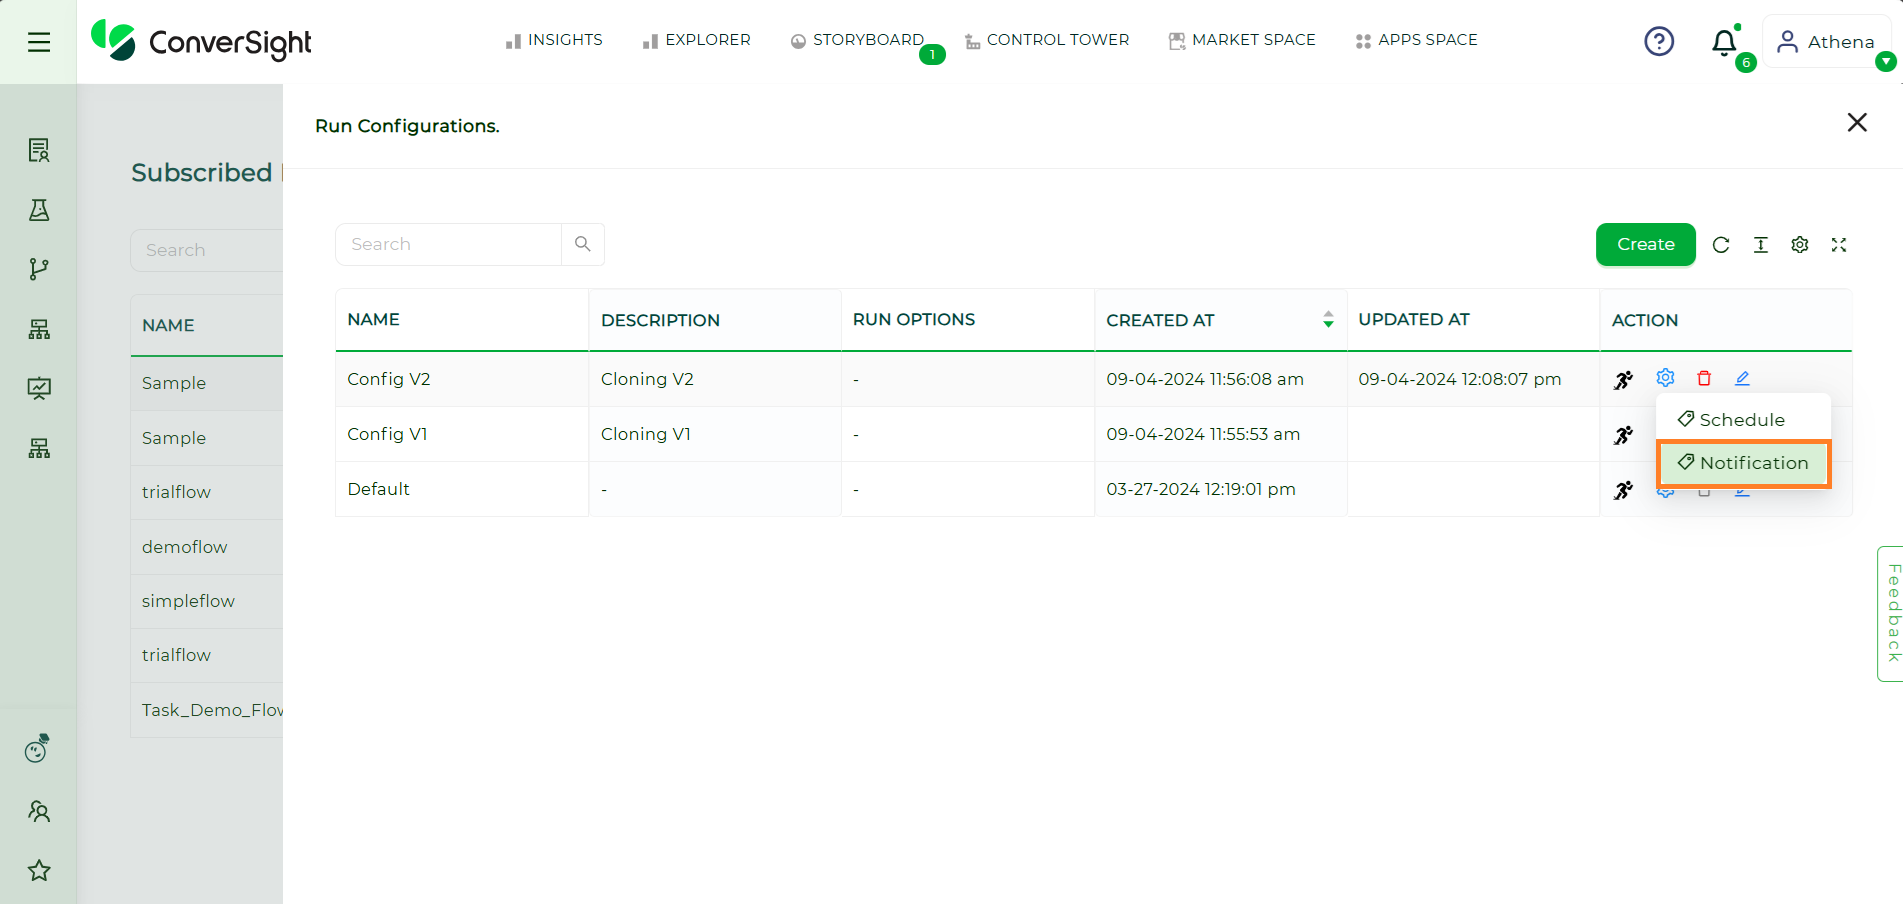
Notification#
The Manage Notification page displays a table that presents all the notifications related to a specific workflow. The table includes information such as the name, description, status of the flow, notification type, run type and status. Additionally, there is an action column that allows users to delete or edit notifications.
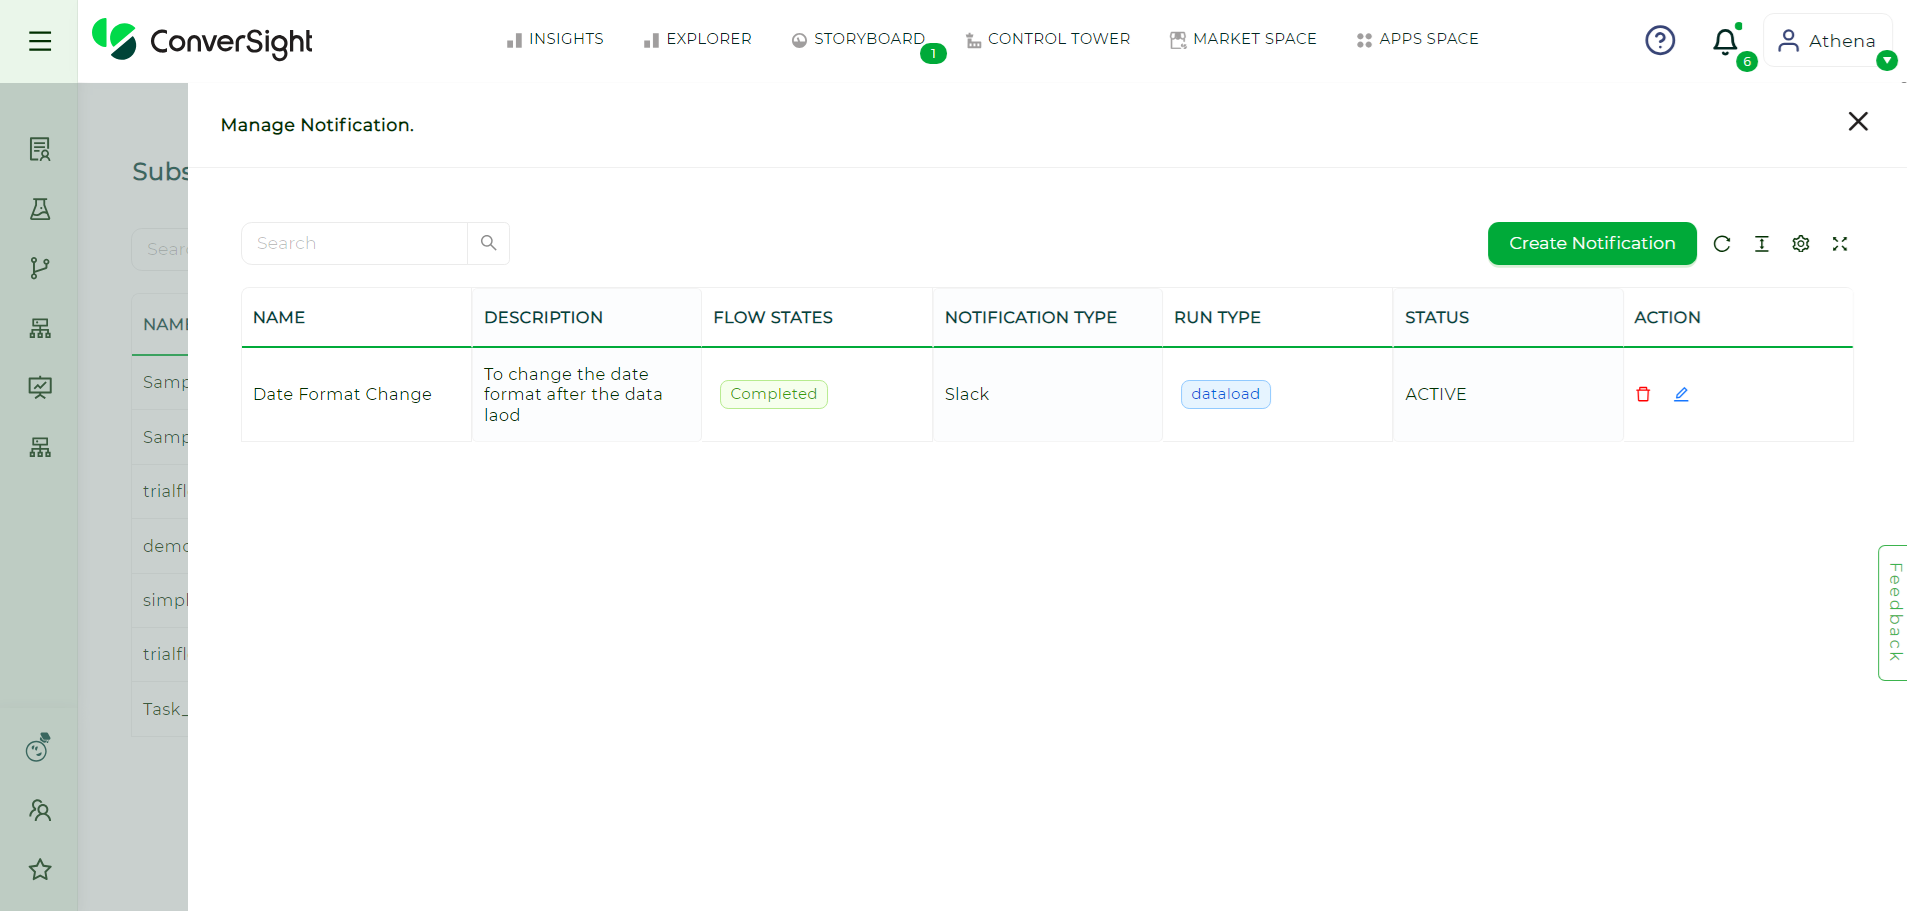
Manage Notification Page#
Create a Notification#
To create a notification, click on the Create Notification button in Manage Notification page.

Create Notification#
When creating a notification, the user is required to provide a name and description for the notification, as well as select a run status that will trigger the notification. Available run statuses include completed, crashed, deployed, failed and running. The user must also select a run type, such as API, on demand, event trigger or time schedule.
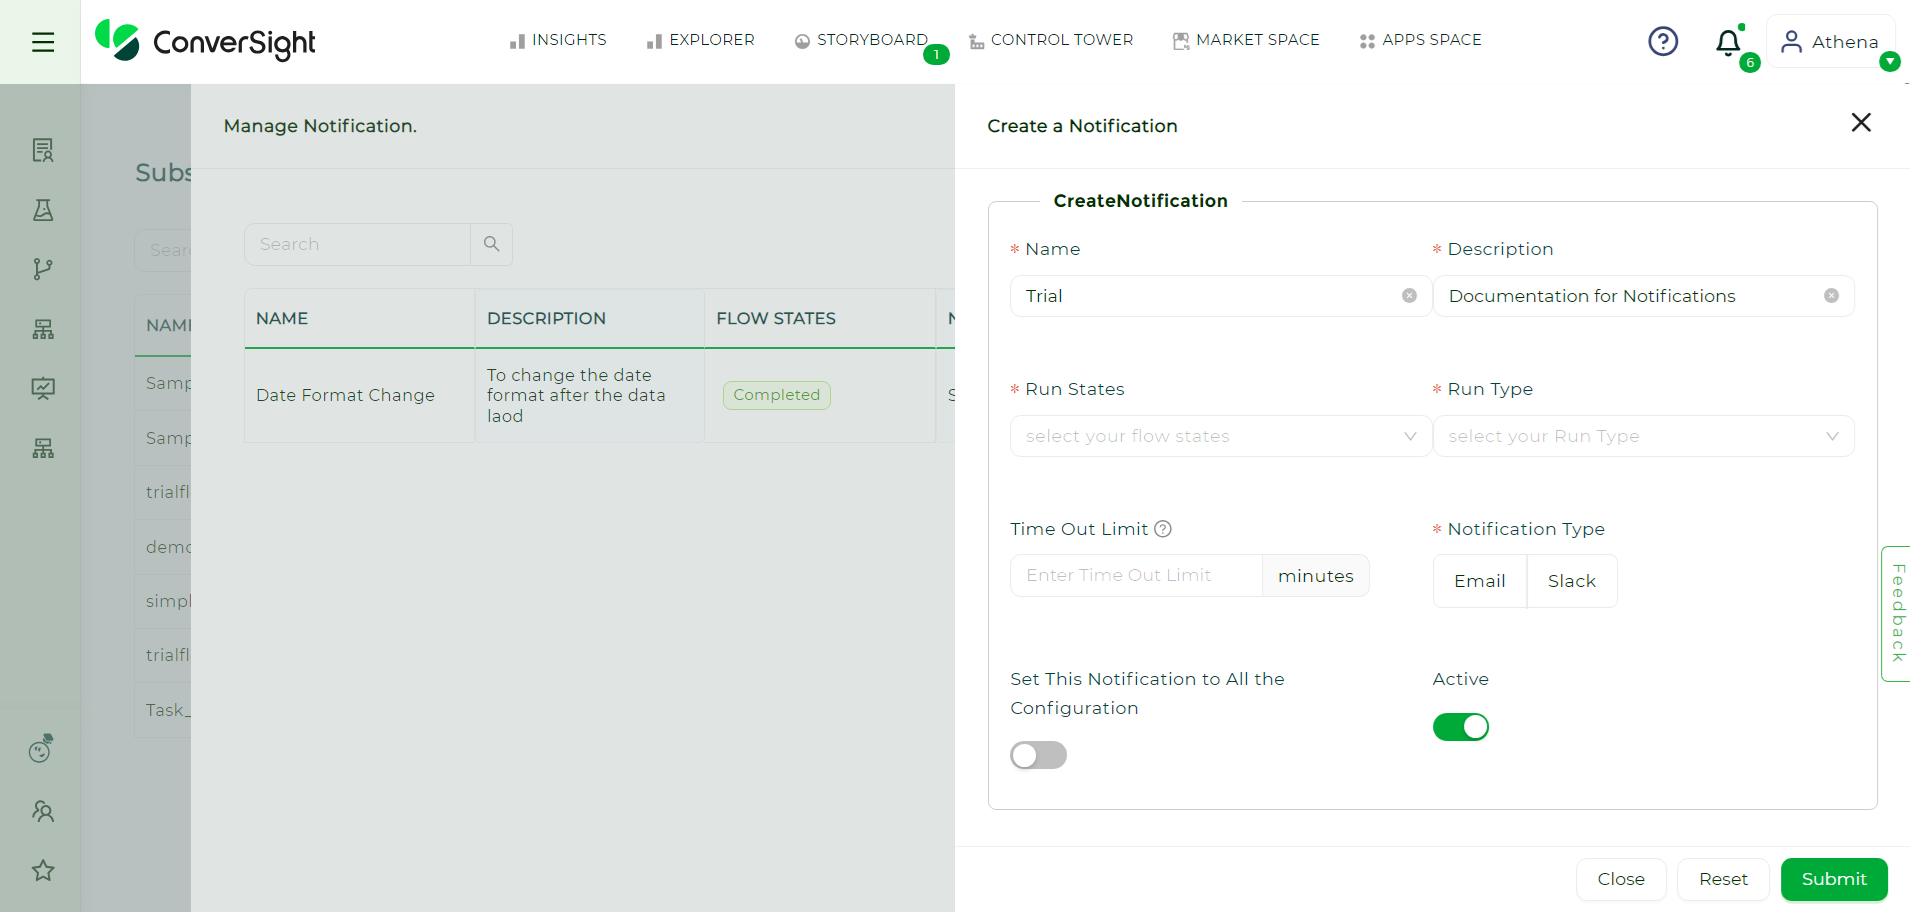
Create Notification Page#
Notification type can be set to either email with the option to add a single email or multiple emails or Slack. Additionally, the user can choose to receive alerts for all configurations by toggling the option.
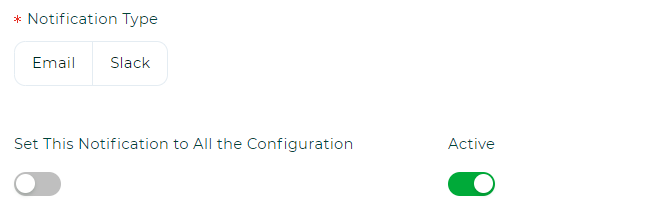
The user can activate or deactivate a notification using the toggle bar and then click Submit to create the notification.
In conclusion, the Subscribed Flows feature is a powerful tool that is helpful for users looking to optimize their productivity and take control of their workflows. With Subscribed Flows, users can leverage the power of existing flows to maximize their efficiency and productivity.