Git for Notebook#
Conversight notebooks now offer Git integration for cloud storage, enabling secure and efficient storage on a Git repository — a standard for version control and collaborative development. This integration empowers users to access their notebooks anytime, anywhere, breaking free from device or location constraints. Retrieval directly from the Git repository ensures seamless integration, enhancing the flexibility and accessibility of Conversight Notebooks. Users can monitor changes, revert to previous versions and collaborate on shared notebooks. This integration streamlines workflows, fostering a collaborative environment for more efficient and effective use of Conversight notebooks in the platform.
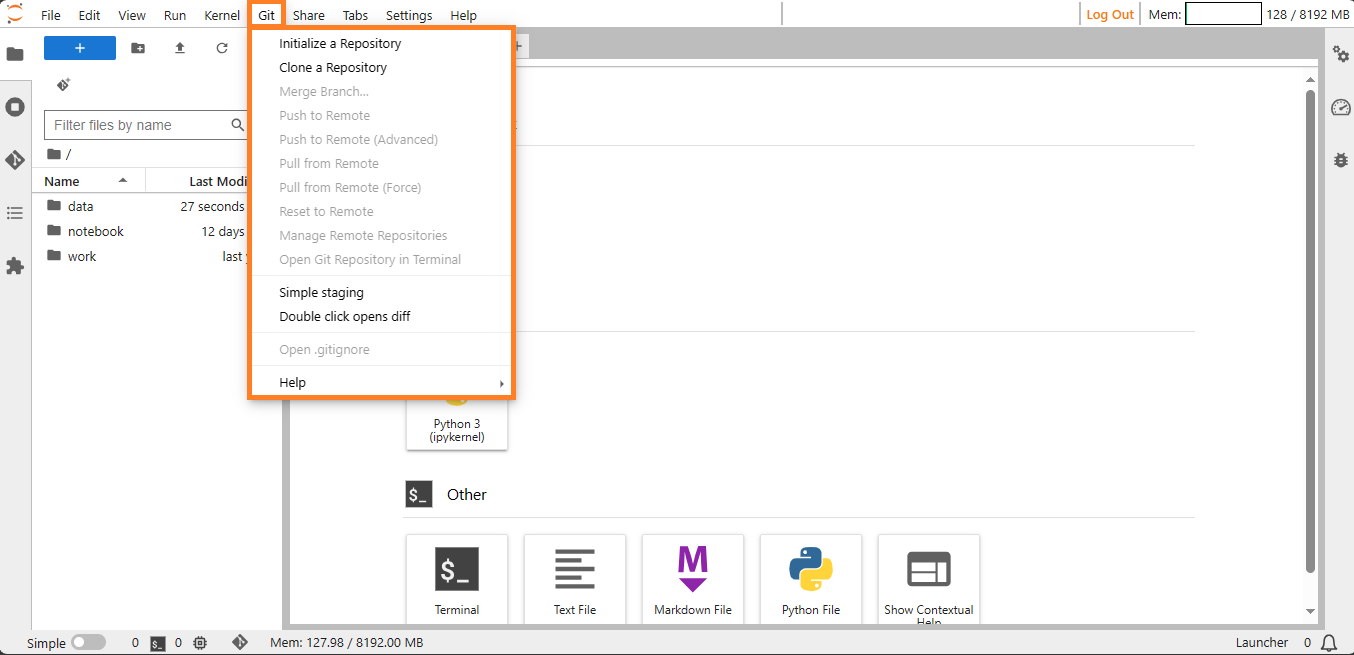
Git Tab#
Git Icon#
Initializing a Repository#
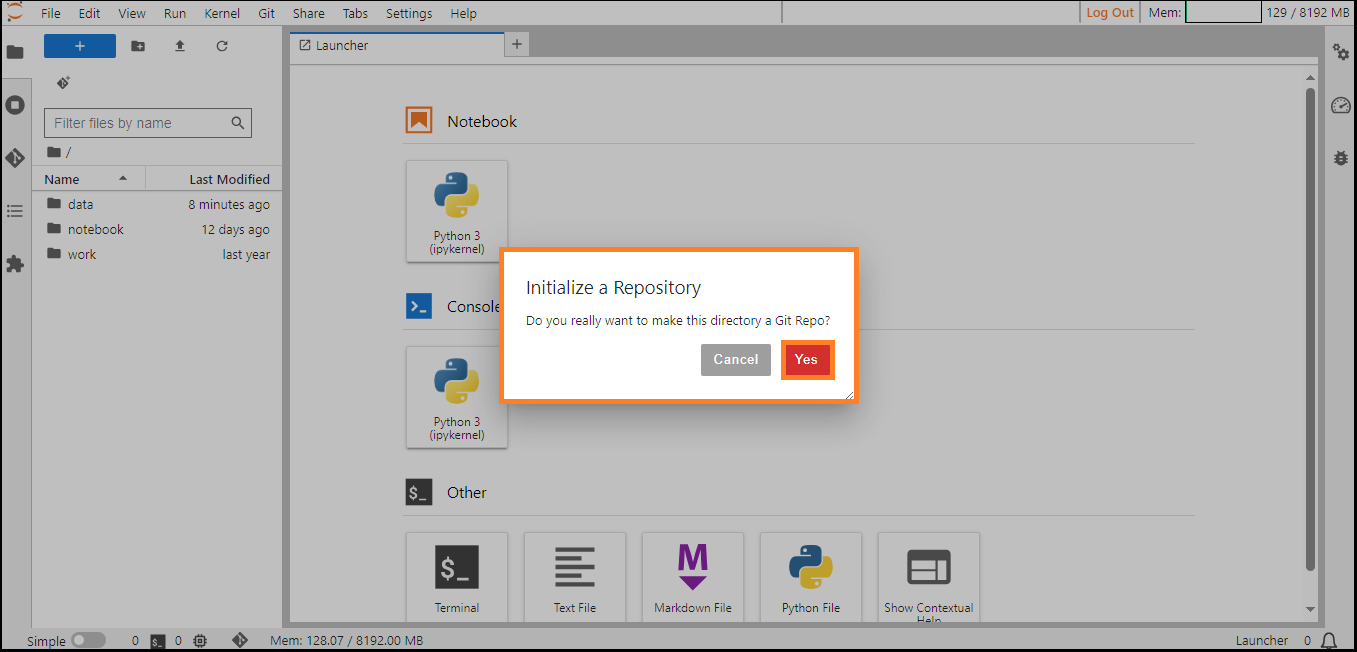
To initialize a repository, click on the Initialize a Repository option, a prompt will appear, inquiring if you wish to designate this directory as a Git repository. Click Yes to proceed.
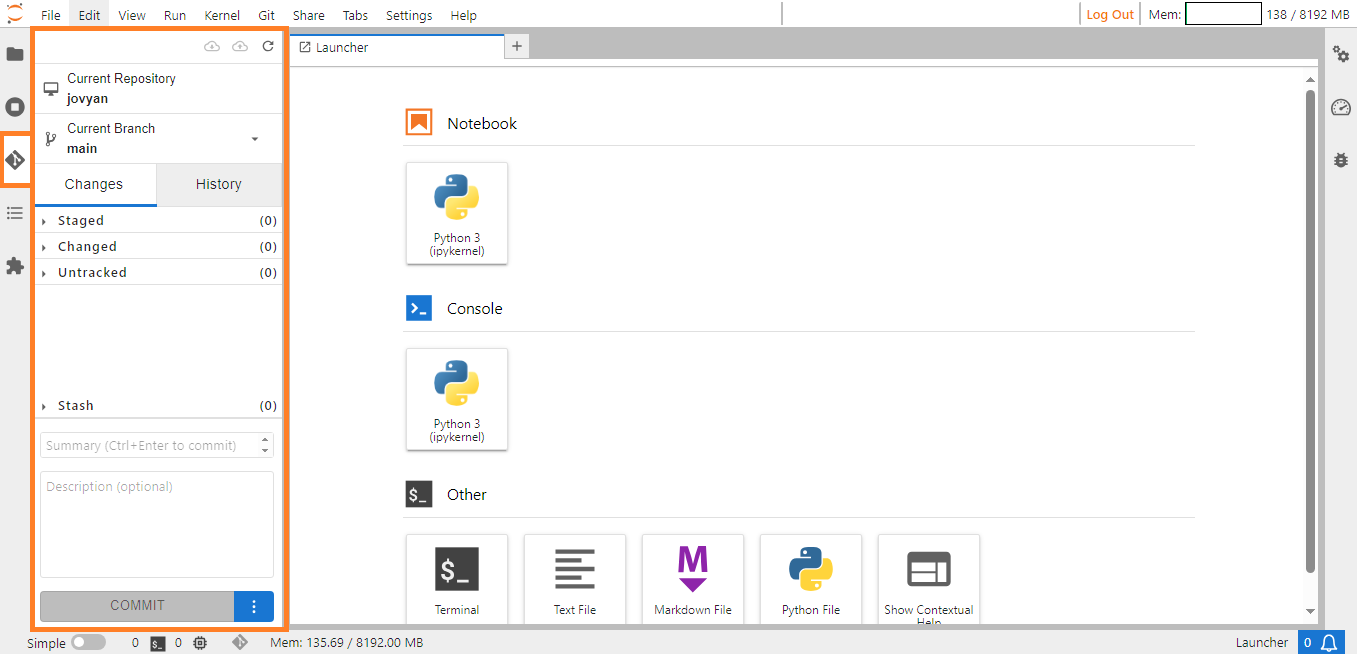
The directory now serves as a local repository, enabling you to view the current repository, current branch, changes, make commits, view the commit history and manage different versions of your project.
Initializing a Repository#
Clone a Repository#
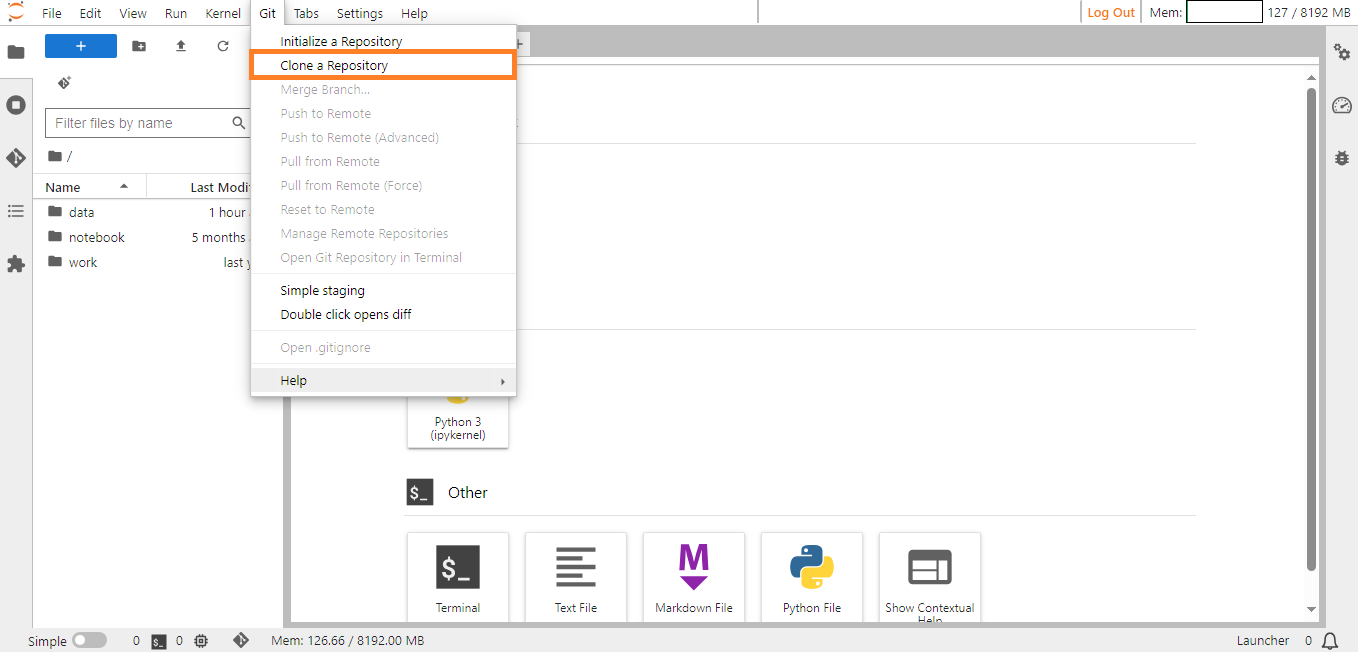
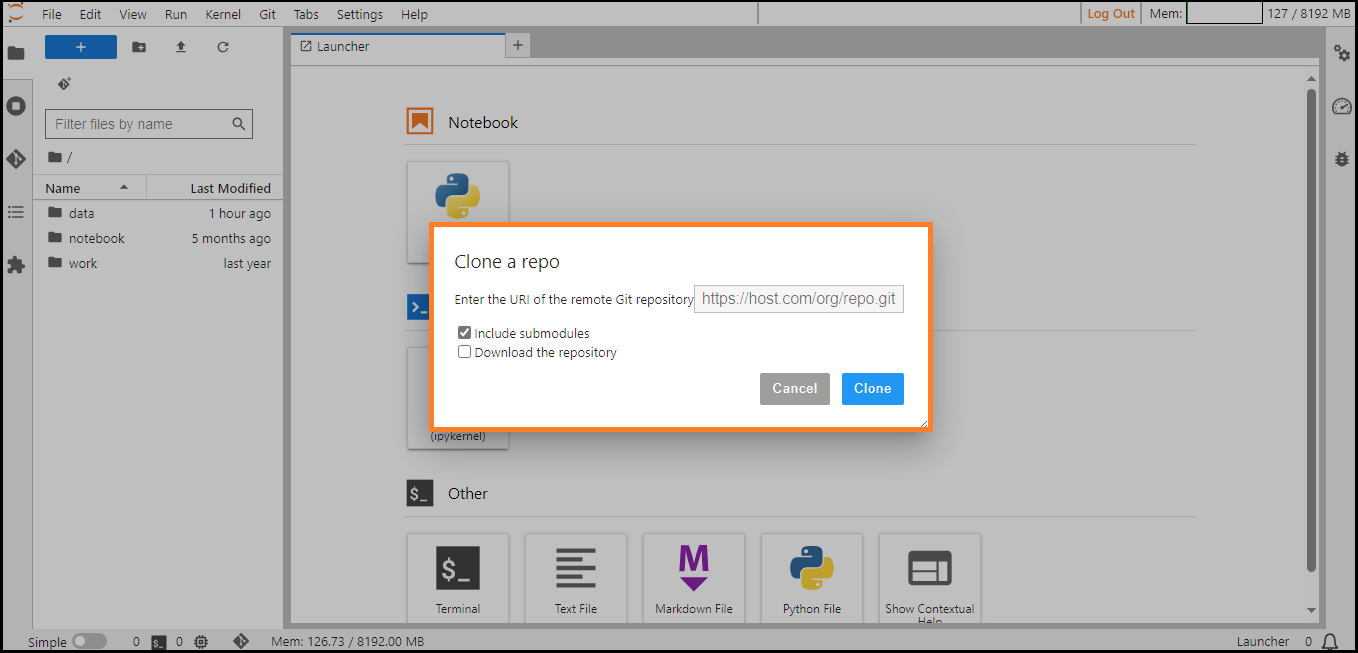
Users can clone any git repository into Jupyter Notebook using the Clone a Repository option under the Git menu.
Clone a Repository#
Selecting the Clone a Repository option will prompt a page where users must enter the following information to initiate the cloning process.
Argument |
Description |
|---|---|
URL |
Enter the URL of the remote Git repository that needs to be cloned. |
Include Submodules |
A Git submodule is an embedded repository within another Git repository. Select the checkbox if you want to include them. |
Download the Repository |
Selecting this checkbox allows you to download an entire repository. |
Once you have entered all the details click on the Clone button.
Clone a Repository Popup#
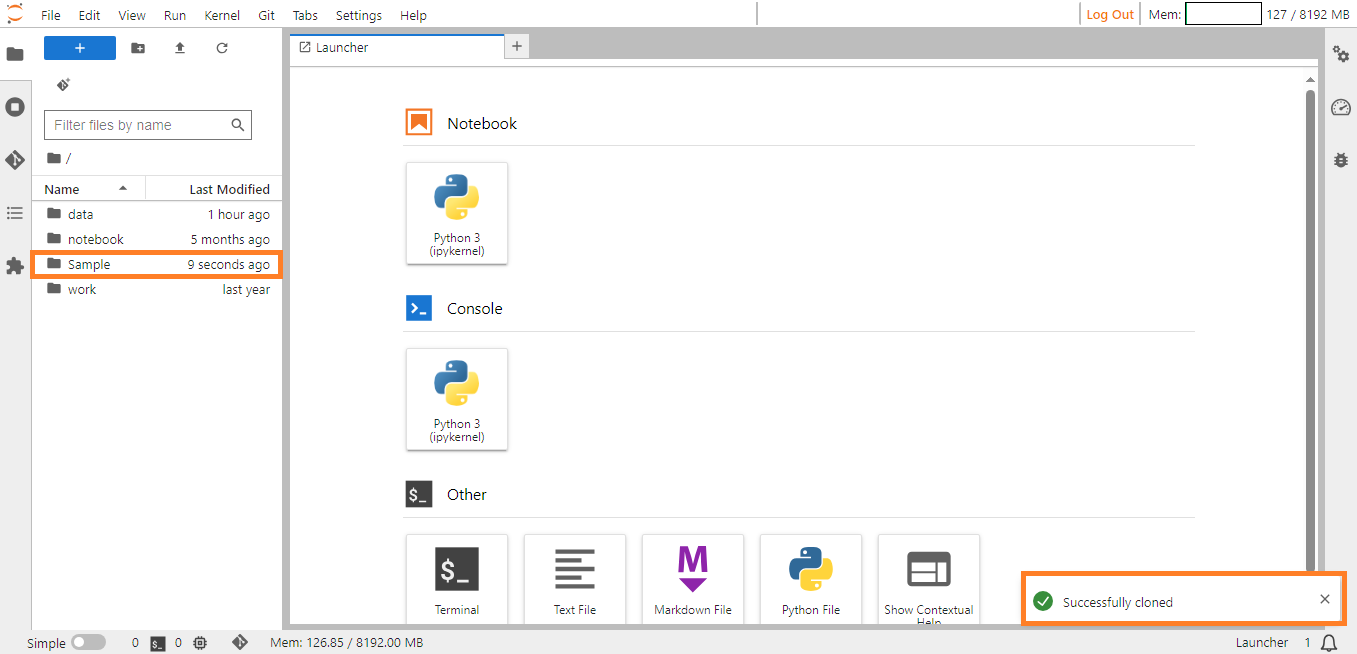
A popup notification will appear, indicating that the cloning process was successful. You will observe the addition of a new folder (in this instance, Sample).
Download#
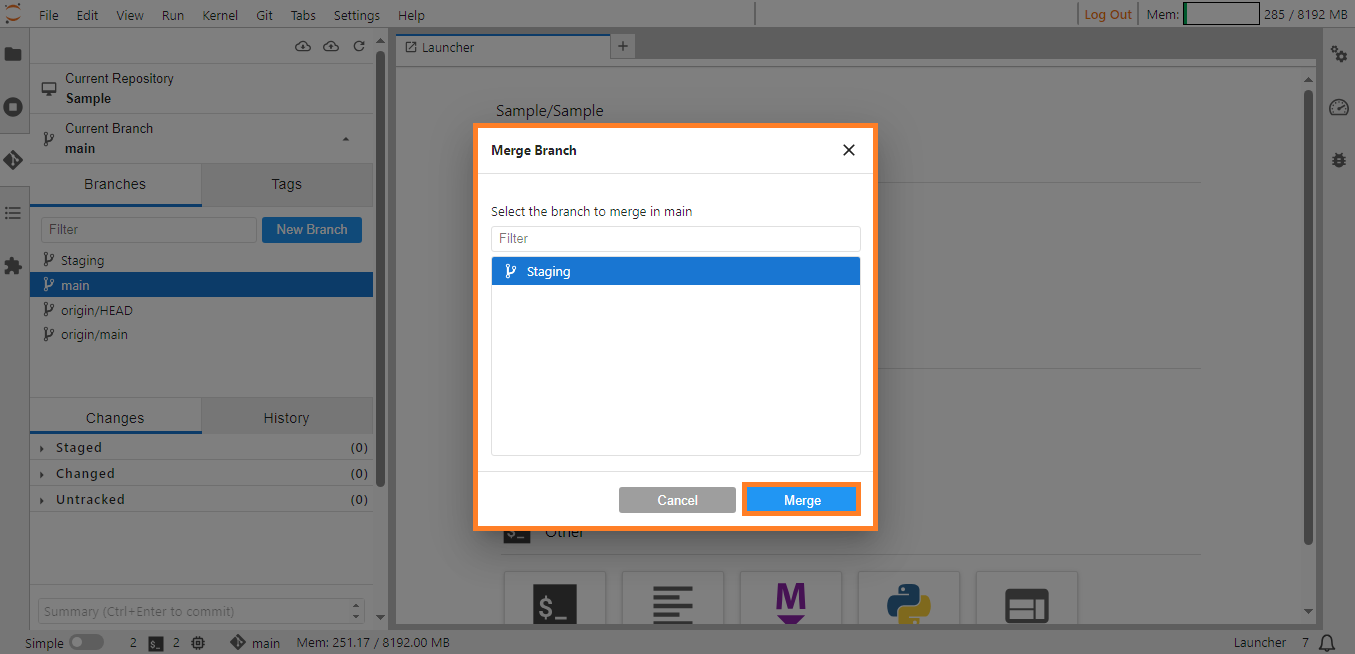
Merge Branch#
The Merge Branch refers to the process of combining the changes made in one branch of a Git repository with another branch. It serves to integrate work developed separately, often by multiple collaborators, into a unified codebase.
Now let’s look into it stepwise.
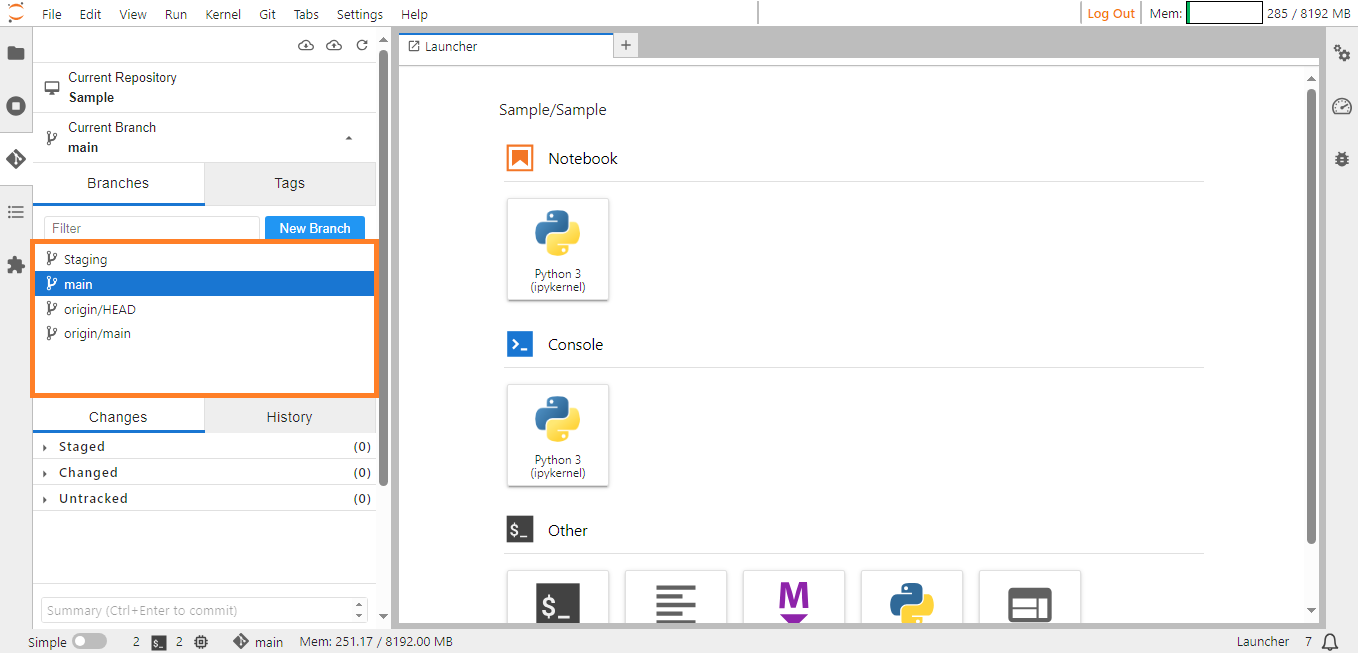
Step 1: Switch to the target branch.
Step 2: Click on the branch name at the top of the Git panel.
Step 3: Select the branch you want to merge changes into (typically the main branch or another long-lived branch).
Branch Switch#
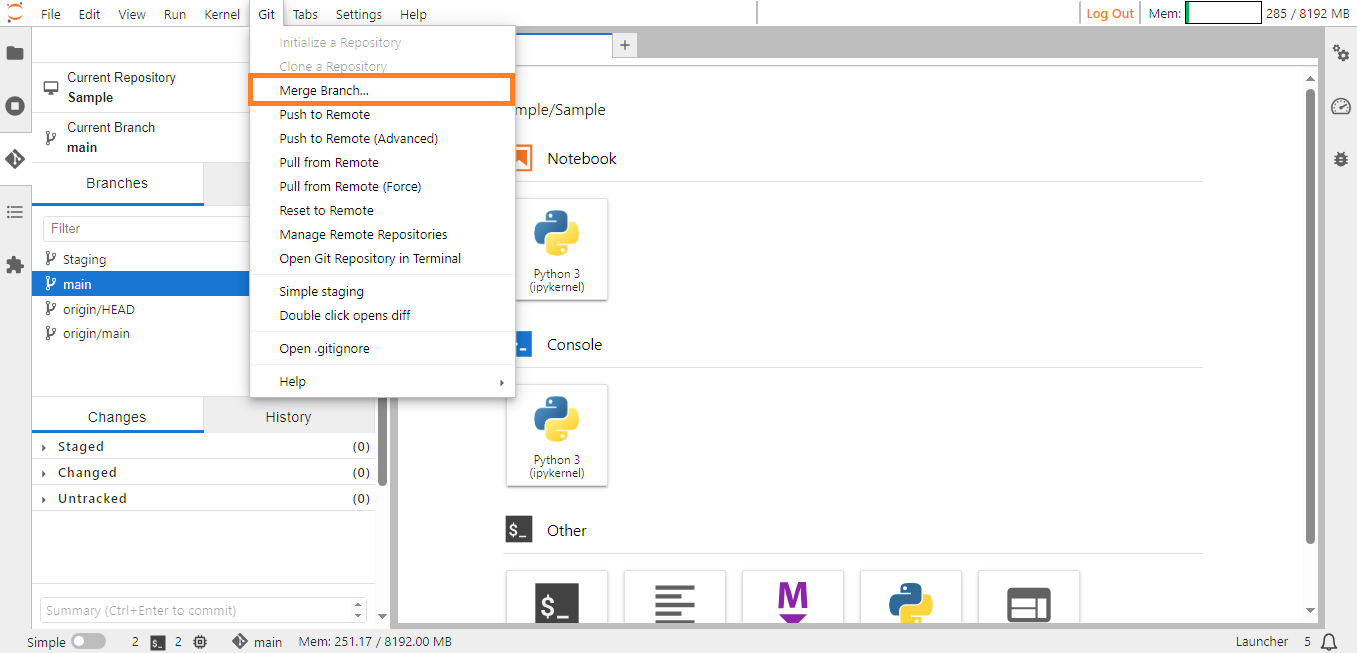
Step 4: Access the Git menu located in the menu bar.
Merge Branch#
Step 5: Click the Merge Branch option in the Git menu. A dialog will appear, prompting you to select the branch to merge from.
Step 6: Select the branch containing the changes you want to integrate and click on the Merge button.
Download#
If there are conflicting changes between the two branches, Notebook will highlight them in the Conflicted Files section of the Git menu. Manually edit the conflicted files to choose which version of the code to keep and mark each conflict as resolved once addressed.
Once conflicts are resolved (or if there were none), click the Merge button.
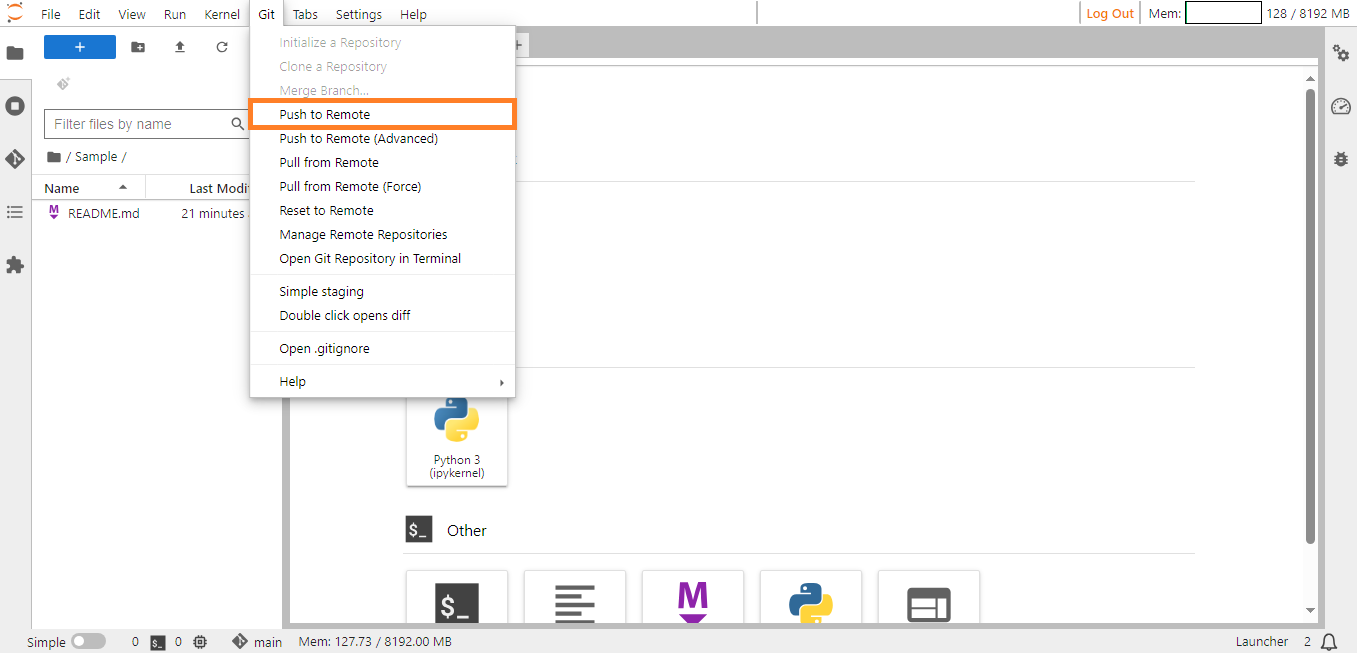
Push to Remote#
Push to Remote refers to the action of uploading or sending the changes made in a local Git repository to a remote repository. When you make changes to your local repository (create new commits), you may want to share those changes with others or update the version of the project stored on the remote server. To achieve this, you use the ‘Push to Remote’ option under the Git menu.
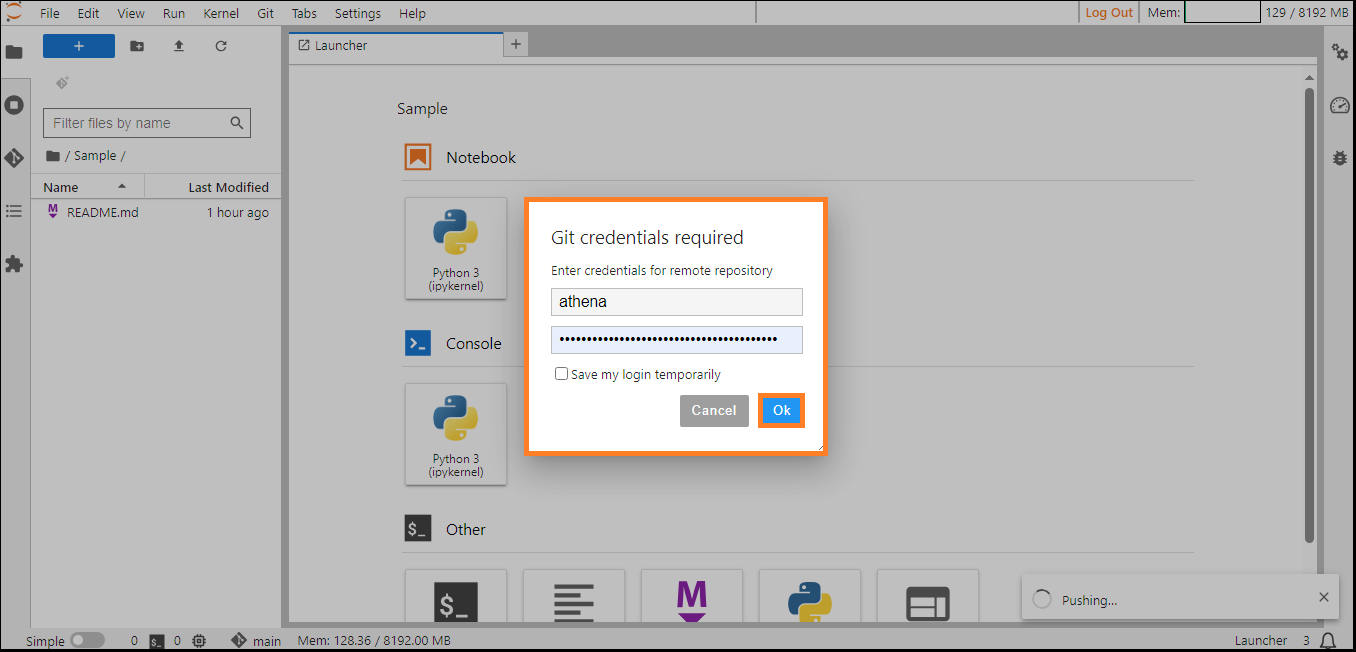
Select the Push to Remote option and a popup will prompt you to provide your Git credentials. Complete all the required details and click Ok to proceed with the operation.
Push to Remote#
Push to Remote#
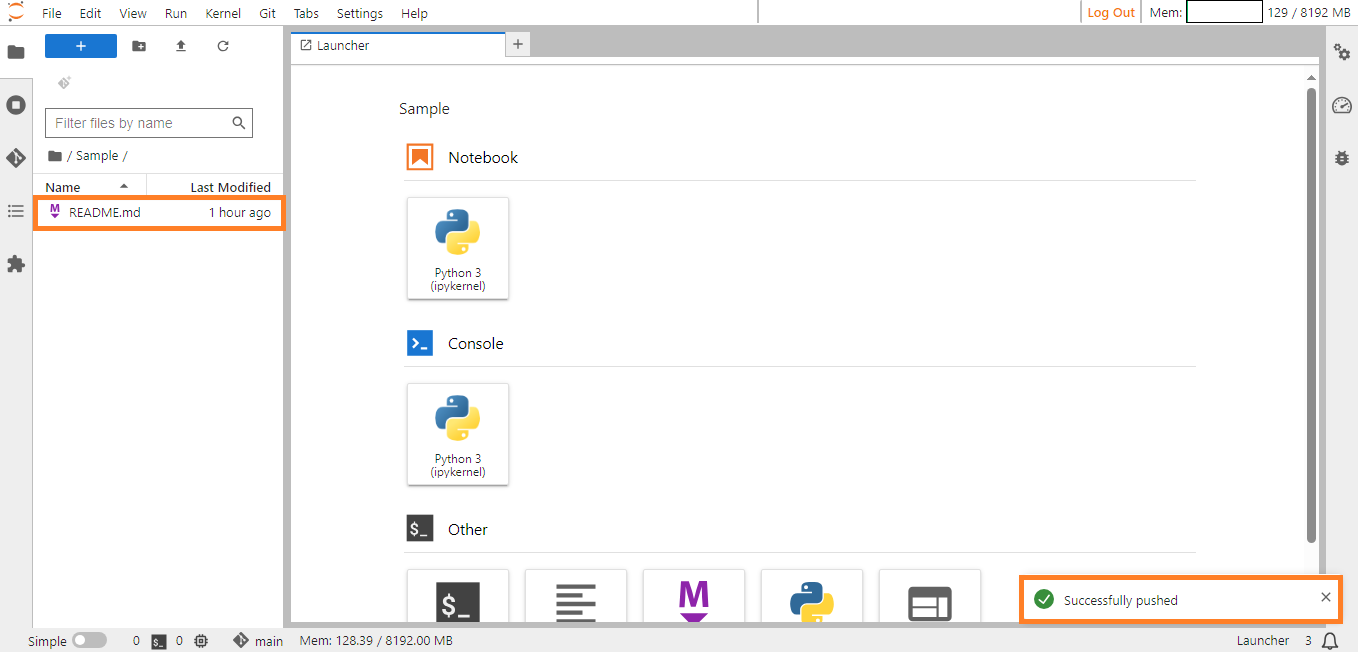
A popup notification will appear, indicating that the Push to Remote was successful.
Download#
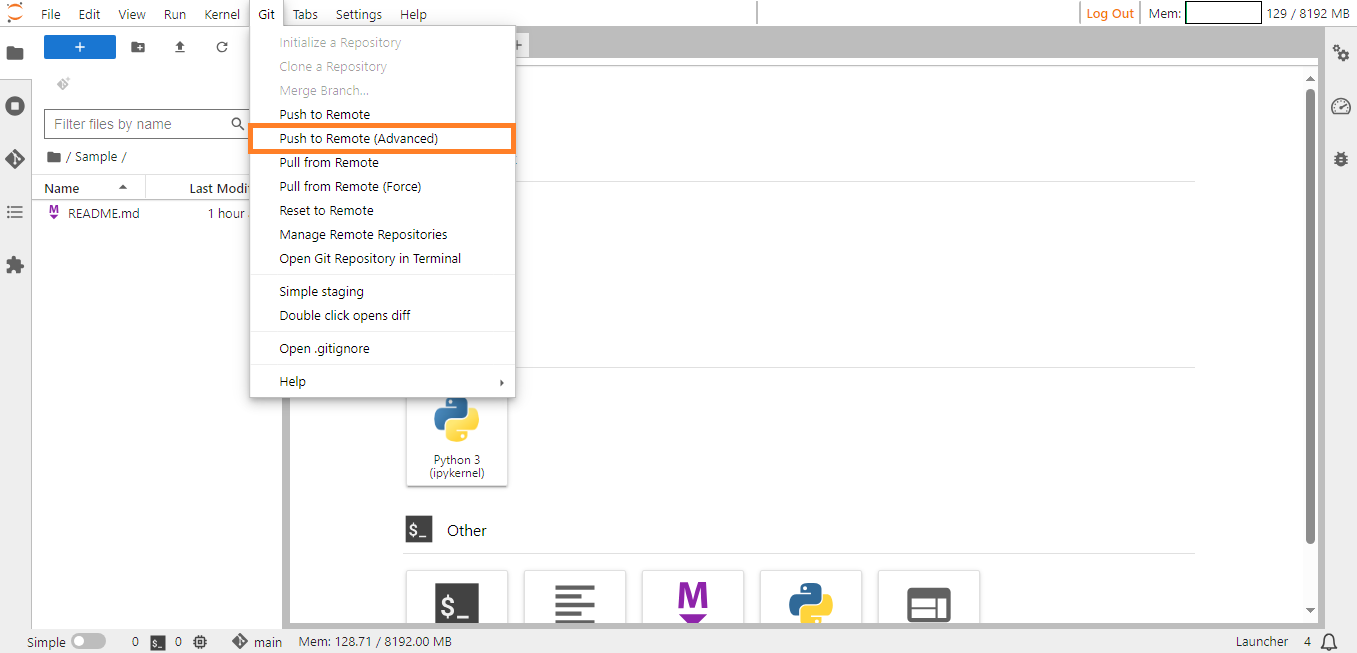
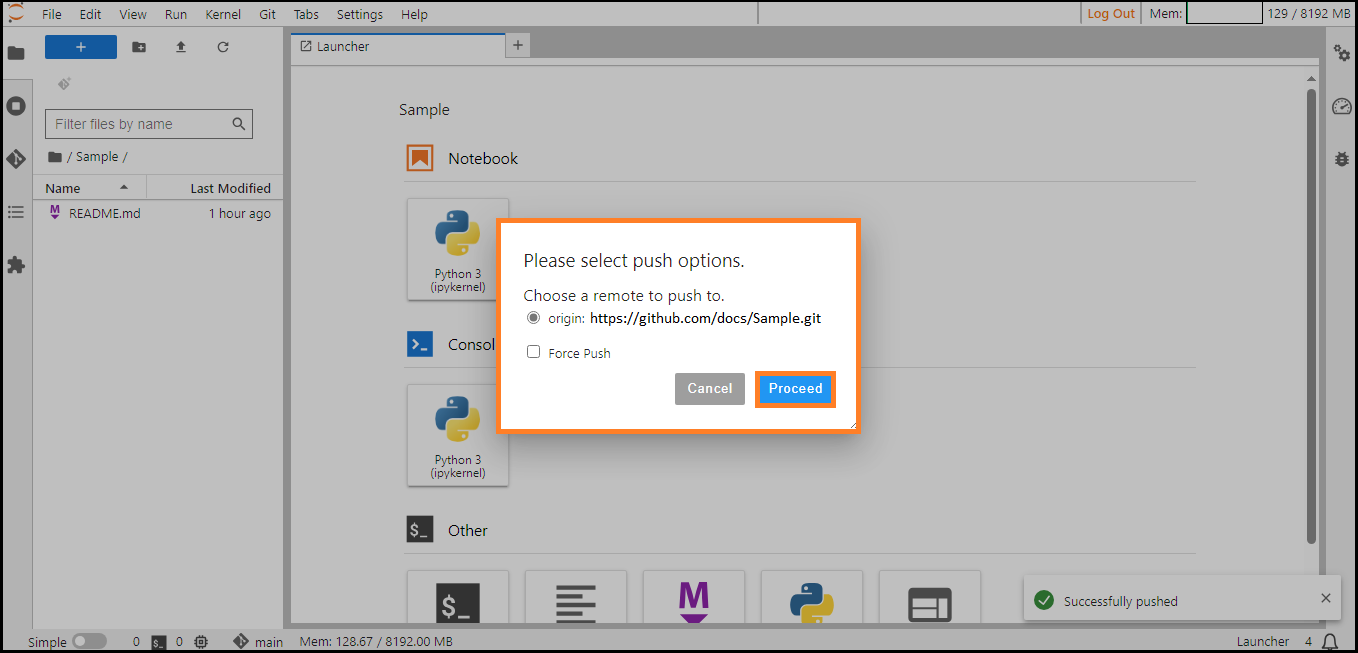
Push to Remote (Advanced)#
The Push to Remote (Advanced) option in the Git menu enables you to specifically select the remote repository where you intend to push the changes you’ve made.
Push To Remote Advanced#
Push to Remote Advanced#
The Force Push option allows you to push your changes forcefully to the online repository, even in the presence of conflicting changes. It comes in handy when you need to update the online version with your local changes, even if they don’t exactly match.
Once done click Proceed to push your changes.
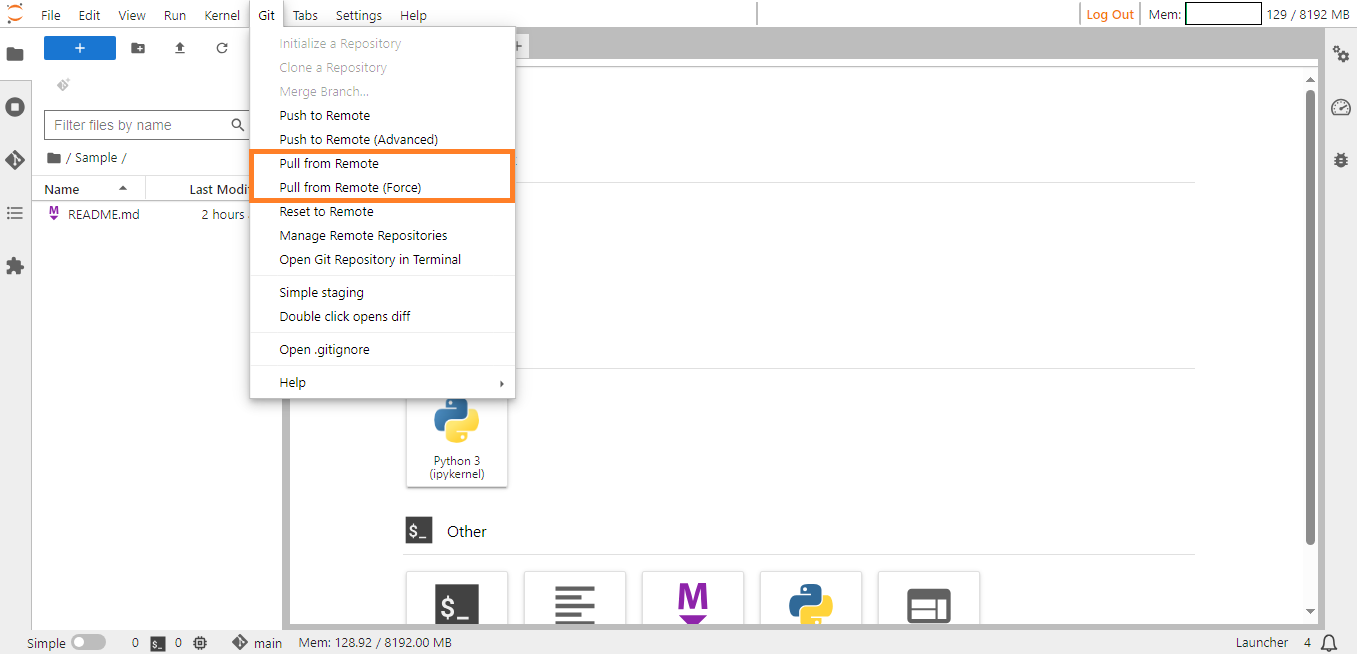
Pull from Remote#
The Pull from Remote feature in the Git menu allows you to bring in changes from a remote repository and integrate them into your local branch. This process involves two steps:
Fetching Changes: The Pull from Remote command initially retrieves updates from the remote repository, including any new commits or modifications made by others on the remote branch.
Merging Changes: Subsequently, Git automatically merges these fetched changes into your local branch. In cases of conflicts, manual resolution might be necessary.
Pull From Remote#
Pull from Remote (Force)#
The Pull from Remote (Force) option will reset your local branch to match the remote branch. This discards all your local changes.
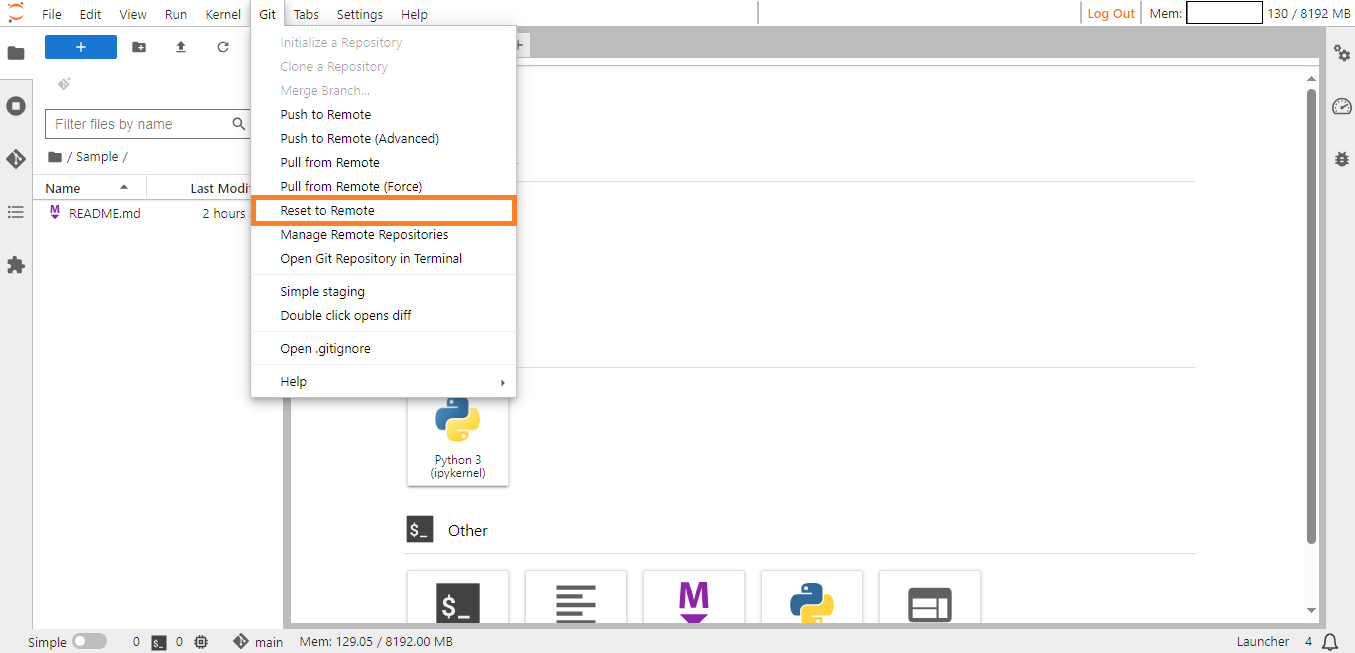
Reset to Remote#
To align your local branch with the state of the corresponding branch on the remote repository, you can utilize the Reset to Remote option found in the Git menu.
Reset to Remote#
This option discards any local changes and ensures your local branch precisely mirrors the remote branch. It’s a powerful operation that demands caution due to its potential for data loss.
Manage Remote Repositories#
The Manage Remote Repositories option under the Git menu allows you to add new repositories or delete existing repositories.
Adding a Repository#
To add a new repository, simply provide a name and the remote Git repository URL. Click the Add button to complete the process.
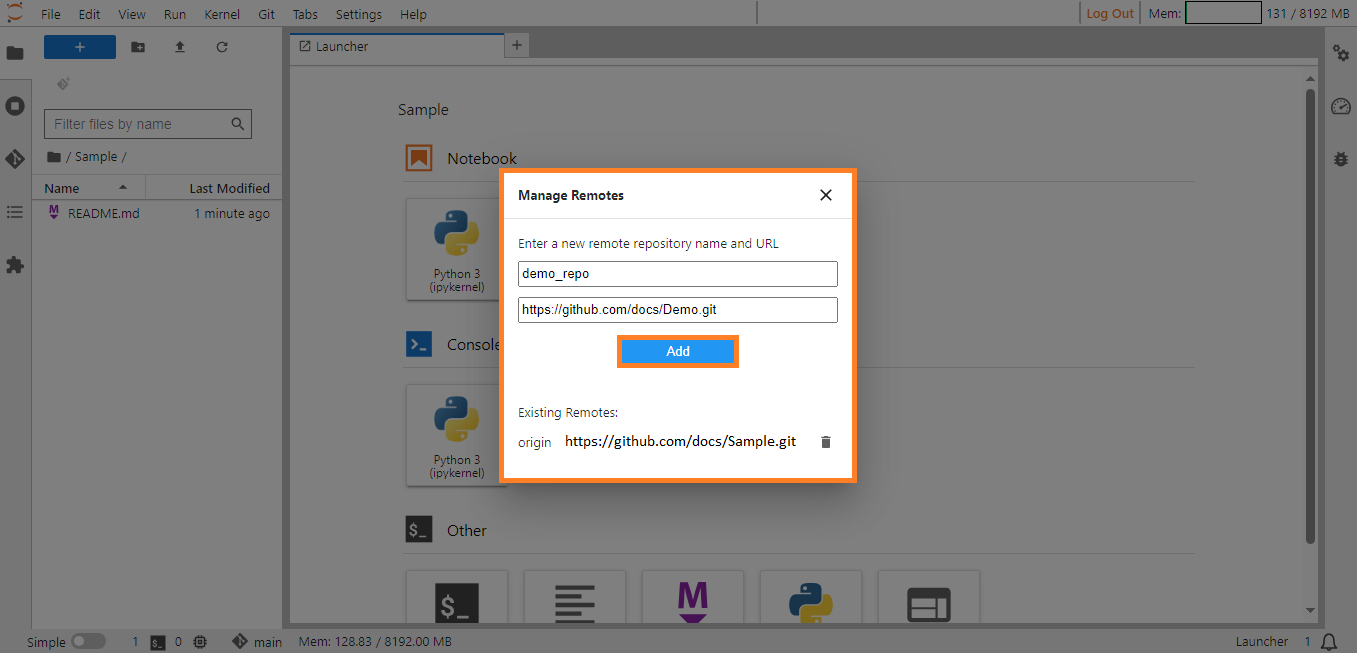
Adding Repositories#
The newly added repositories will be displayed below as shown.
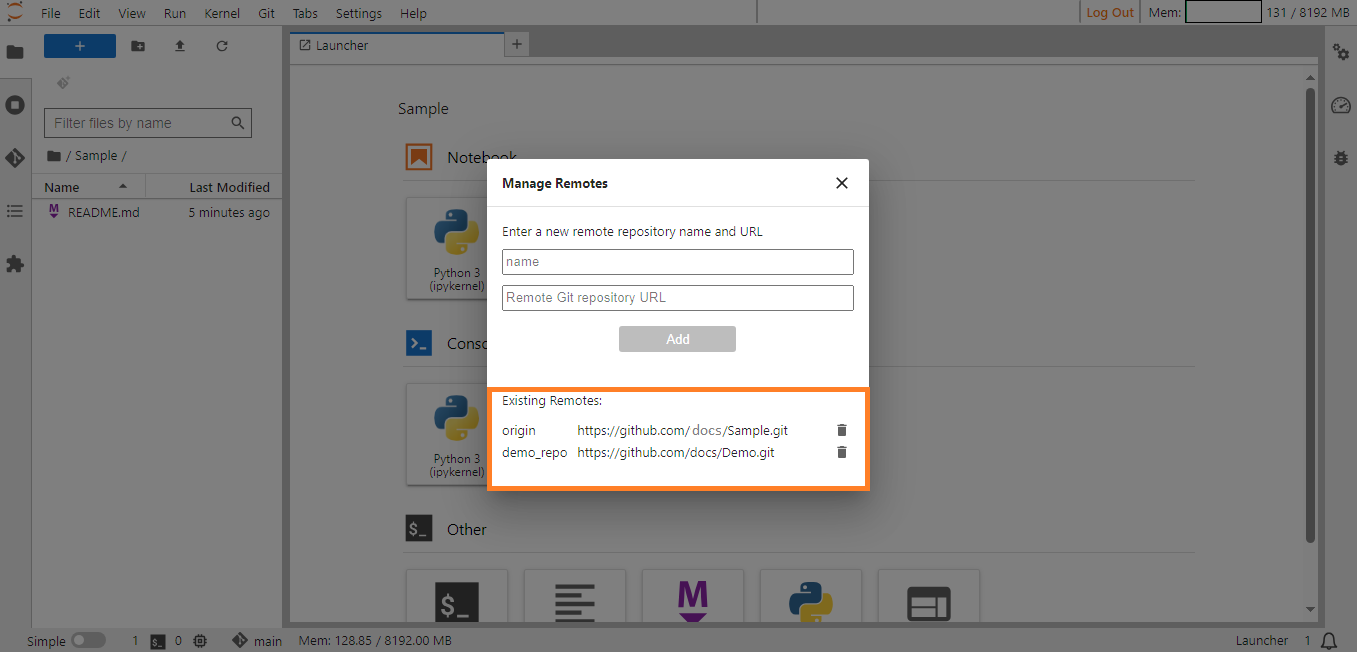
Adding Repositories#
Deleting a Repository#
To remove an existing repository, click on the Delete icon next to the respective repository.

Deleting Repositories#
Open Git Repository in Terminal#
Open Git repository in Terminal typically refers to navigating to the directory of a Git repository using a command-line terminal or command prompt. It’s the process of accessing and interacting with the Git repository through a text-based interface.
To access the Git Repository in a terminal you must click on the Open Git Repository in Terminal option under the Git menu.
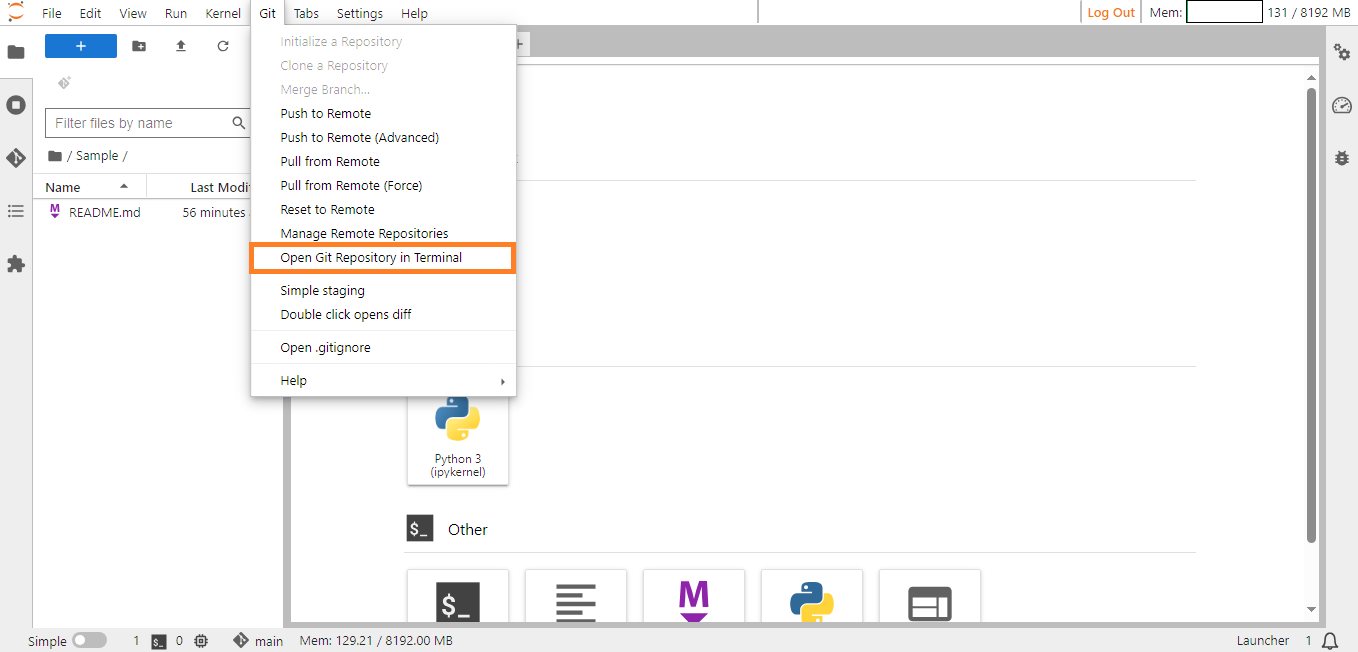
Opening a Repository in Terminal#
If you open a Git repository in the terminal, you can perform various Git-related tasks and commands to manage and work with the repository. Here are some common actions:
Check Repository Status
Use the command: git status
It shows the status of your working directory, indicating changes to be committed, modified files, etc.
View Changes
Use the command: git diff
It shows the changes made to your files that are not yet staged.
Add Changes to Staging Area
Use the command: git add <filename> or git add . (to add all changes).
This stages changes for the next commit.
Commit Changes
Use the command: `git commit -m “Your commit message”.
It records the staged changes to the repository.
Push Changes to Remote Repository
Use the command: git push origin <branch-name>
It sends your committed changes to the remote repository.
Pull Changes from Remote Repository
Use the command: git pull origin <branch-name>
It retrieves changes from the remote repository and merges them into your local branch.
Create a New Branch
Use the command: git branch <branch-name> to create a new branch.
Use git checkout <branch-name> to switch to the new branch.
Merge Branches
Use the command: git merge <branch-name>
Merge changes from one branch into the current branch.
Inspect Commit History
Use the command: git log
It shows a log of commits, their authors, dates and commit messages.
These are just a few examples. The terminal provides direct access to all Git commands, allowing you to navigate, modify and collaborate on your Git repositories.
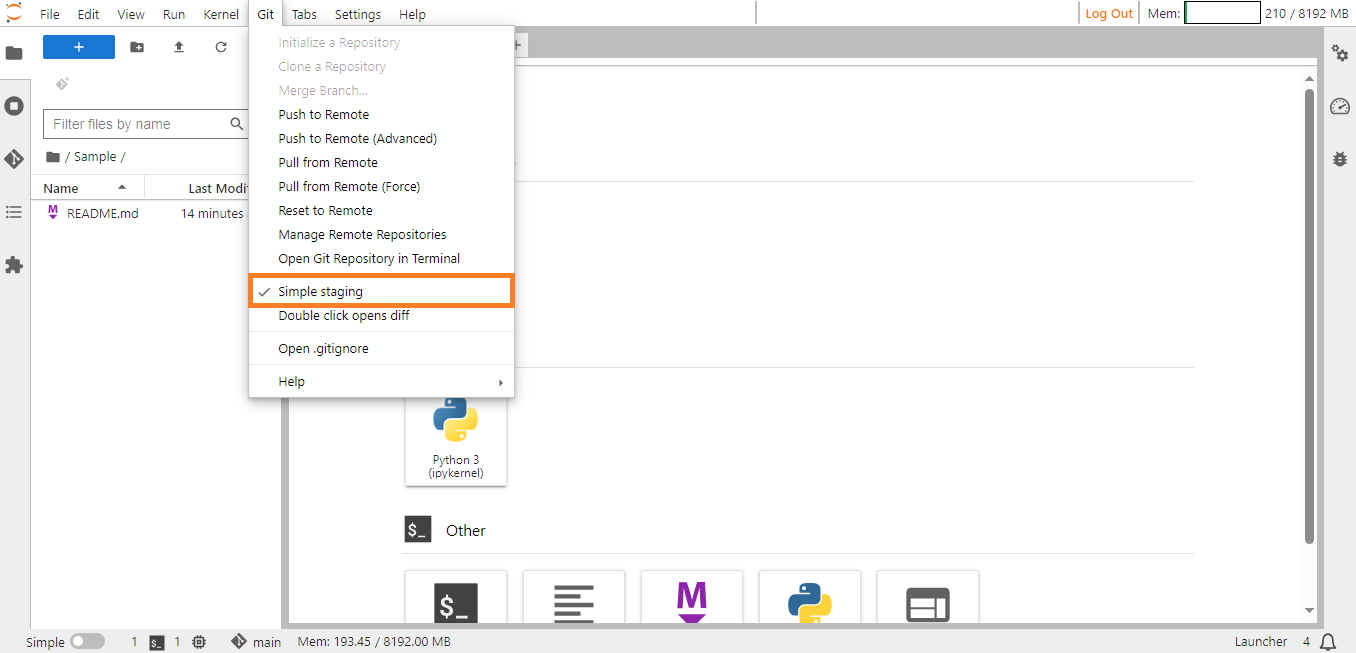
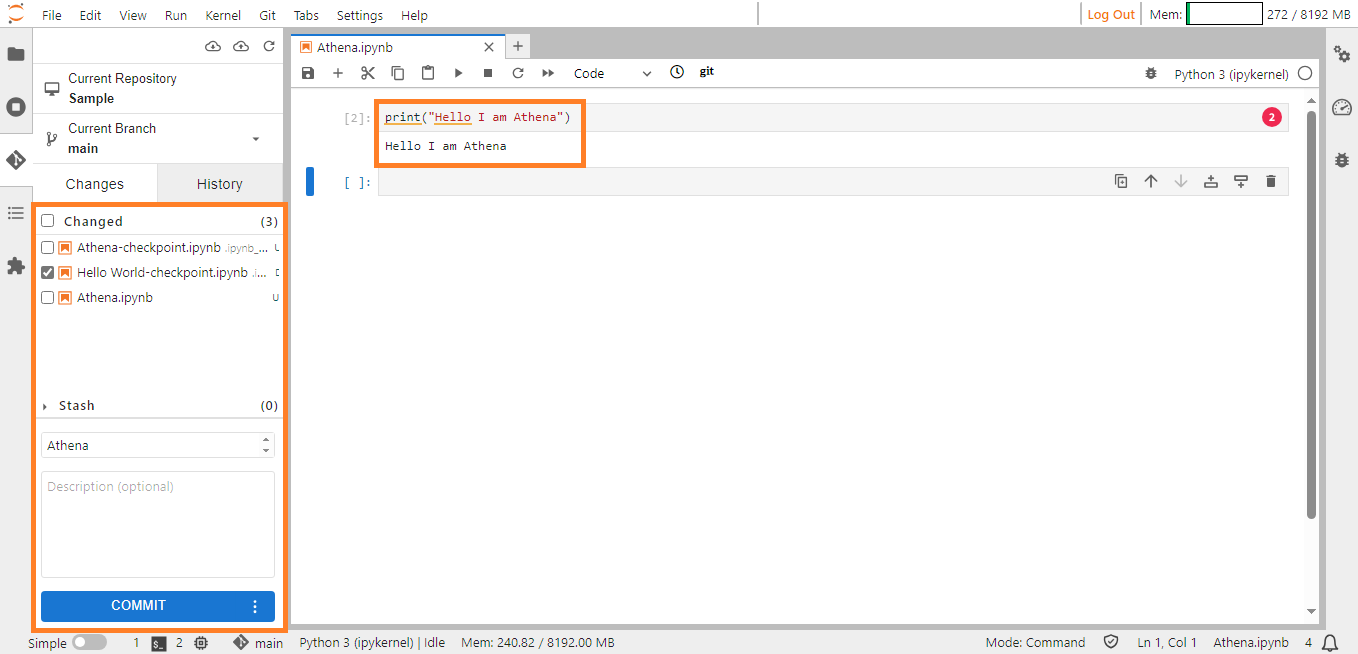
Simple staging#
Simple Staging is a feature that streamlines the Git staging process within JupyterLab in ConverSight. When enabled, it automatically stages all files with changes, regardless of their prior tracking status. It removes the need to manually stage individual files using the + button. Simplifies the workflow by reducing the clicks and mental overhead for users who primarily care about committing all changes at once.
How it works:
Step 1: Open the Git menu in JupyterLab.
Step 2: Find and enable the Simple Staging option.
Simple Staging#
Step 3: Make changes to files: The Git panel will automatically display all changed files as staged.
Step 4: Enter a commit message and click Commit.
Commiting Changes#
Step 5: All staged files will be included in the commit.
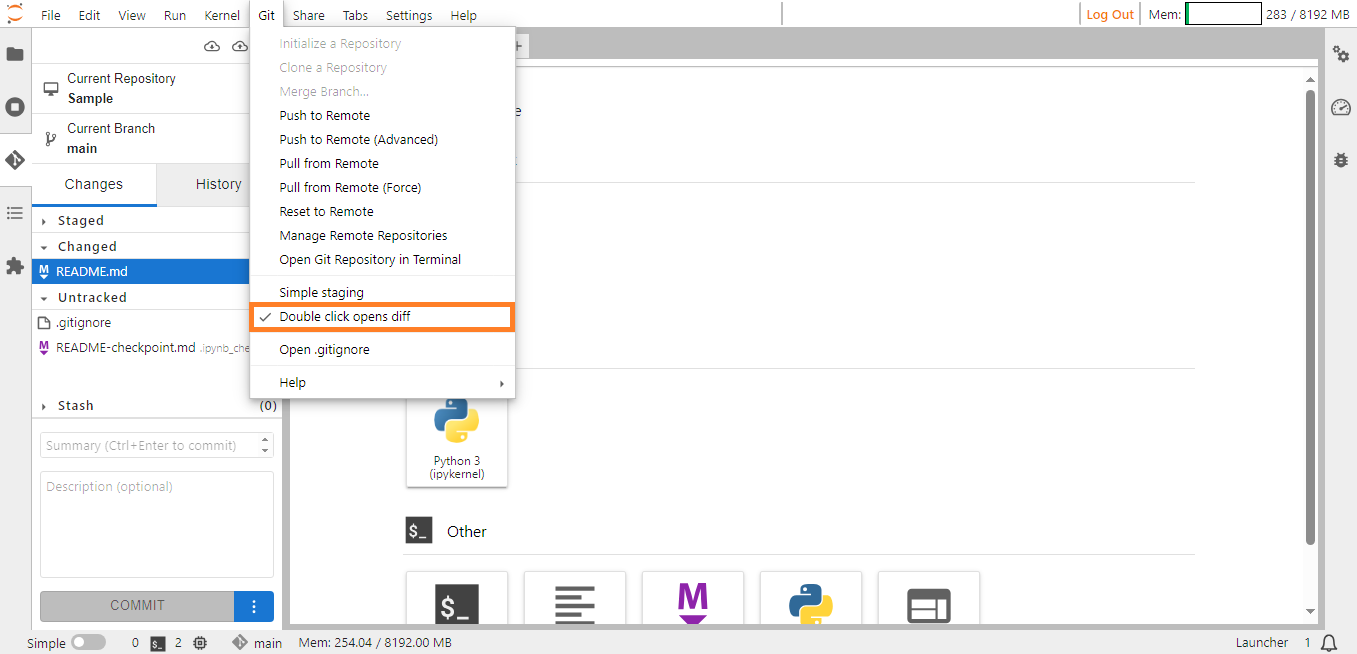
Double click opens diff#
The Double click opens diff option under the Git menu lets you check the differences between two commits or branches in the repository.
Double Click Opens Diff#
When you double-click on a file, it opens a tool that shows the changes made to that file. This makes it easier to compare different versions side by side. While the specific details of this feature may vary, it generally enhances the user experience by visually representing changes in the version control system.
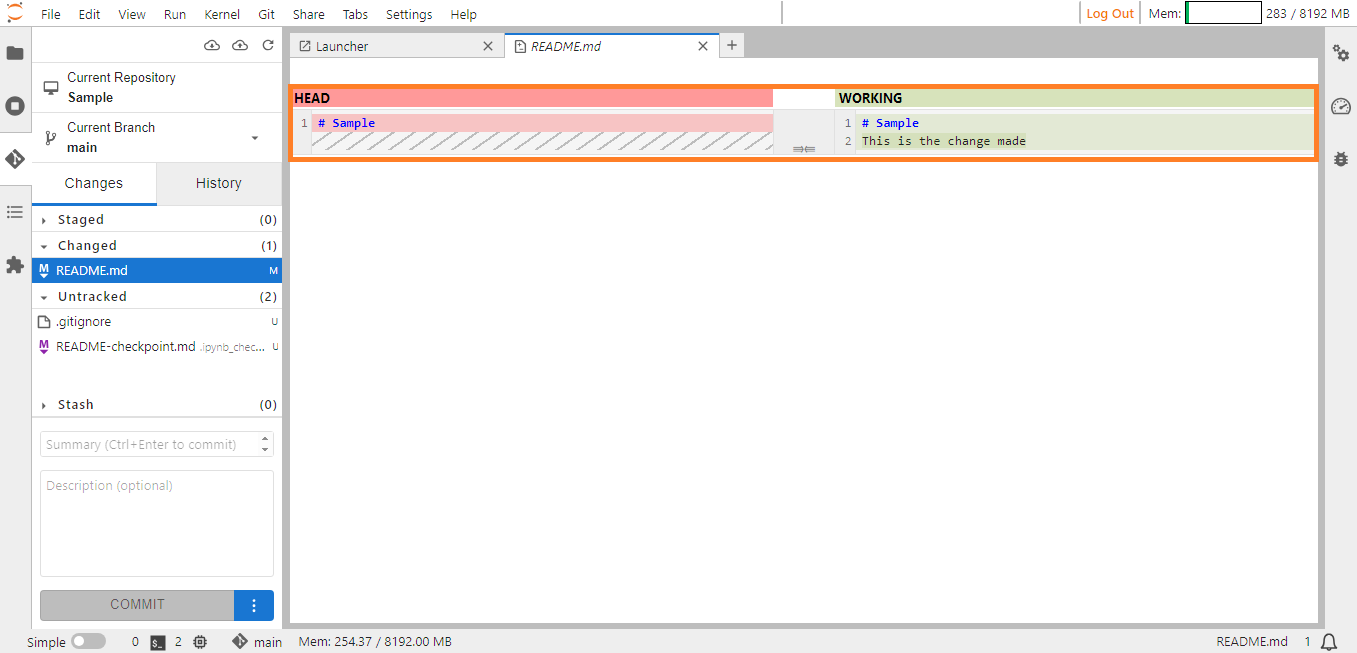
Viewing Changes#
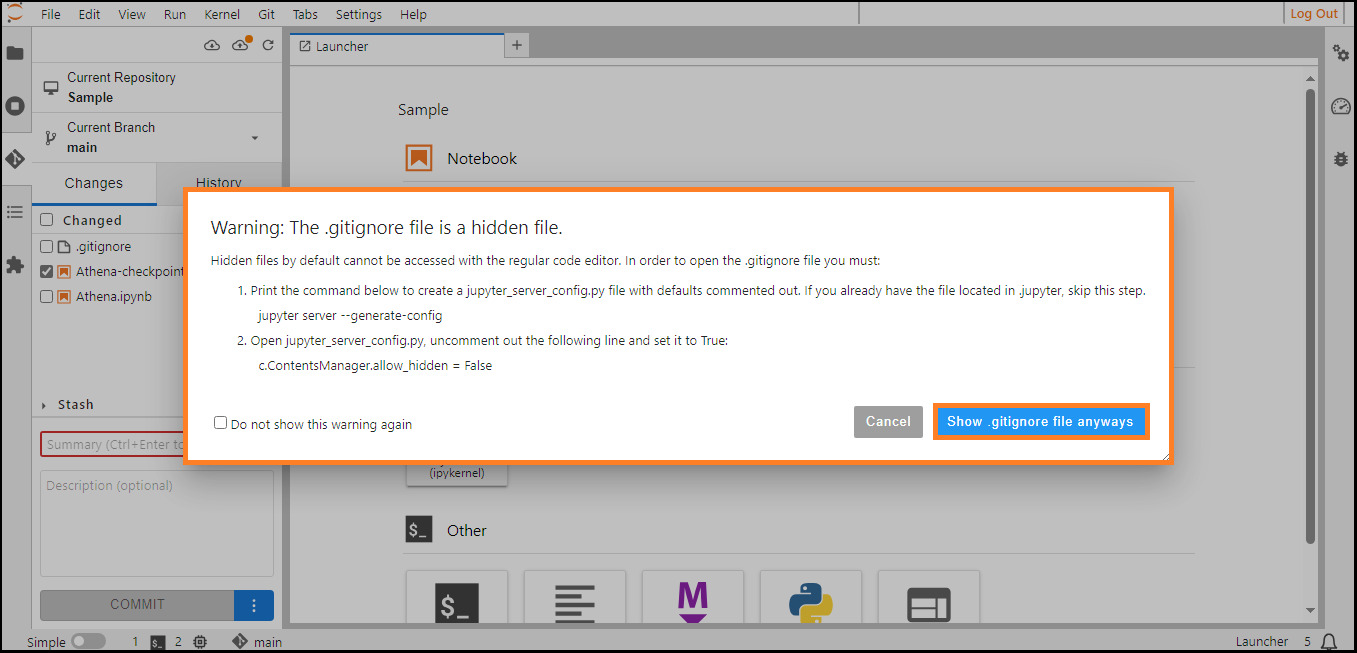
Open .gitignore#
The Open .gitignore option serves the purpose of conveniently opening the .gitignore file within the JupyterLab environment, allowing you to directly view and edit its contents to control which files and folders are intentionally excluded from Git version control.
Access the Git menu and click the Open .gitignore option, this action will load a popup window with a warning message.
Click on the Show .gitignore file anyways button and the .gitignore file will open in a text editor within JupyterLab.
.gitignore popup#
The .gitignore option prevents unnecessary files and folders from being tracked by Git, reducing clutter, potential conflicts and commonly ignored files.
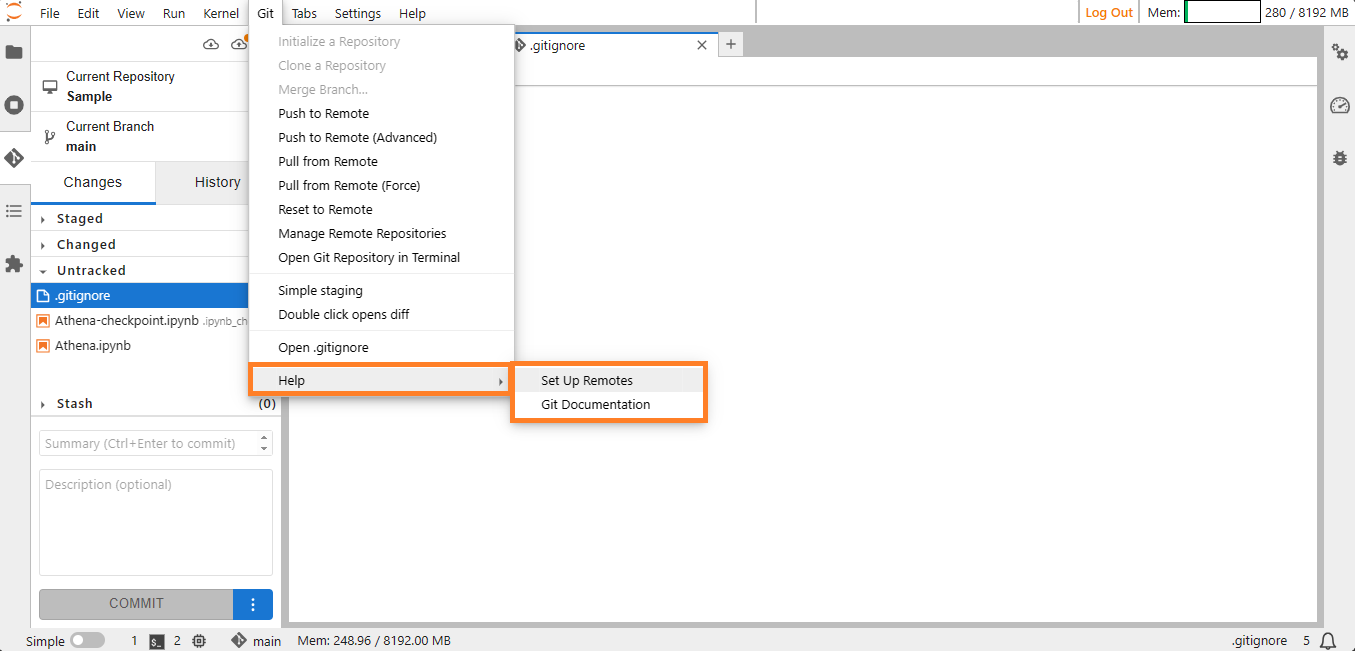
Help#
Accessing the Help option within the Git menu enables you to configure remote repositories and navigate the Git Documentation.
Help#