Embed Storyboard#
The Embed Storyboard feature proves highly beneficial in scenarios where an organization’s members prefer to utilize Athena within their own applications instead of accessing the ConverSight platform directly. By utilizing this feature, users can apply filters to restrict access, tailoring it to specific users and allowing them to conveniently access data from any location. This demonstrates their resourcefulness and problem-solving abilities in overcoming challenges.
With the Embed Storyboard functionality, users can select a desired Storyboard and seamlessly embed it into any application of their choice. This integration enables easy accessibility and convenience for viewing the Storyboard within their preferred tools or systems. This feature provides users with the flexibility to access and interact with their Storyboard on the go, enabling them to make informed decisions based on real-time data, no matter where they are. However, there are plans to expand its support to include Embed Webchat in the future. This means that users will be able to Embed Webchat into their applications.
To navigate to Storyboard, Click on the Storyboard in the ConverSight platform.
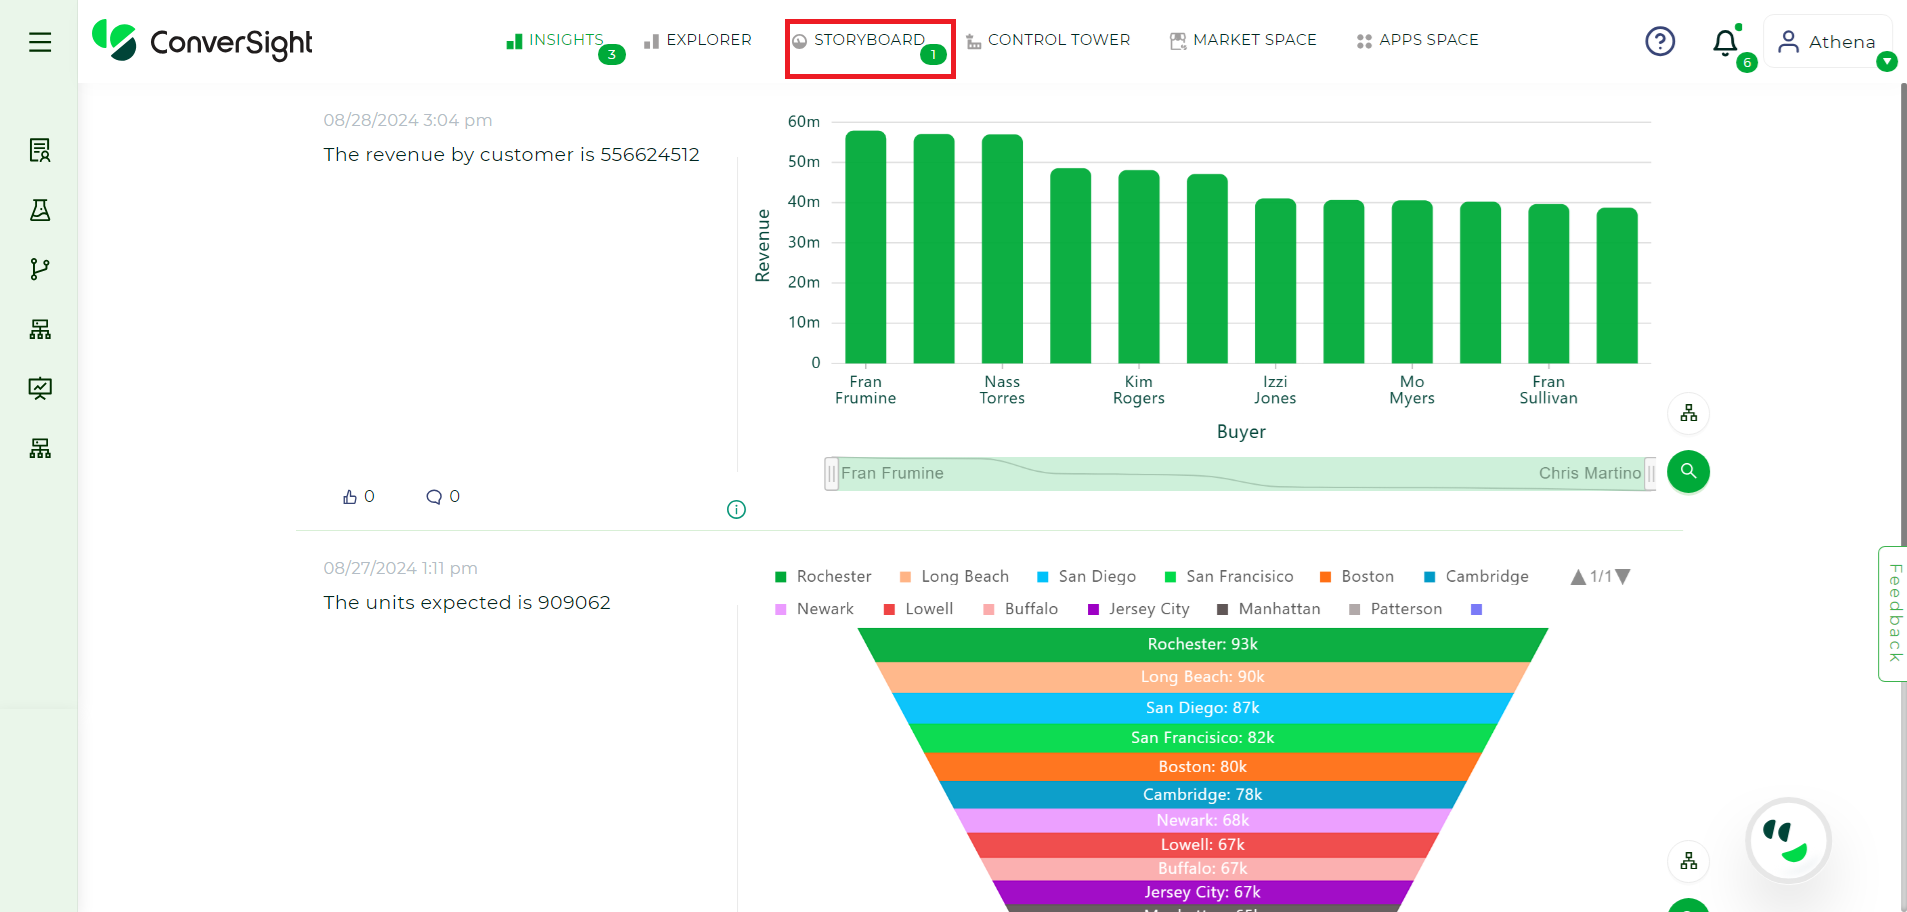
Landing Page#
To Embed a Storyboard, you can follow these steps:
We apply two security access type when Embedding Storyboards.
Embed Storyboard as Public
Embed Storyboard as Private
Embed Storyboard as Public#
When the security access type is set as Public, access to the Storyboard is extended to anyone who possesses the embedding file. The role and permissions associated with the individual who created the embedding file will be applied. This approach facilitates transparency, inclusivity, and collaboration within the organization. All members of the organization can benefit from the valuable insights and information presented in the Storyboard. Since the roles and permissions depend on the person who created the embedding file, it allows for a flexible and dynamic access control mechanism. Regardless of specific roles or permissions, anyone embedding the file can access and engage with the Storyboard’s content, promoting a culture of knowledge sharing and collaboration across the organization.
Steps to Embed Storyboard as Public:#
Step 1: To Embed a specific Storyboard, navigate to the desired Storyboard and select it. Then, click on
 icon and choose the Embed Code option.
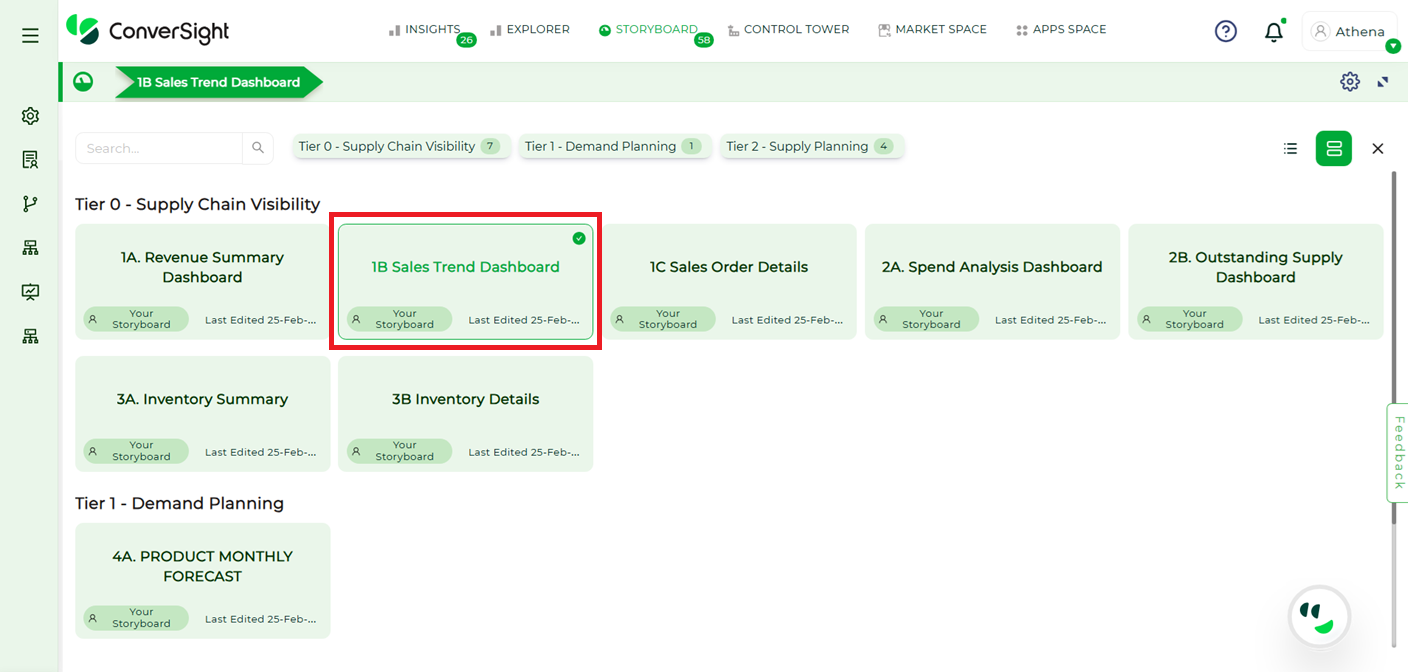
Storyboard#
Embed Storyboard#
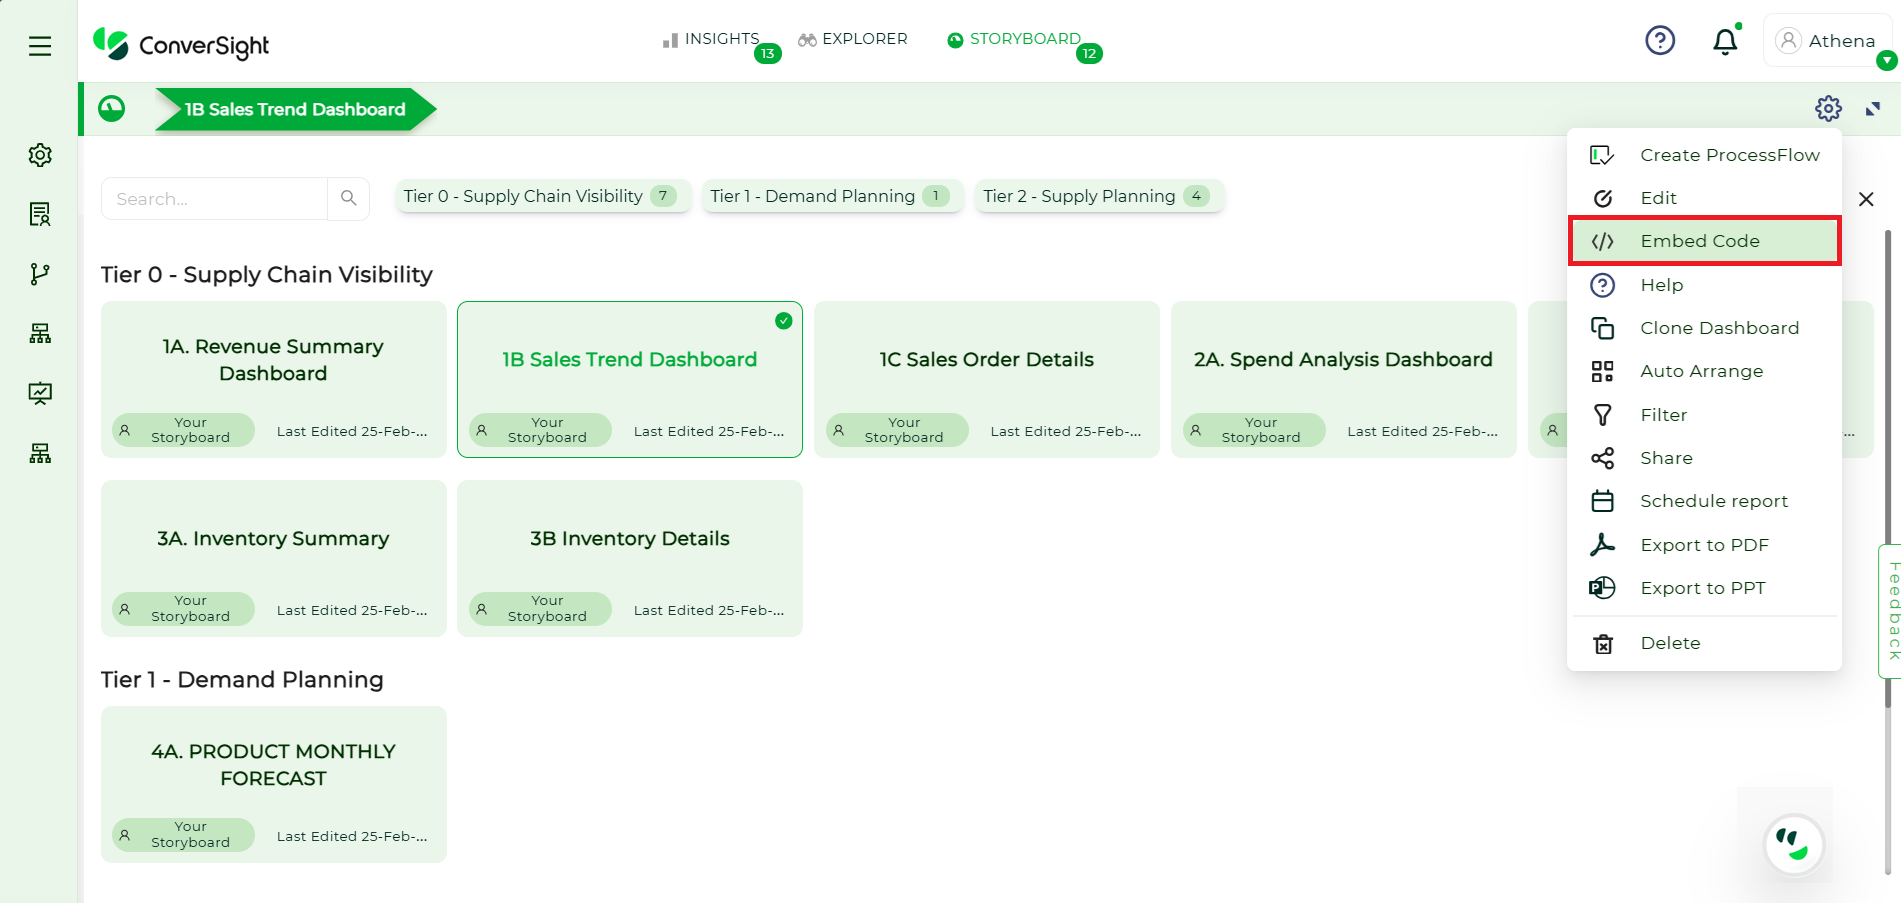
Step 2: Upon clicking
icon, a snippet for the Storyboard will be displayed. To proceed, click on the Generate Token option.
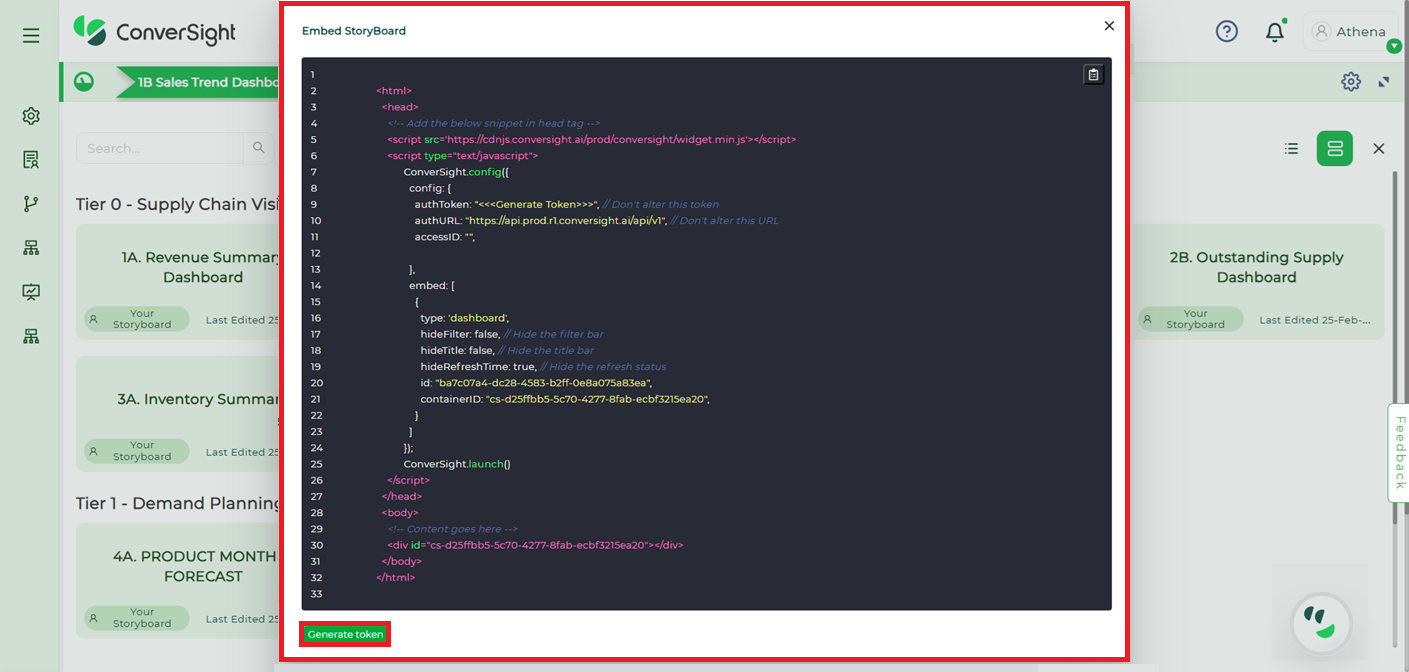
Generate Token#
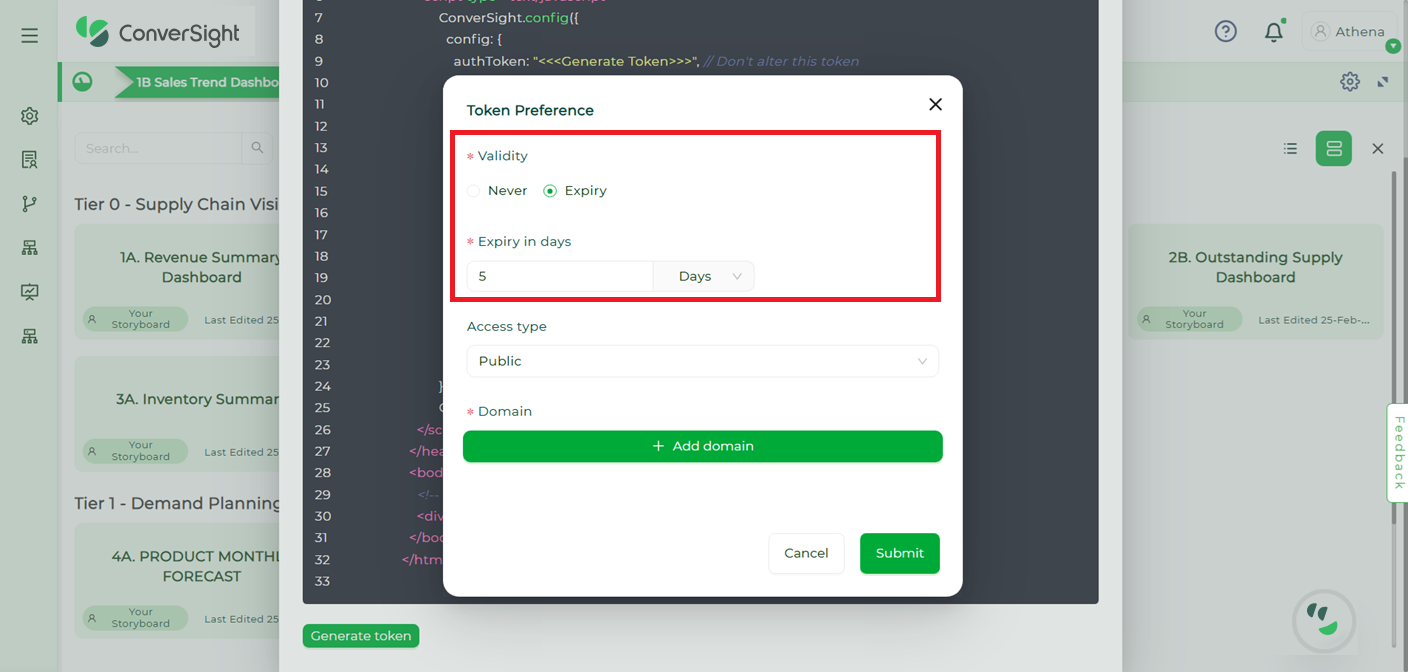
Step 3: On the Generate Token page, you can choose the validity period for the Storyboard using one of the following options:
Never: Selecting the Never option means that the Storyboard will not have any time constraints. It will remain accessible indefinitely without an expiration date.
Expiry: Opting for the Expiry option allows you to define a specific duration in days, weeks or months, for accessing the Embedded Storyboard. By setting an expiry time, you gain control over the timeframe during which users can access and make use of the designated Storyboard.
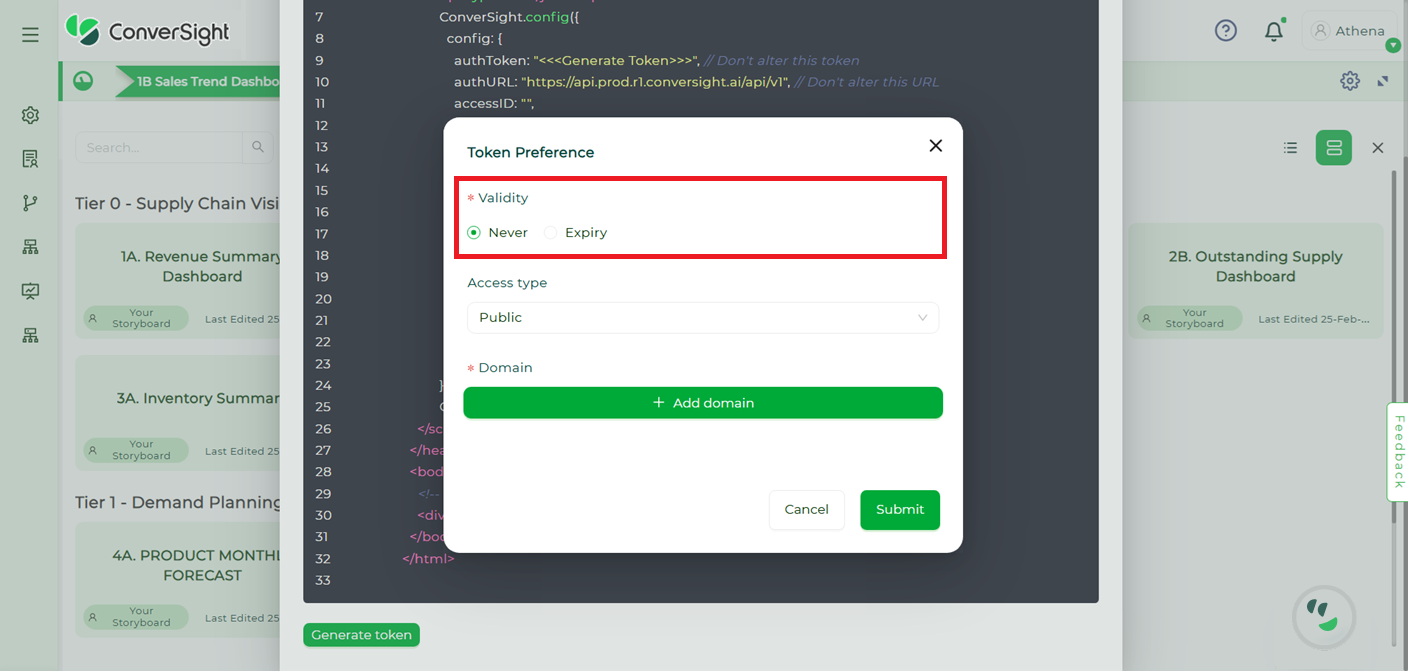
Validity Options#
Step 4: Choose the security access type as Public and specify the desired domain.
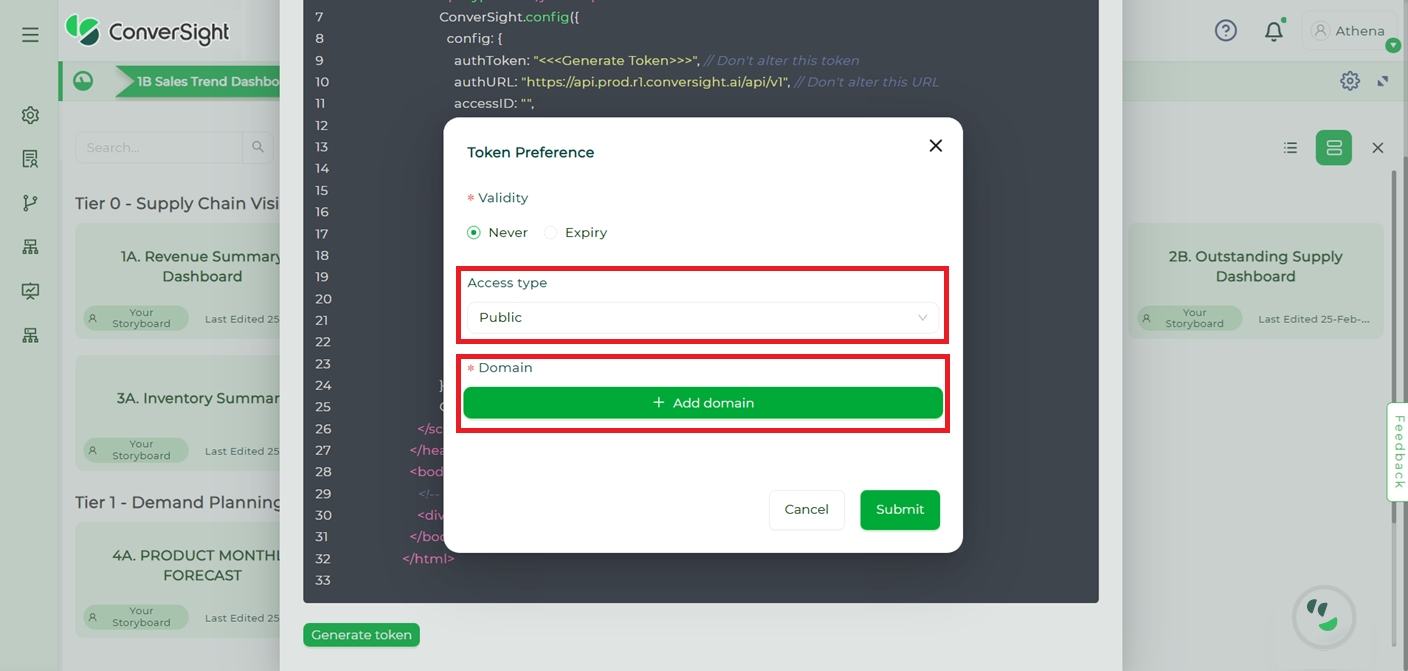
Public#
NOTE
Users are provided with the choice to add multiple domain names, but they are required to include at least one domain name.
Step 5: Once all the necessary details have been entered, click on the Submit button to generate the authToken and accessID within the snippet.

Submit Changes#
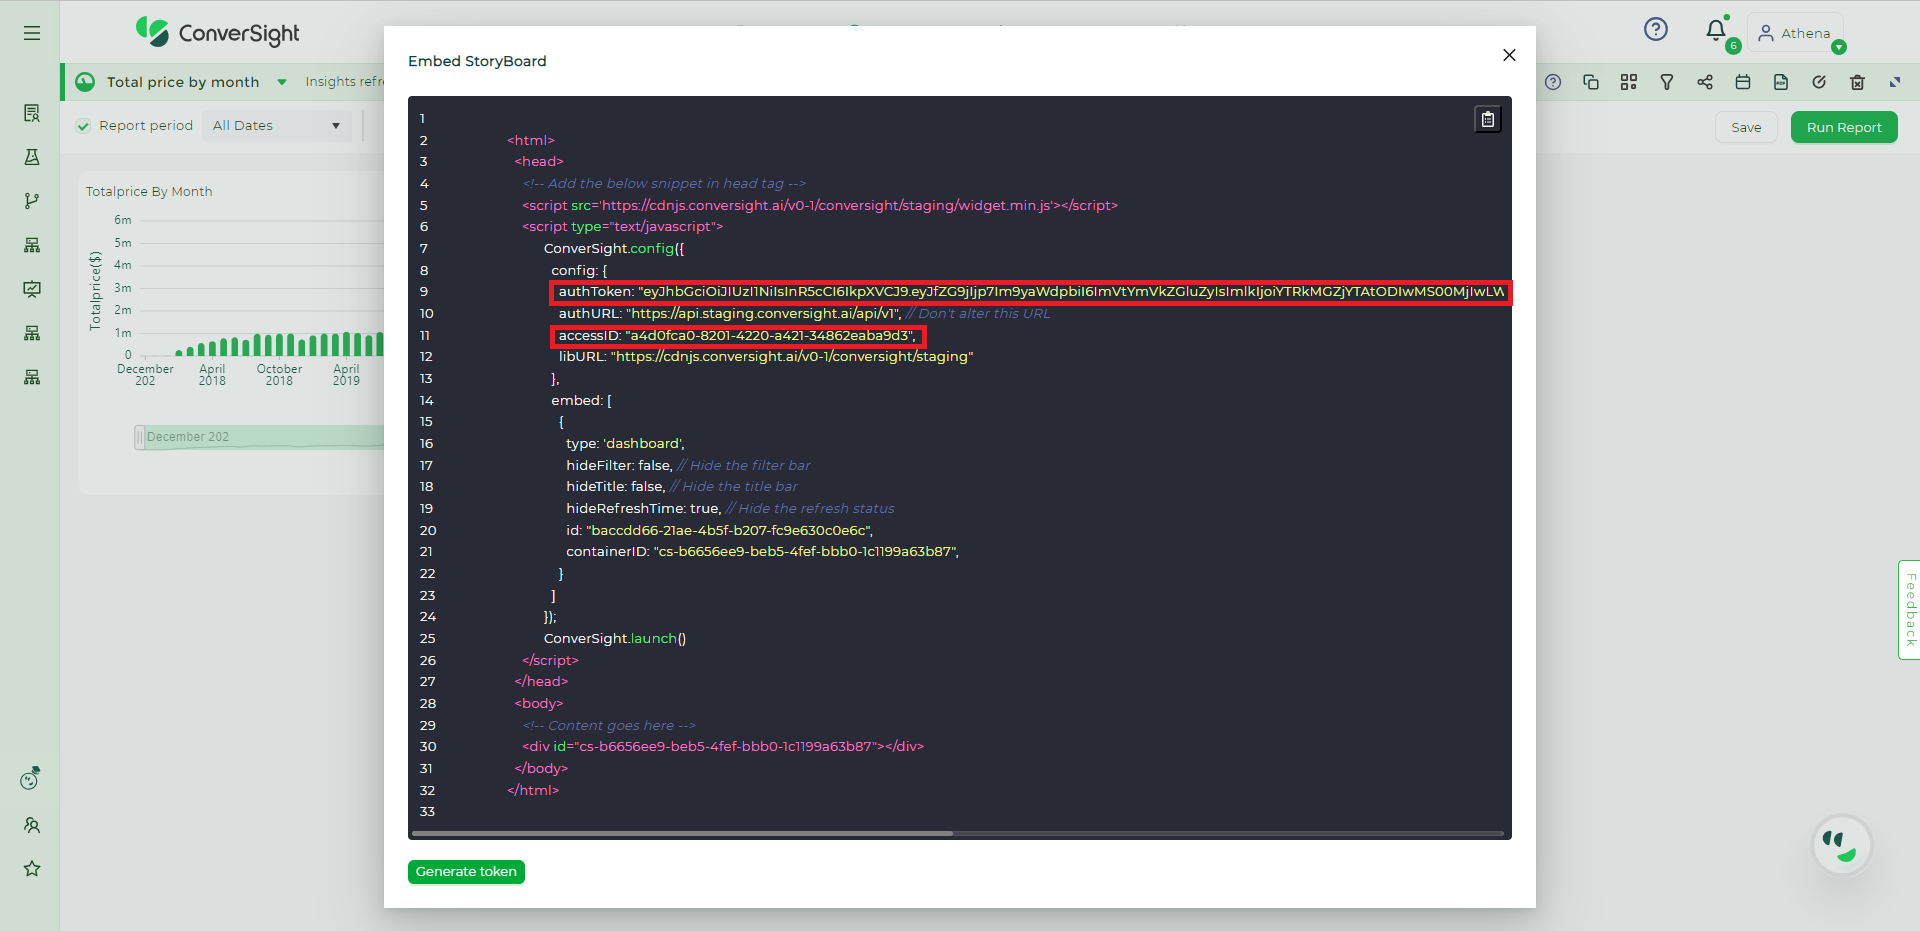
Authentication Token and Access ID#
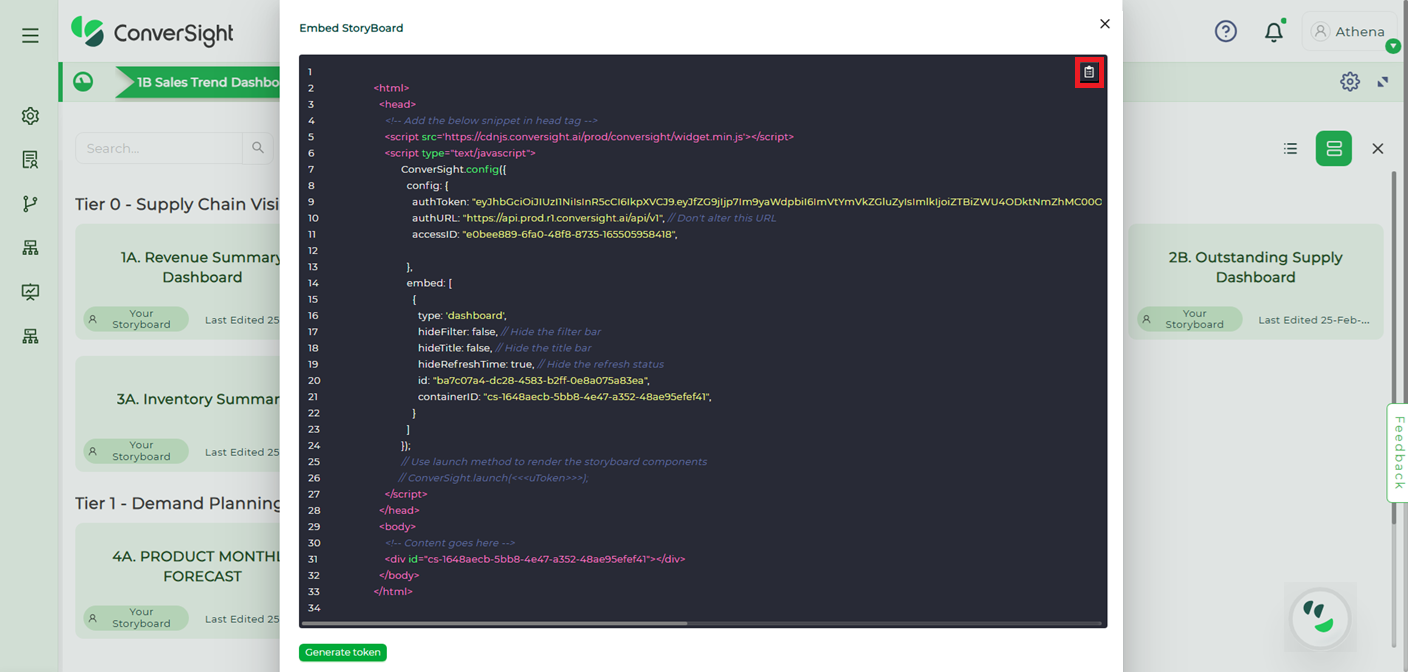
Step 6: To copy the snippet, you can easily click on the Copy icon located next to the code, which will automatically copy the code to the user’s clipboard.
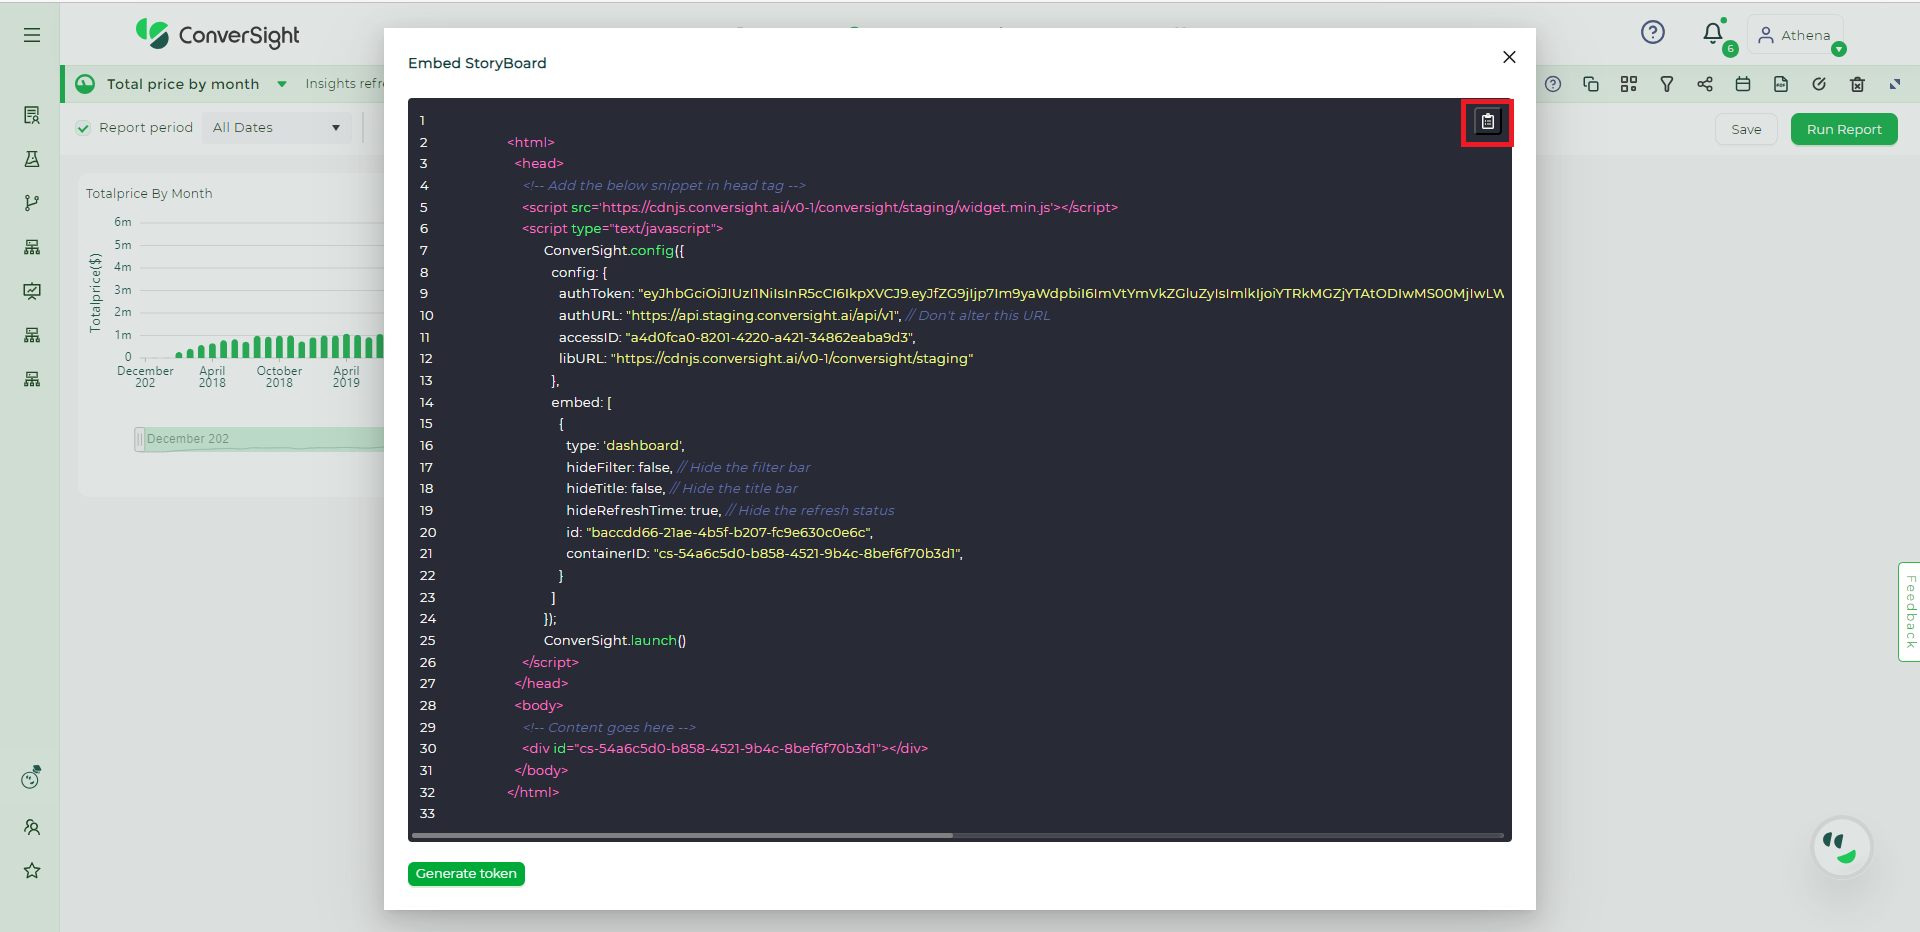
Copy Snippet#
Step 7: Integrate the snippet into the customer platform.
Step 8: After the successful integration of the snippet, users can initiate the launch of storyboards directly from the customer platform and can gain the ability to access and interact with the storyboard directly from their own platform, providing a seamless experience.
NOTE
When setting the security to Public during the Embedding of a Storyboard, there is no need for a User Token.
Embed Storyboard as Private#
In a Private security access type, access to the Storyboard is managed at the user level using assigned filter values and column names within the embedded snippet. These values are determined by the User Token generated on the customer’s side through the User Provision API, integrated into their own tool. Each user is allocated specific roles that determine their access rights to different Storyboards within the organization. As a result, users will have varying access levels to Storyboards based on their assigned filter values and column name permissions.
This role-based access control ensures that users are limited to viewing and interacting only with the Storyboards that are relevant to their specific roles and responsibilities. By doing so, data privacy, security, and confidentiality are upheld by restricting access to sensitive information and functionalities. Implementing this approach enables organizations to ensure that each user has access to the Storyboards essential to their work while preventing unauthorized access and maintaining data integrity. It allows for a tailored user experience that aligns with specific roles and responsibilities within the organization, enhancing productivity and protecting sensitive information.
Steps to Embed Storyboard as Private:#
Step 1: To Embed a specific Storyboard, navigate to the desired Storyboard and select it. Then, click on
icon located on the menu.
Storyboard#
Embed Storyboard#
Step 2: Upon clicking
icon, a snippet for the Storyboard will be displayed. To proceed, click on the Generate Token option.
Generate Token#
Step 3: On the Generate Token page, you can choose the validity period for the Storyboard using one of the following options.
Never: Selecting the Never option means that the Storyboard will not have any time constraints. It will remain accessible indefinitely without an expiration date.
Expiry: Opting for the Expiry option allows you to define a specific duration in days, weeks or months, for accessing the Embedded Storyboard. By setting an expiry time, you gain control over the timeframe during which users can access and make use of the designated Storyboard.
Validity Options#
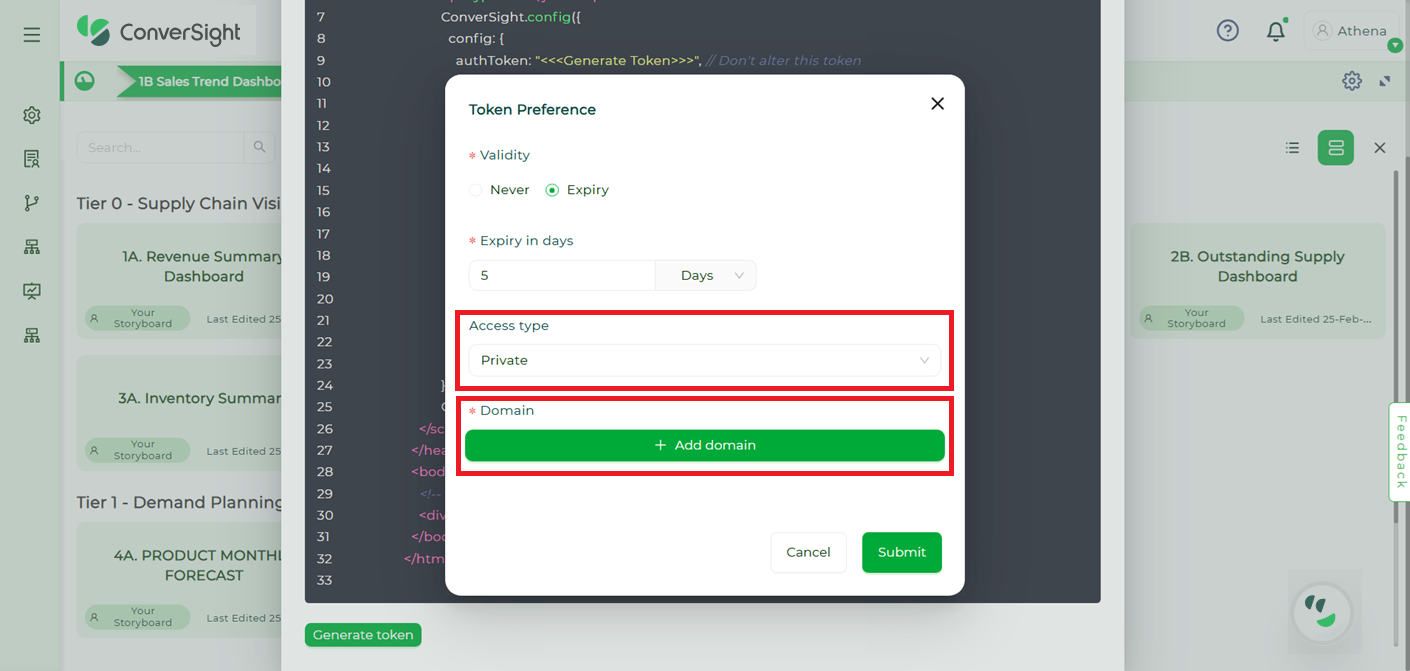
Step 4: Choose the security access type as Private and specify the desired domain.
Private#
NOTE
Users are provided with the choice to add multiple domain names, but they are required to include at least one domain name.
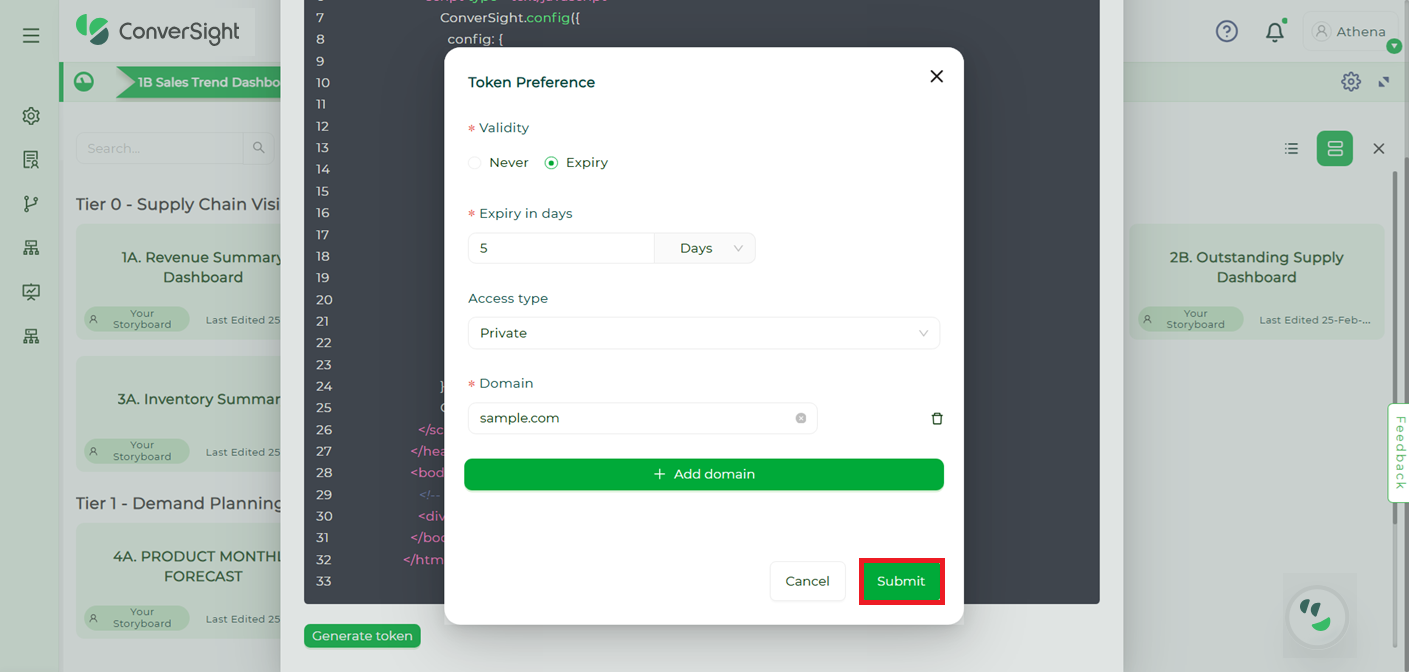
Step 5: Once all the necessary details have been entered, click on the Submit button to generate the authToken and accessID within the snippet. It is crucial for the user to securely store this accessID for future reference and utilization.
Submit Changes#
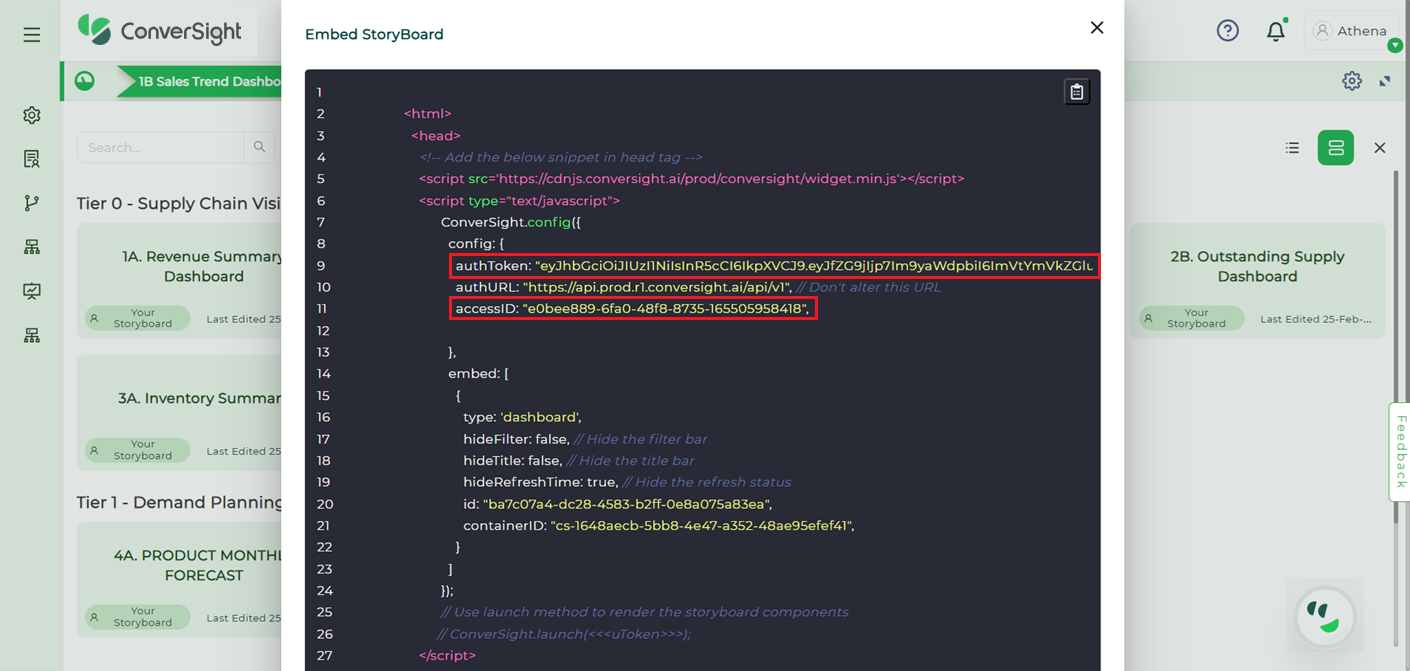
Authentication Token and Access ID#
Step 6: To copy the snippet, you can easily click on the Copy icon next to the code, which will automatically copy the code to the user’s clipboard.
Copy Snippet#
Step 7: Integrate the provided code snippet into the customer-designated platform, ensuring that the ConverSight launch component is uncommented and provided with the User Token as an argument. This User Token serves as the authentication key, granting users the necessary permissions and privileges to access the Embedded Storyboard.
Step 8: The User Token is created using the User Provision API, utilizing the organization token, which is a unique identifier generated exclusively by the system administrator at ConverSight. Each organization is assigned its own distinct Orgtoken, acting as a crucial key to authenticate and access various organizational functionalities and resources. Additionally, the generated Access ID from the snippet is utilized in the process.
To generate the user token, it is essential to provide the necessary details such as the dataset and roles-specific filters to the user in the API body. These filters grant the capability to limit access to specific columns or apply conditions to columns. Additionally, they allow for the inclusion of multiple dataset access for a single user. These details ensure appropriate access and permissions for the user within the system.
NOTE
The User Provision API is utilized to create and update user access.User Provision Request:
URL: https://app.conversight.ai/api/v1/user/provision?token= Org AccessToken
    Request:
    {

    "expiry": {

            "frequency": "days",

            "value": 1

        },
        "email": "<<email>>",

        "firstName": "<<firstName>>",

        "lastName": "<<lastName>>",

        "displayName": "<<displayName/Alias>>",

        "accessID": "<<accessID>>",

        "roles": [

            {
                "name": "<<roleName>>",

                "dataset": "<<datasetID>>",

                "configuration": {

                            "currency": "<<currency>>",

                            "financialOffset": <<num>>
                    },

                "filters": [

                    {
                         "column": "<<columnName>>",

                        "operator": "<<operator>>",

                        "value": [

                            "<<valuesToFilter>>"

                        ] } ] } ] }

    Response:

    Success Response:

    HTTP Status code -> 200
    {
        "status": "success",
        "data": {

            "token": "<<userLevelAccessToken>>",

            "id": "<<userID>>"

        }

    }

    Failure Response:

    HTTP Error code -> 401, 400, 403, 500

    {

        "status": "failed",

        "error": "<<errorMessage>>"

    }
The provided HTTP request mandates certain fields:
firstName: The first name of the user intended for provisioning.
lastName: The last name of the user intended for provisioning.
displayName: The desired display name or alias preferred by the user.
email: The email address of the user intended for provisioning.
roles: Roles include details such as the role name, dataset ID, configurations (including currency format and financial year settings) and the related filters. These role details are crucial for ensuring controlled data visibility and security.
Additionally, the filter in the roles is an optional field. If left empty, the user will be granted full access. It is important to note that the details within the request should remain unaltered. Furthermore, when generating the token ensure to include the accessID that is generated.
NOTE
Note: If the frequency is set as Never then the value will be -1.Step 9: Upon receiving a response from the User Provision API, it will provide a User Token and a User ID. These generated tokens should be securely stored within the customer platform for future usage. The User Token obtained from the response should be provided as an argument in the ConverSight.launch(<< user token >>) method within the snippet. This ensures that the user is authenticated and granted appropriate access to the embedded functionality within the ConverSight platform.
Step 10: After the successful integration of the snippet, users can initiate the launch of storyboards directly from the customer platform. If a user does not have an existing account with ConverSight then the creation of an account can be done either directly on the ConverSight platform or by utilizing their API from the customer`s platform along with their filter values for roles and datasets. Once the account is created, the user gains the ability to access and interact with the storyboard directly from their own platform, providing a seamless experience.
The Embed Storyboard feature allows users to conveniently access and tailor data from any location, demonstrating their resourcefulness and problem-solving abilities. This integration provides easy accessibility and flexibility, empowering users to make informed decisions based on real-time data, regardless of their location.
For any queries, please get in touch with our support team at info@conversight.ai.